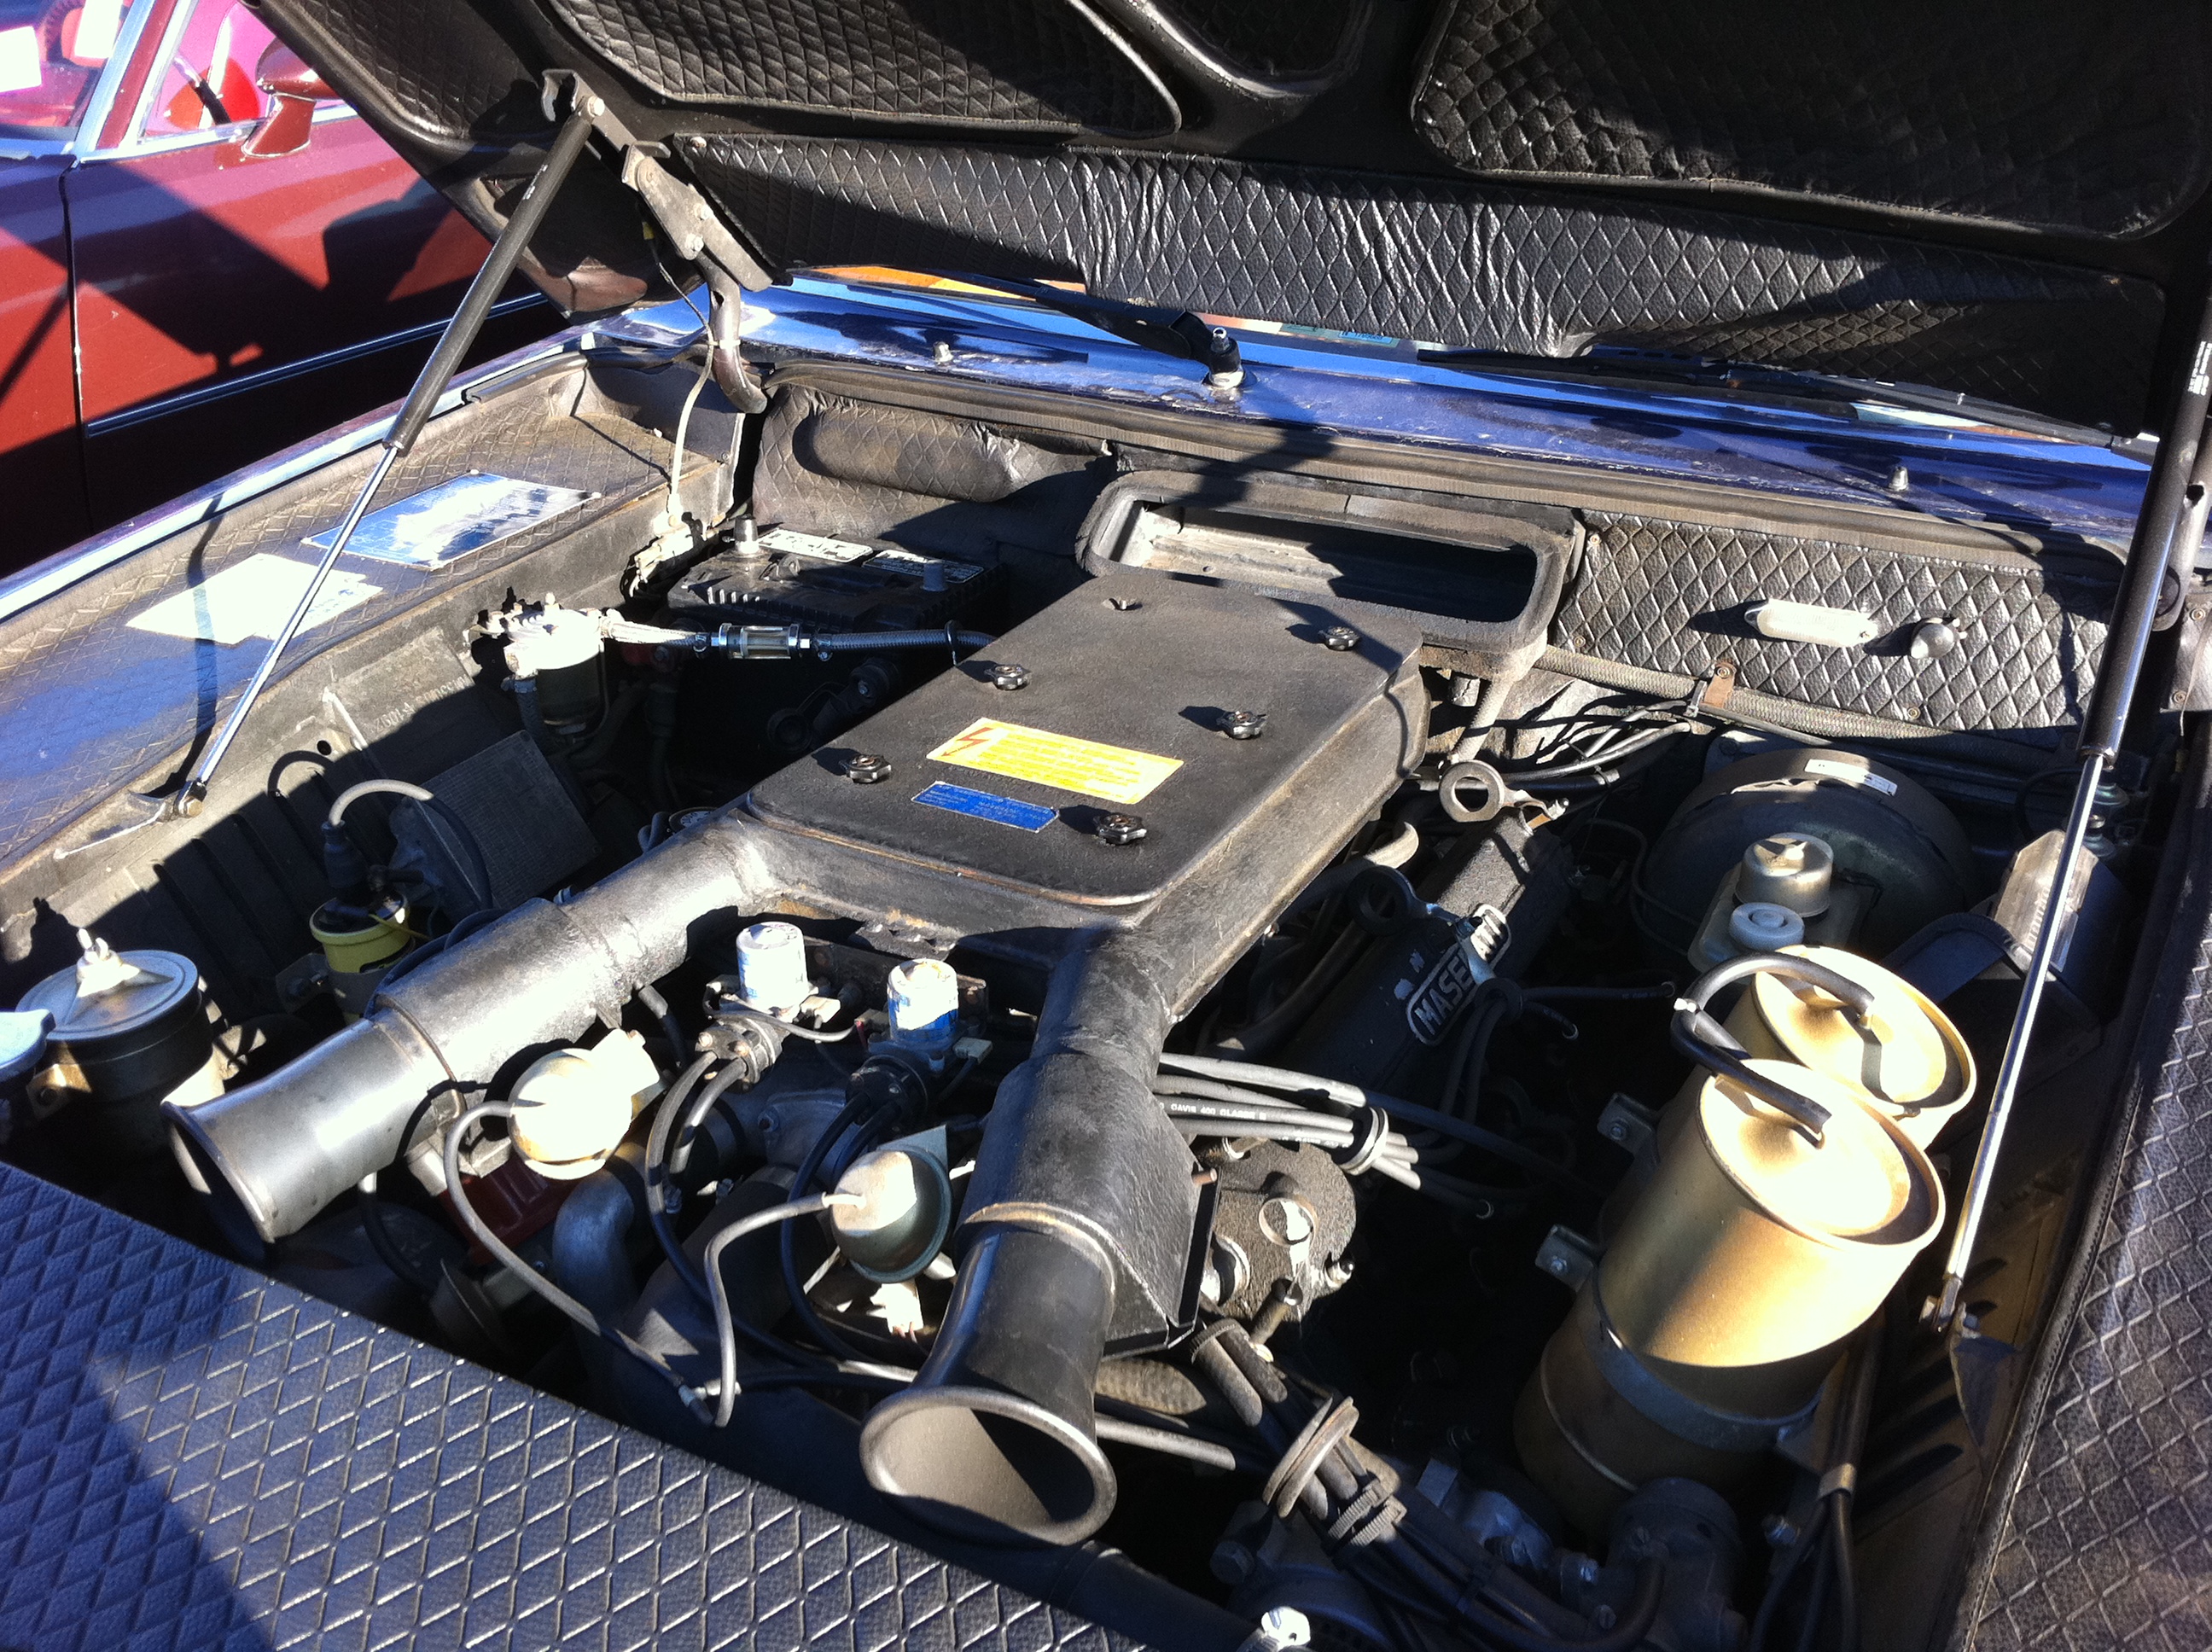
The body, paint and interior all look sharp, with some minor issues that perhaps should be addressed, but the engine bay could really use tidying up. And someone should remove the faux “gills” behind the front wheel wells pronto!
They tested a 4.2 liter model, which is somewhat rarer than the 4.9l, and lacks some of the grunt of the larger engine.
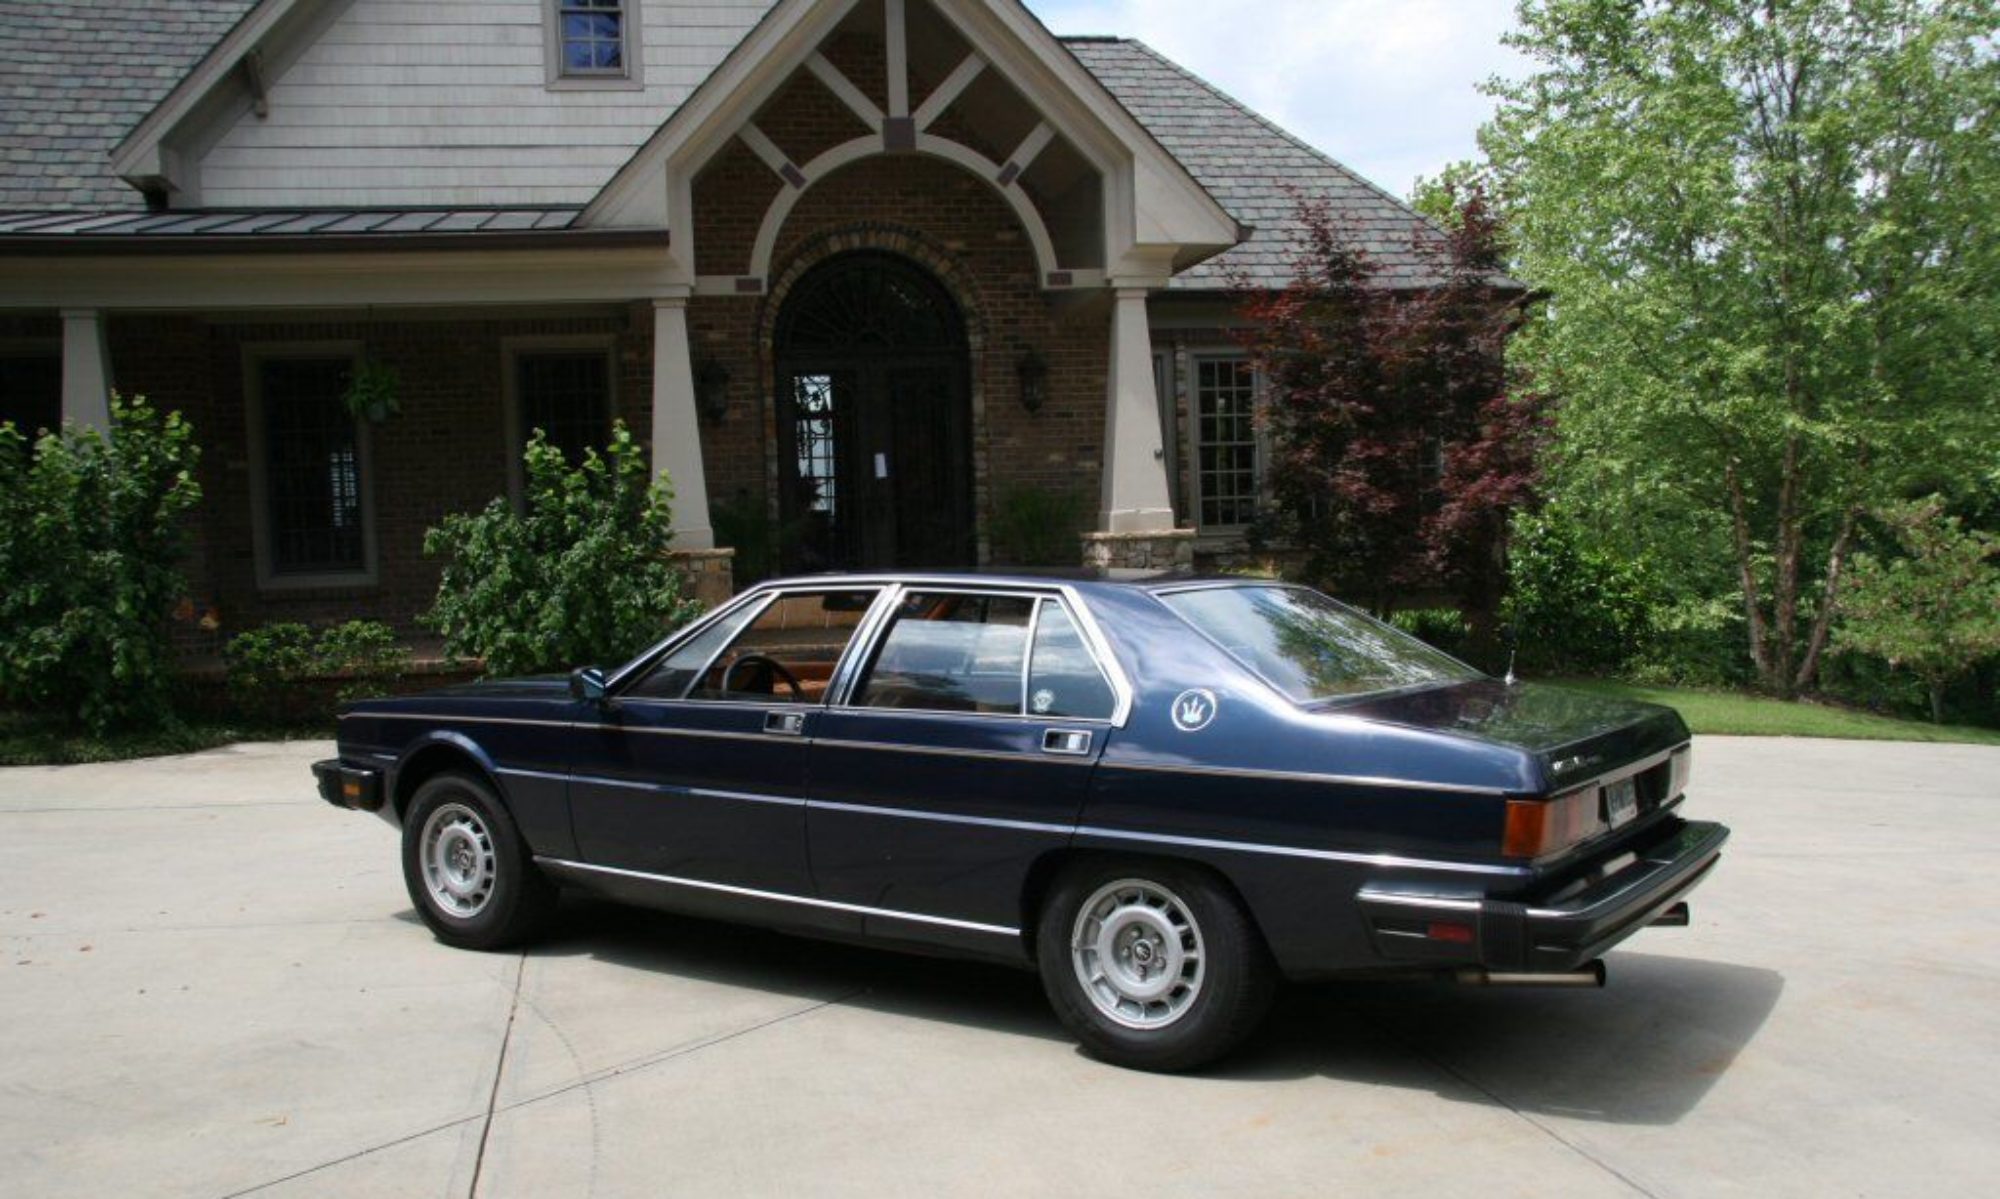
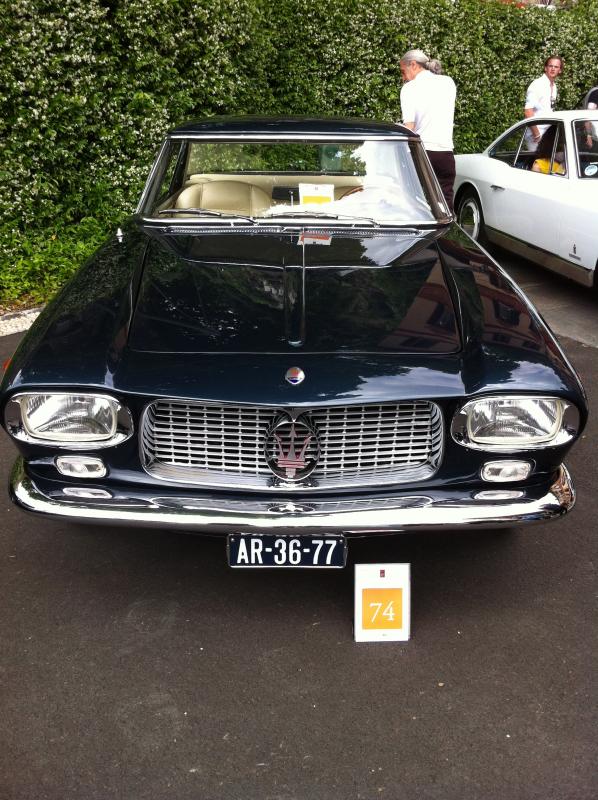
I agree with the authors take on the charisma of the car, it’s even more imposing in person than in photographs, and IMHO is a much more livable design than f.x. the Aston Martin Lagonda. The market has however clearly favored the Lagonda, as it’s risen in value almost fourfold the last few years, while the Quattroporte III has not quite doubled.
I’ll update this post with more articles in a bit. Drop me a link in the comments section if you know of a good one!
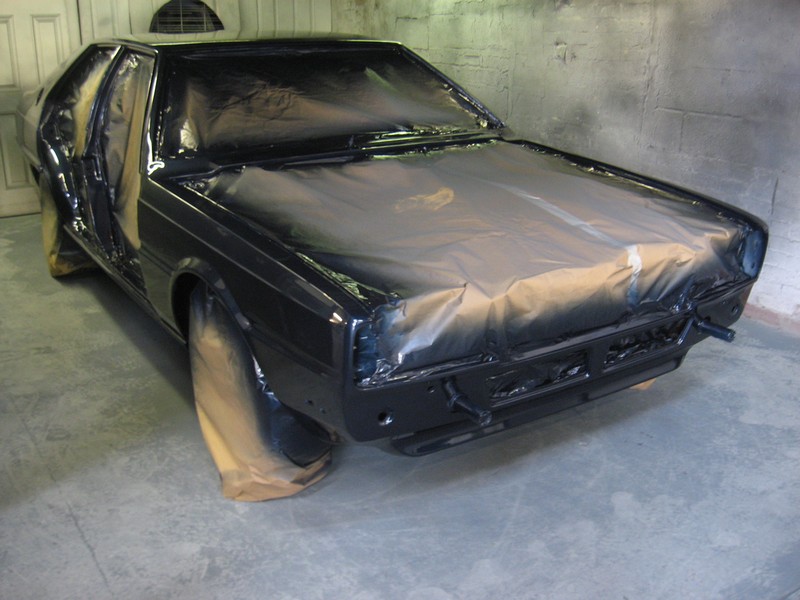
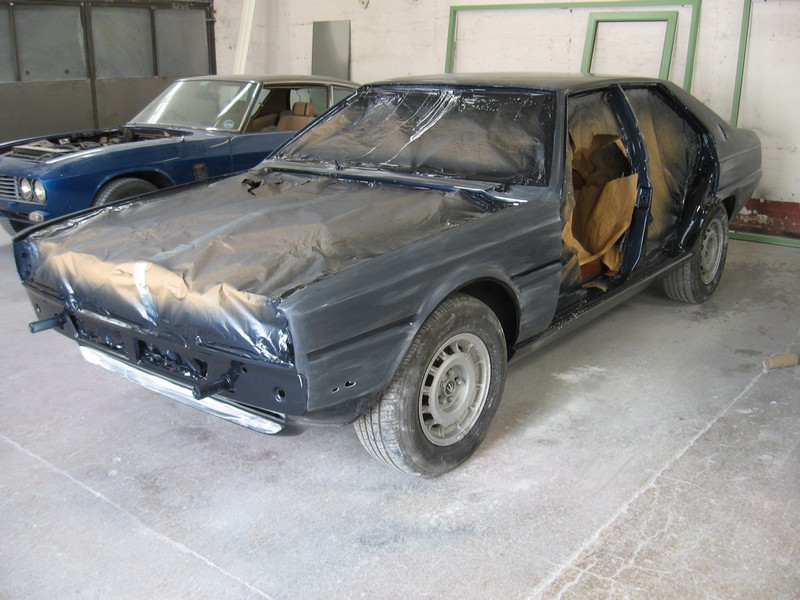
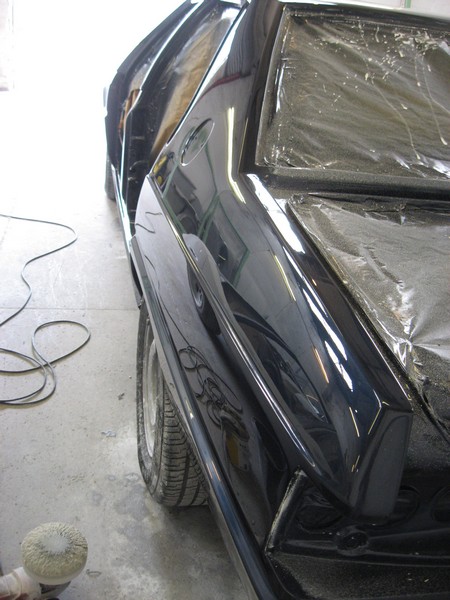
Color on car. Bits and pieces being polished and added. Everything looking very good. I was looking for a deep color that would “pop” with the chrome and interior, I think I found it…
Pop!Nice contrast, crisp body linesChrome and lights finding their way back on to carNew Euro headlights (Bosch H4)Warm yellow light. No blue Xenon here!
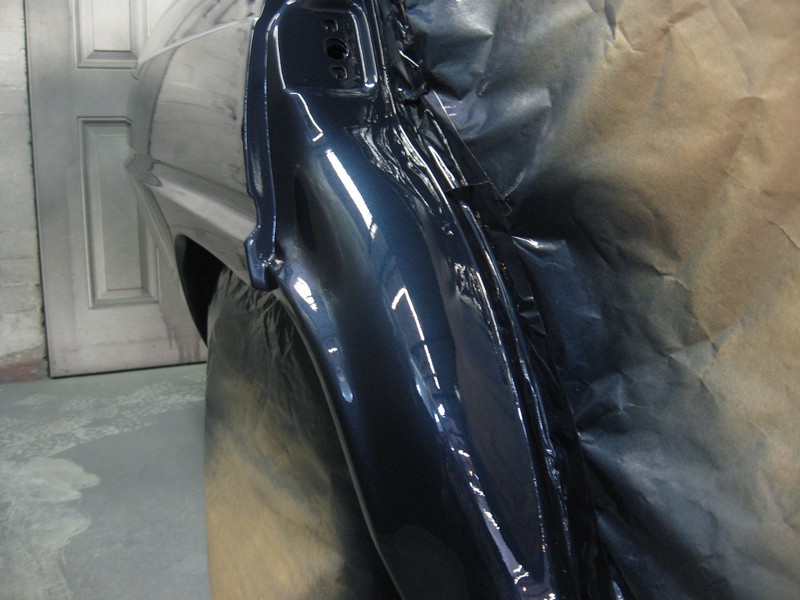
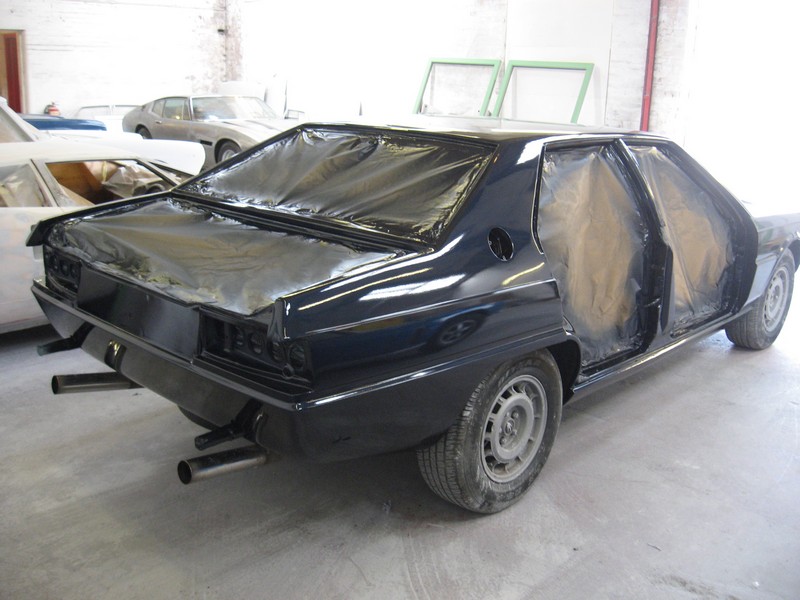
The pictures speak for themselves. First the color itself:
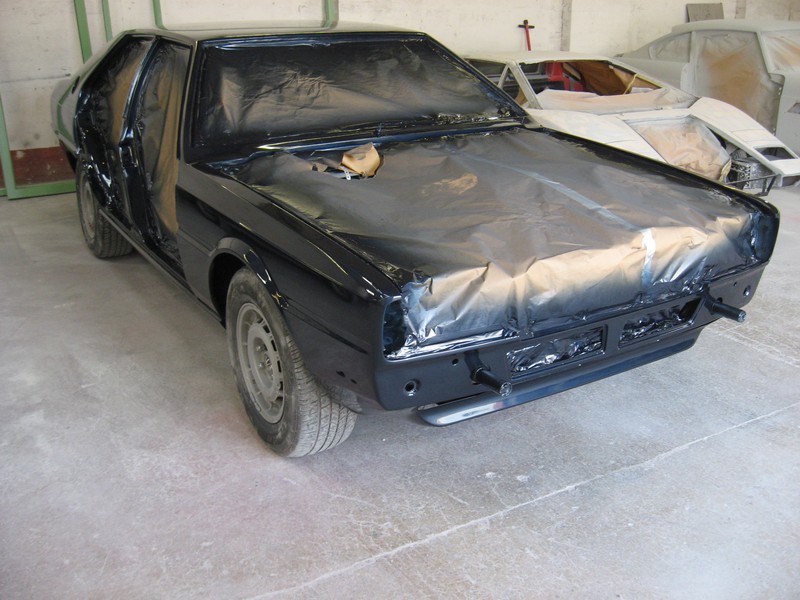
After a few coats, a clear top coat is applied, rubbed down and polished:
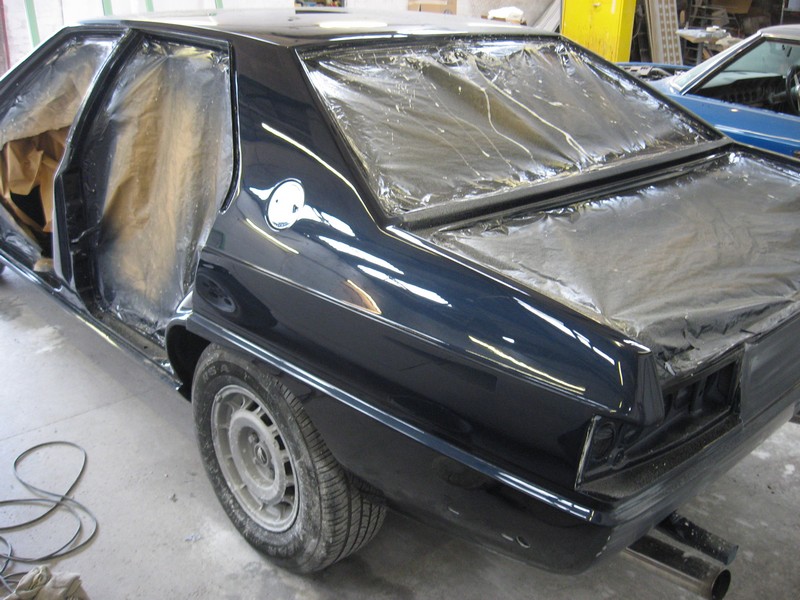
Clear top coat appliedA Ghibli in the backgroundWet sandingwet sandingFirst polishLooking good, and there are still 2 more polishing stages to go before she’s done!
As is probably apparent from the pictures, the color is quite different from what she came in with, which was a purplish blue from a respray in the USA many years ago. This is the 1980 model year correct Maserati “Blu Sera metalizzato” that the car came with originally. It’s quite close to the 5000GT color, although the metallic flakes appear a bit larger, giving a livelier impression. On a car this size, that’s a good thing.
I’d love to hear what you think of the color – thumbs up? Thumbs down? What’s your opinion of the color? Does it suit the car? What color do you think works best on this car, and why? Comments are open!
Sylvia is still at the mechanics getting her physical checkup, new belts, filters, tuning, etc. As part of her checkup, the shop tested cylinder compression and performed a leakdown test.
The results indicate that the compression is good to excellent and even on all cylinders.
While the car is out at the mechanics, let’s have a look at some of the work that I’ve done with the interior.
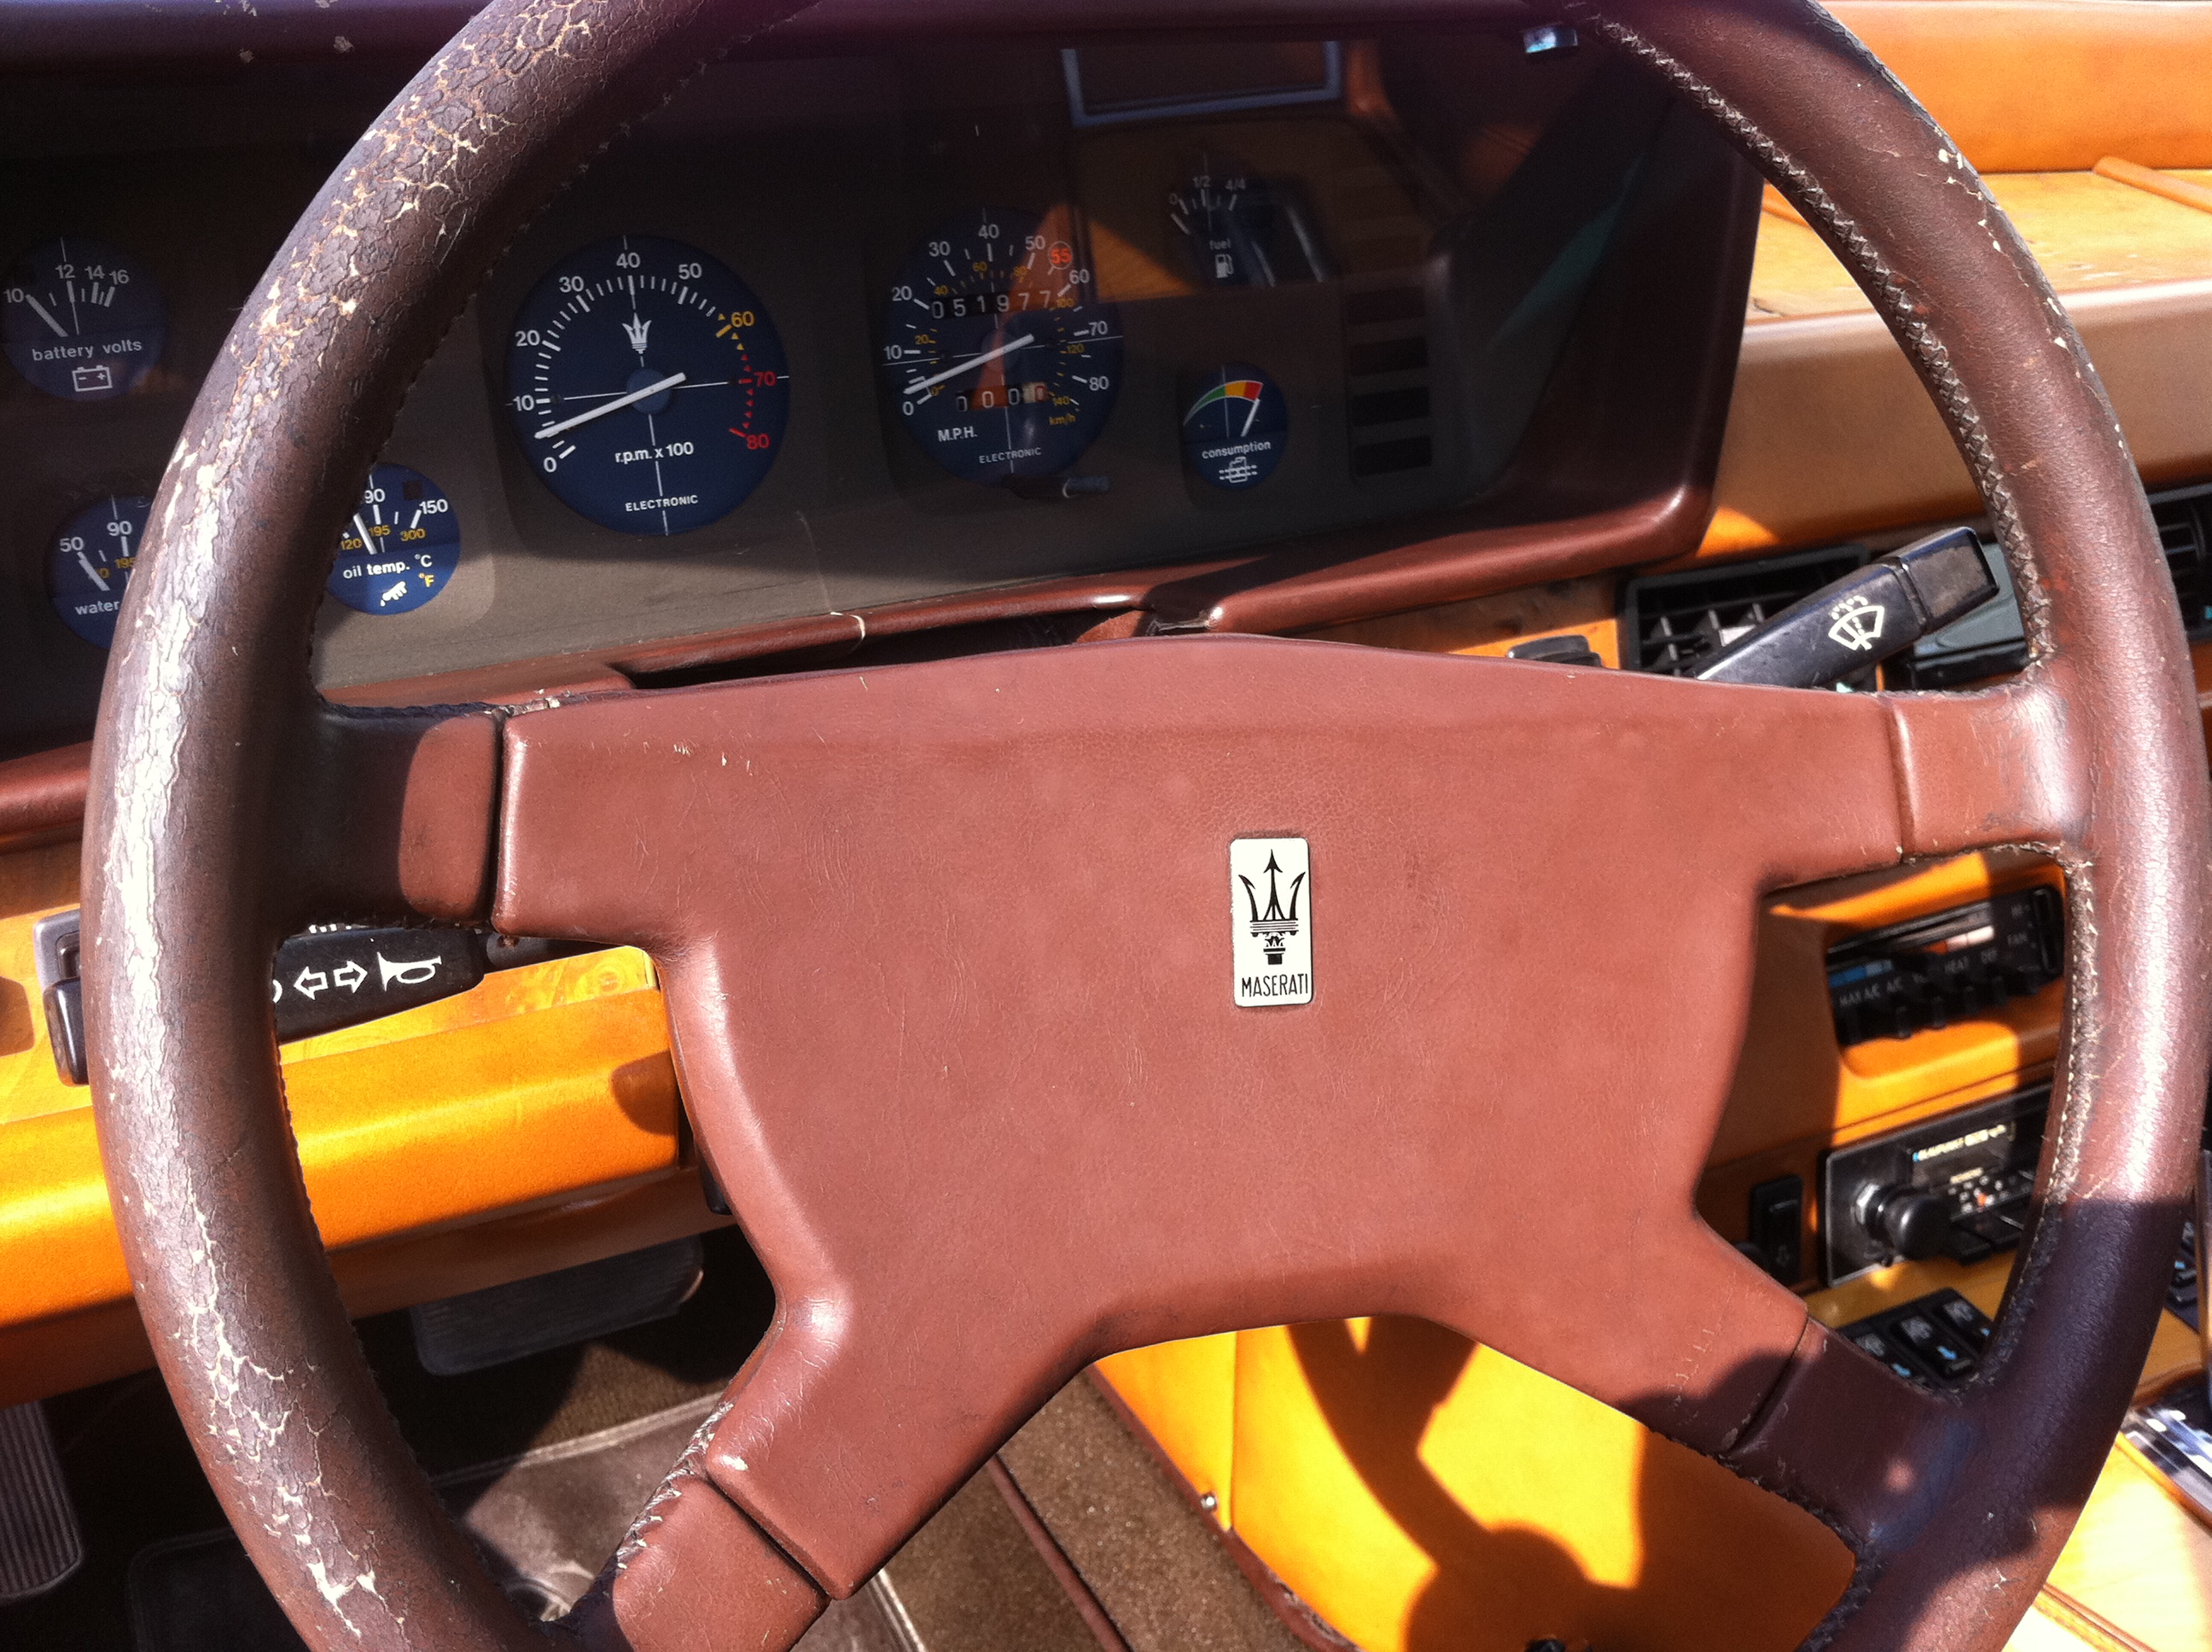
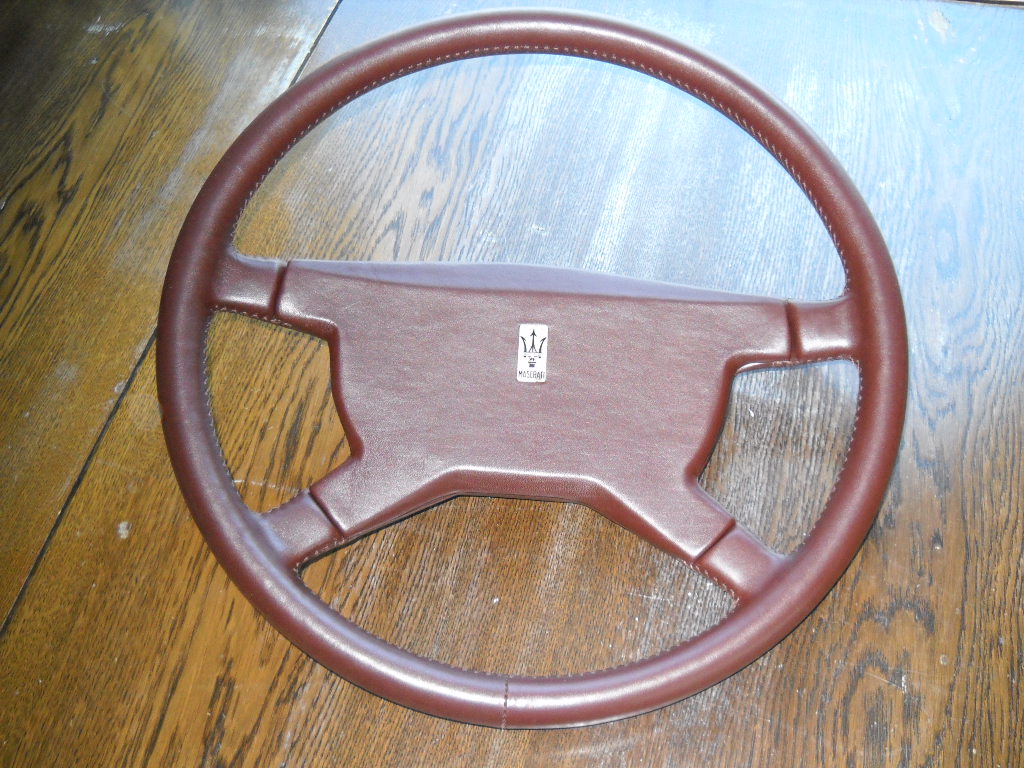
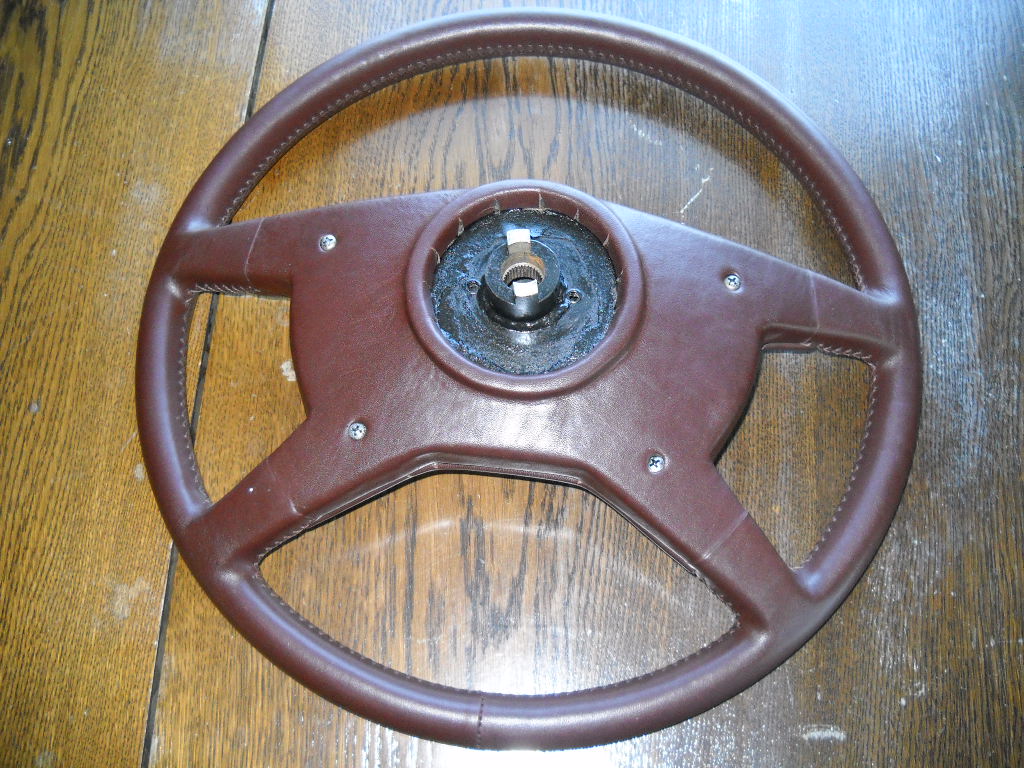
The original steering wheel was badly cracked, the leather dried and discolored. There’s a sailmaker down the street who does leather interiors as a sideline, and is really good. He managed to find replacement leather of the same color and grain and restore the wheel (two, actually, contact me if you need one).
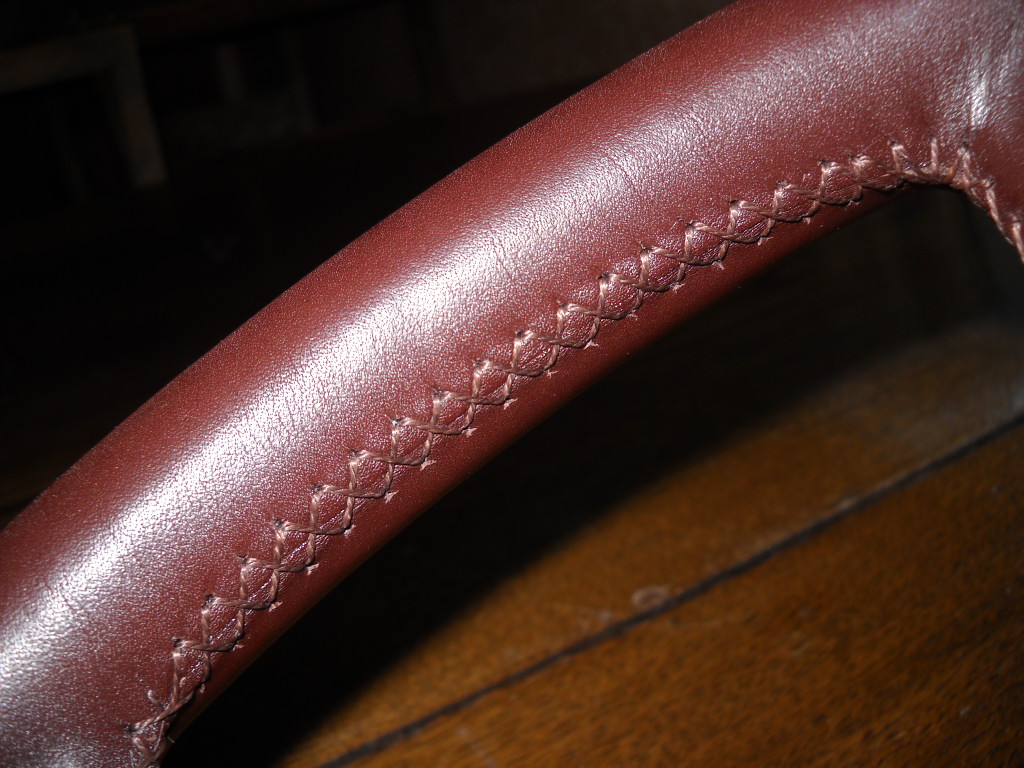
Original steering wheel. Leather baked and cracked all around.Restored wheel looks brand new (this is actually a spare I purchased, as you can see the badge is different)All stitching is done by hand, requires steadiness and patience!Impeccable attention to detail. Probably better than when new.
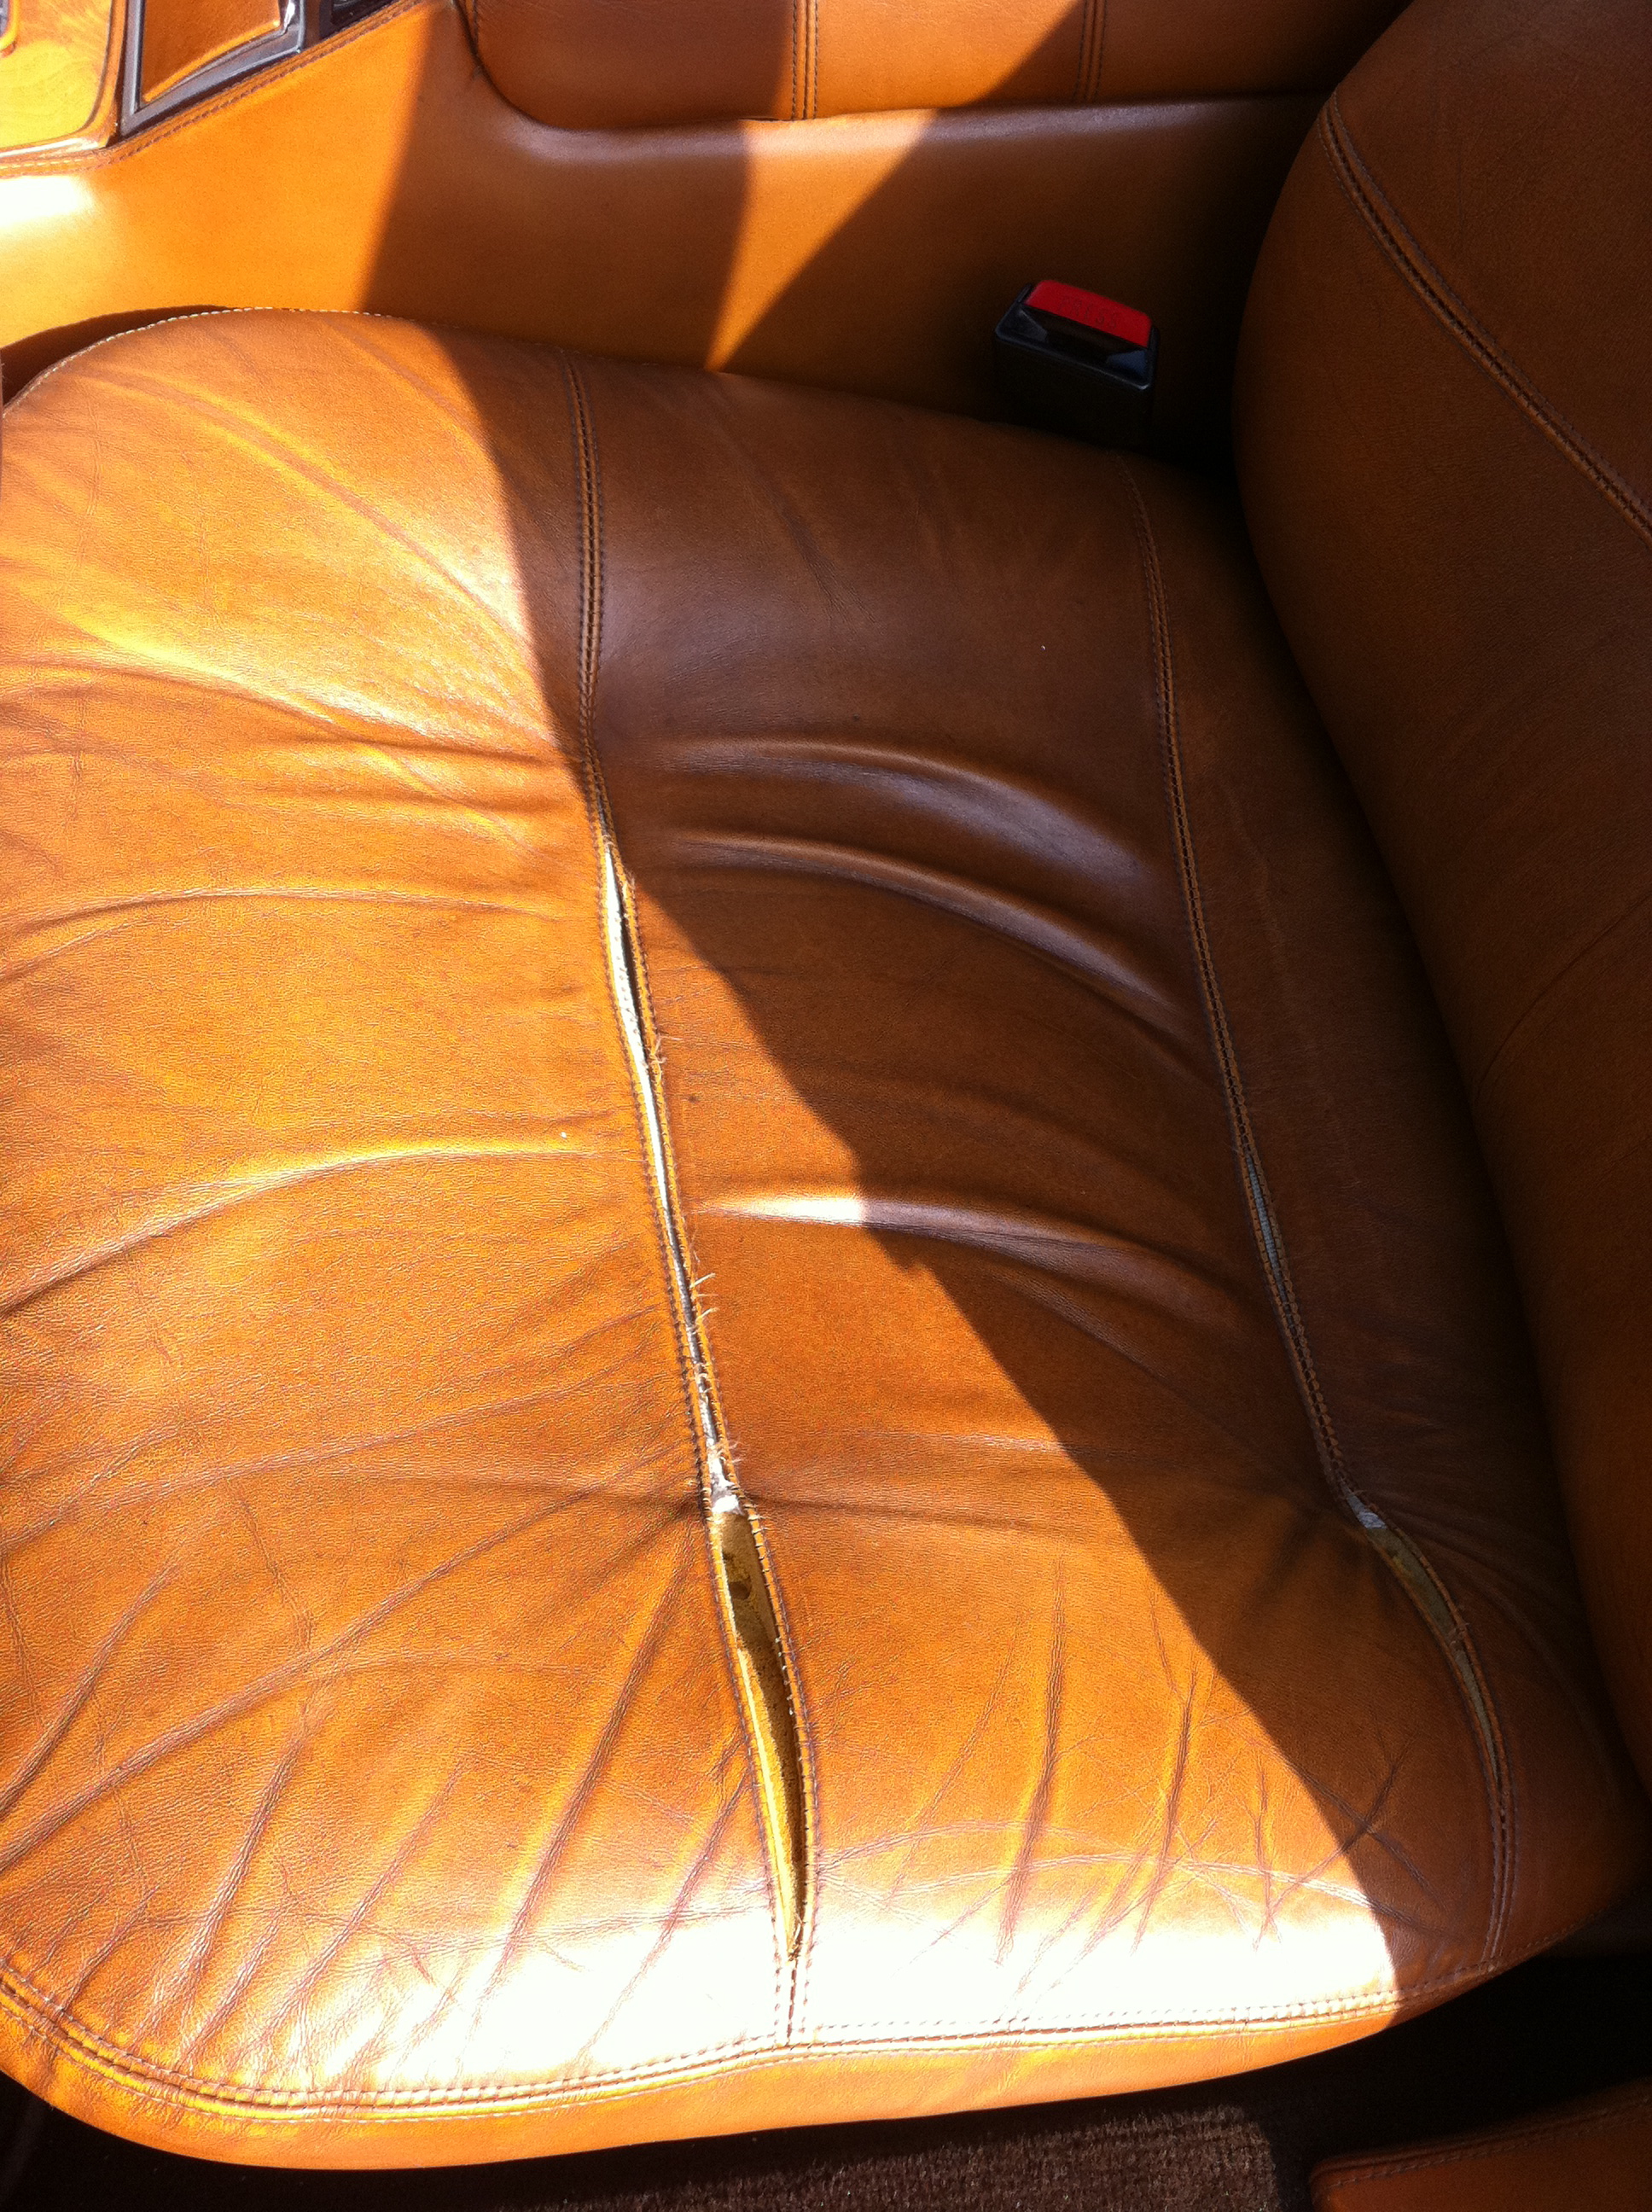
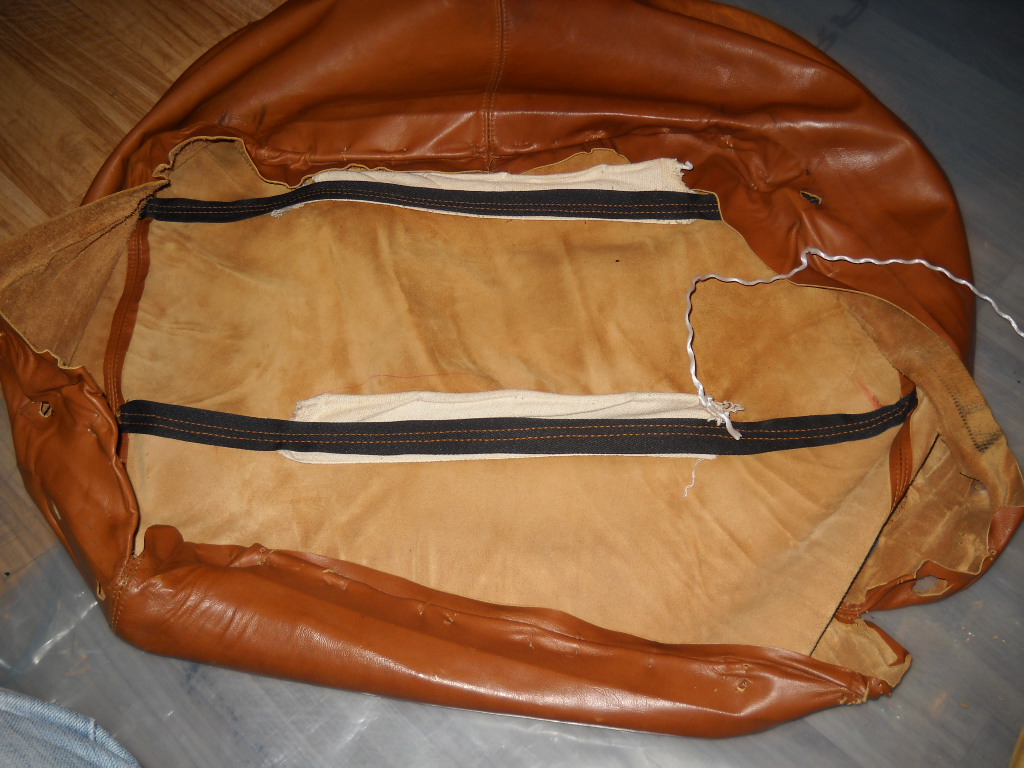
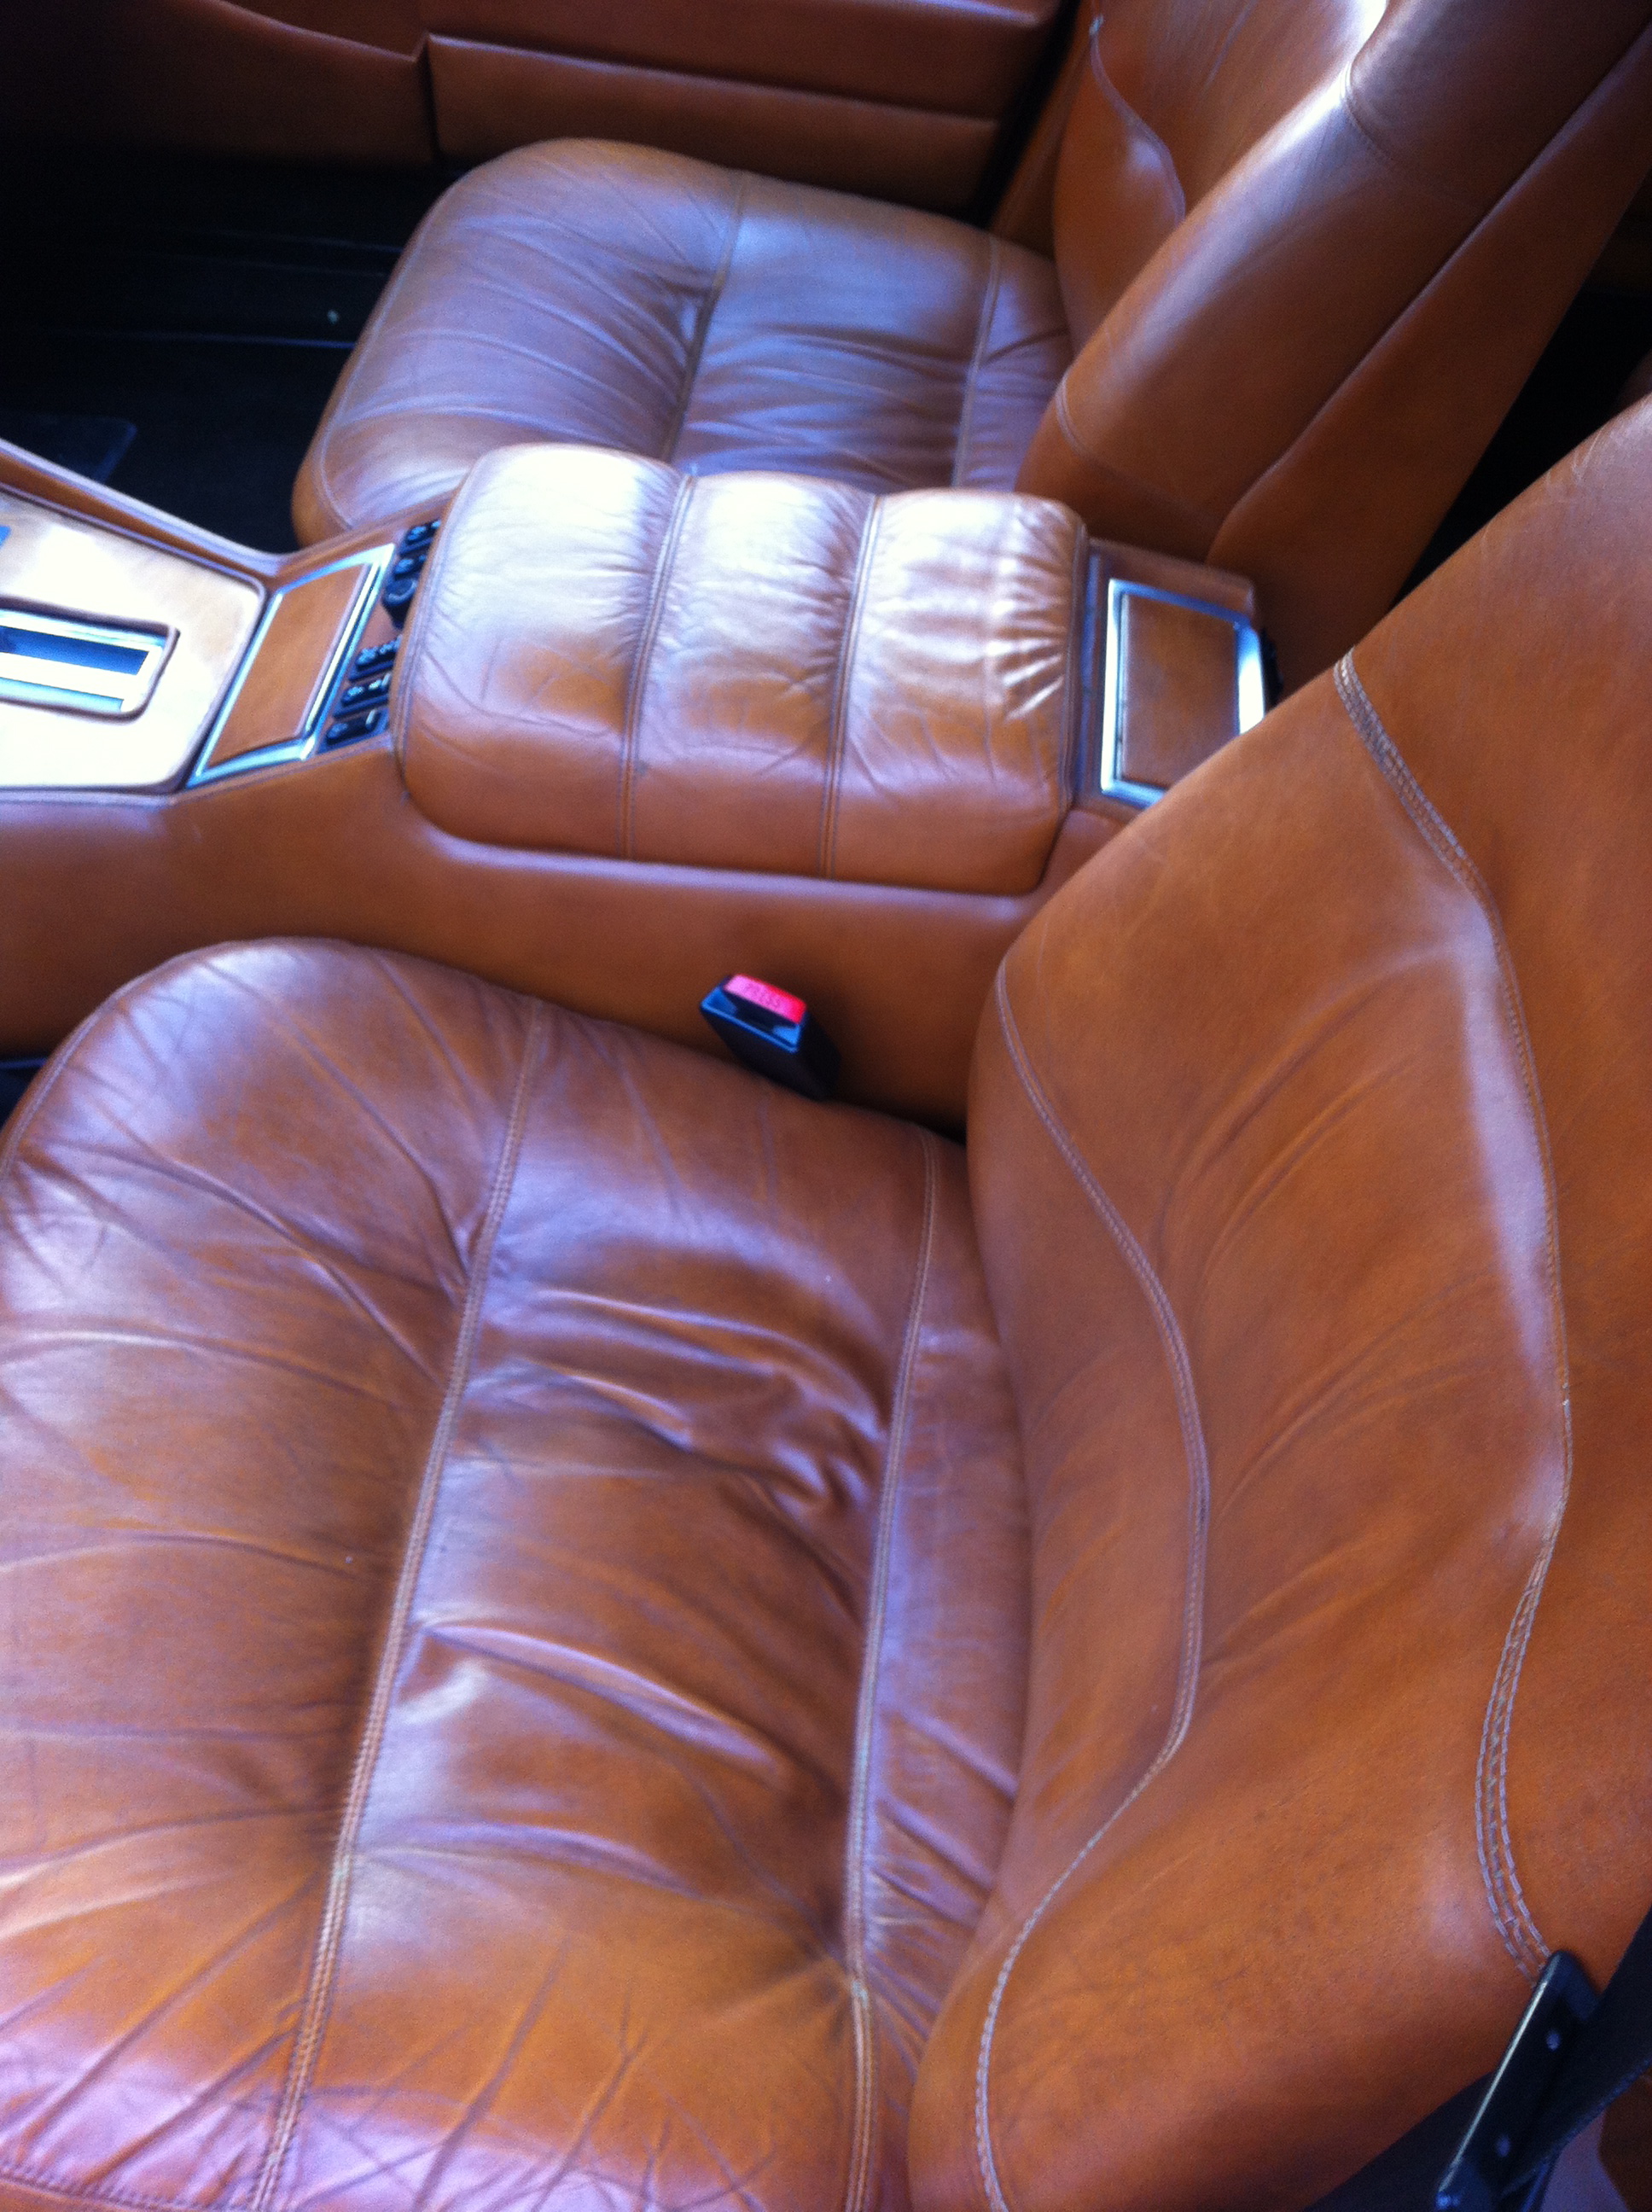
Another problem was that the seams on the front driver’s seat had split, although the leather itself was still in good condition. The passenger’s seat had also developed a beginning split it it’s seam.
There are quite a few stories about the Quattroporte III’s interior, from “a herd of cows was needed to cover it”, to “driving a gentlemans’ club (lot’s of wood and leather) down the highway”. One little known fact (as yet unverified) is that Italian exotica of the era preferred leather sourced from Scandinavian cattle instead of the closer Italian, French and Spanish suppliers. The reason for this was simple – barbed wire wasn’t used in farming in Sweden, Norway and Denmark, while it was common on the rest of the continent. No barbed wire meant hides without blemishes and marks, resulting in more useable hide of higher quality.
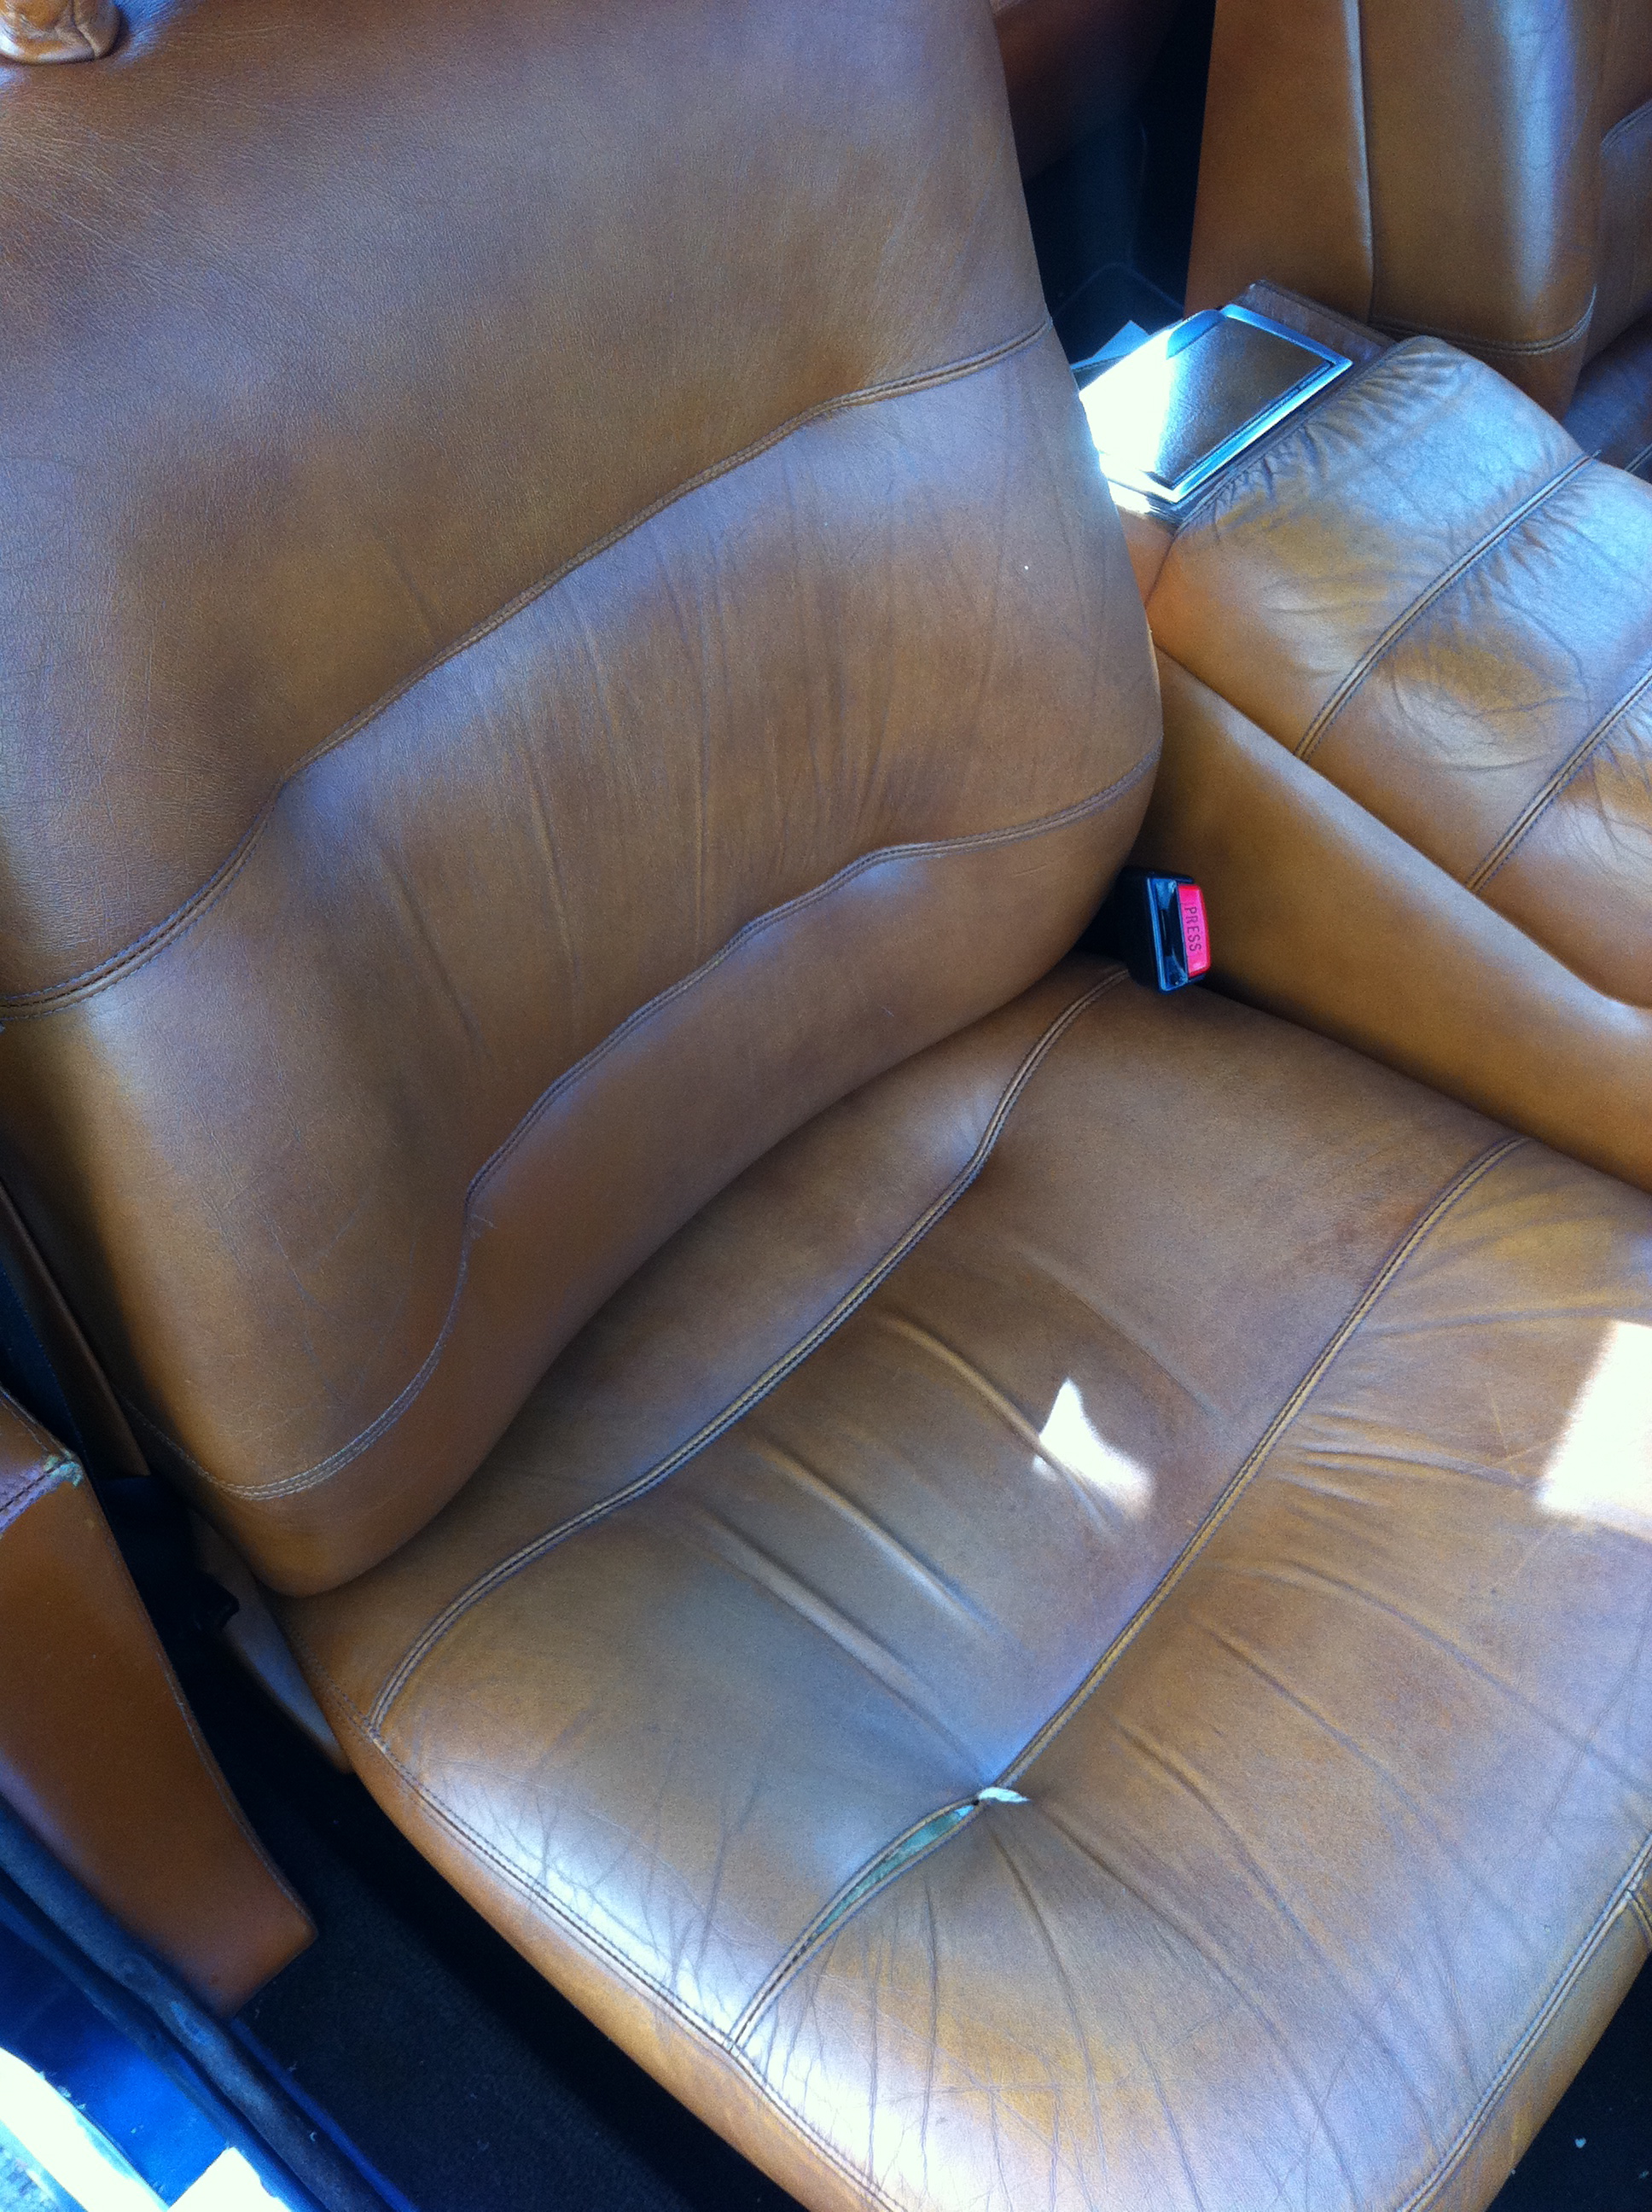
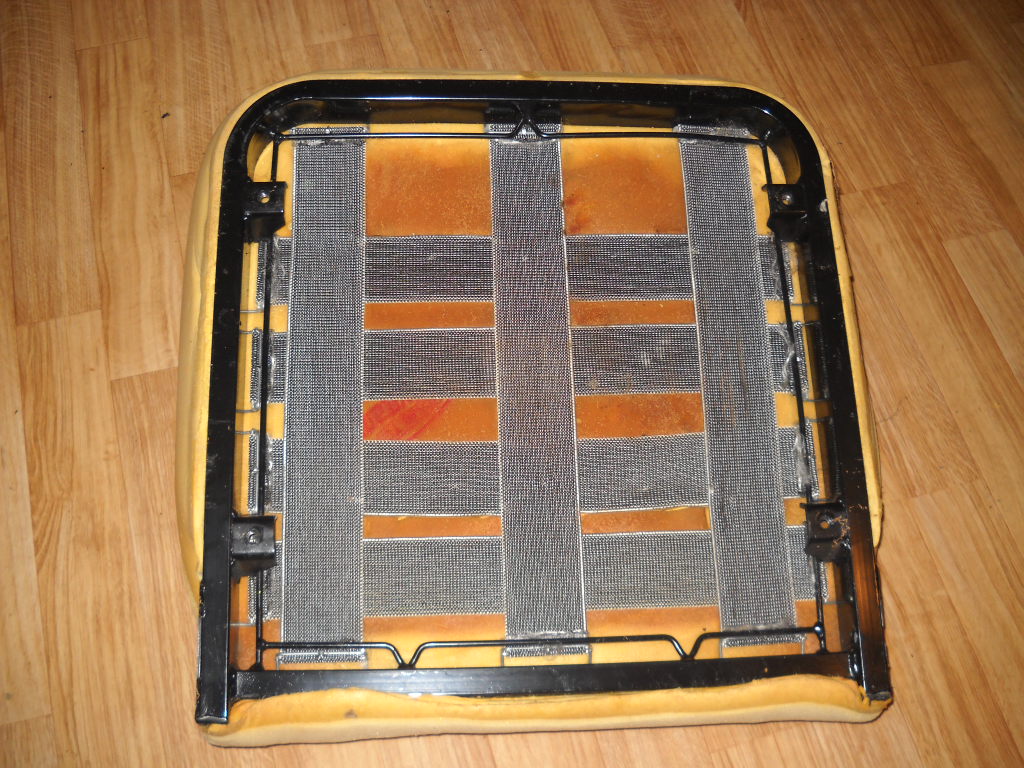
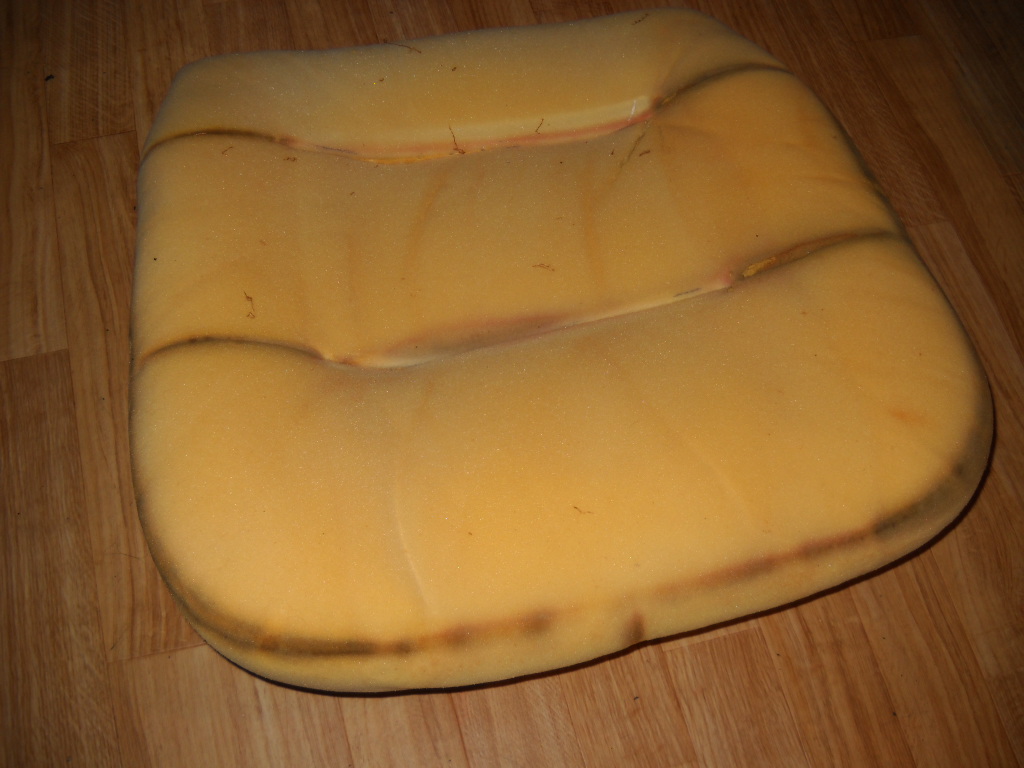
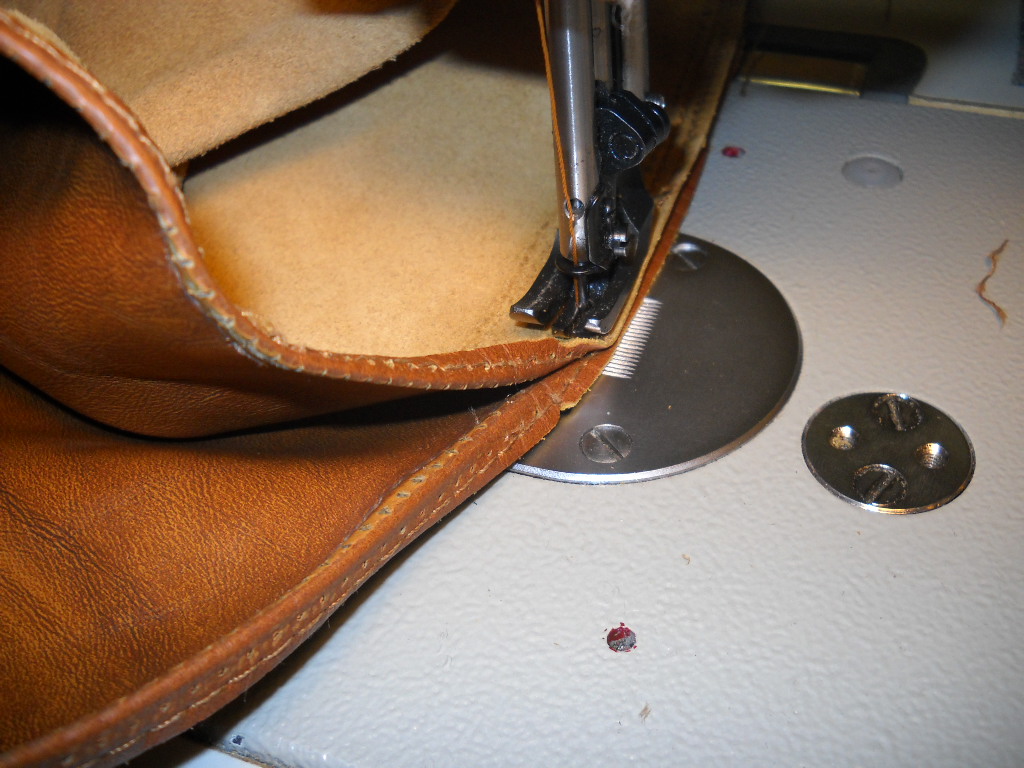
Driver’s seatFront passenger seatWebbing and frame in excellent conditionAs is the cushion itselfOriginal reinforcement tape had rotted and fallen apart, additional reinforcement is addedI don’t know how it’s possible, but all sewing uses the original holes in the leather!Restored. Not a hint that anything was every done, yet stronger than new.
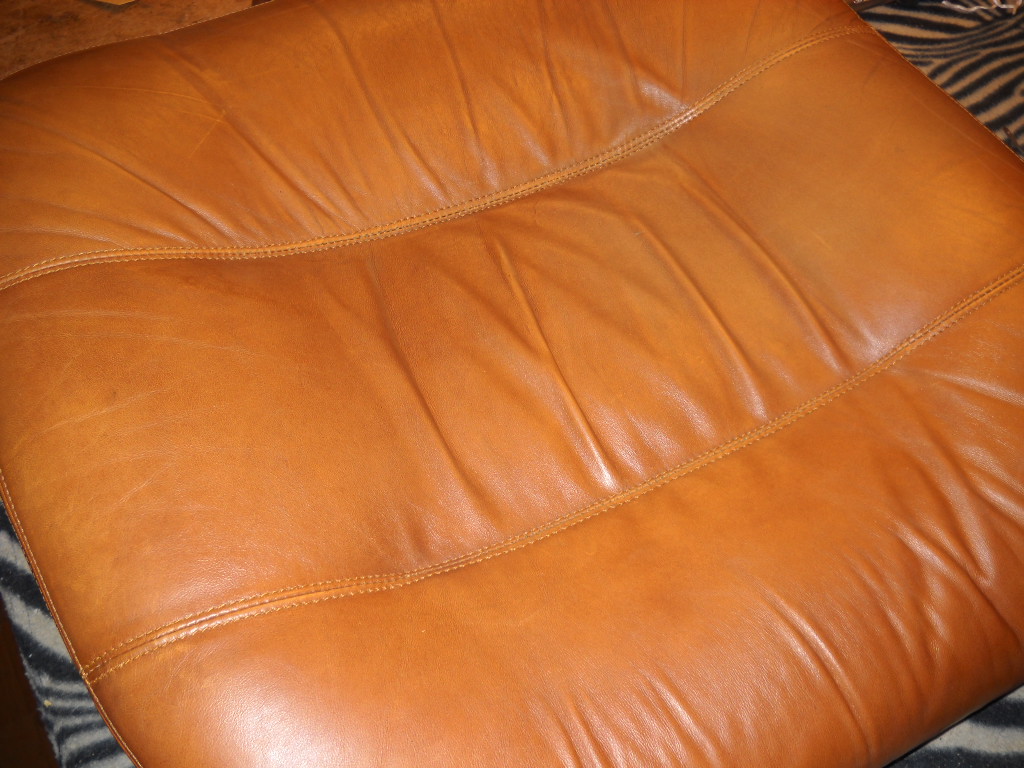
The front seats kept their beautiful patina, yet are now solid and ready for another 30 years. Special heavy duty thread was used to ensure both toughness and longevity. As “Joel” on Bring a Trailer put it (perfectly, IMHO), “sitting in there is what a baseball feels like when its well caught.”
Patina intact.
Based on recommendations I’ve received from other car enthusiasts, I’ve been using Leatherique products to clean and care for the leather. Results have varied, from excellent (center console cover/arm rest was 100% better, clean, and supple) to “is this on?” (rear seats, which seem exactly the same after multiple treatments as before). Lately I’ve heard from people restoring older Masers that Effax Leather-Combi is perhaps even better, and doesn’t risk discoloring or fading the leather. I’m thinking of giving it a try.
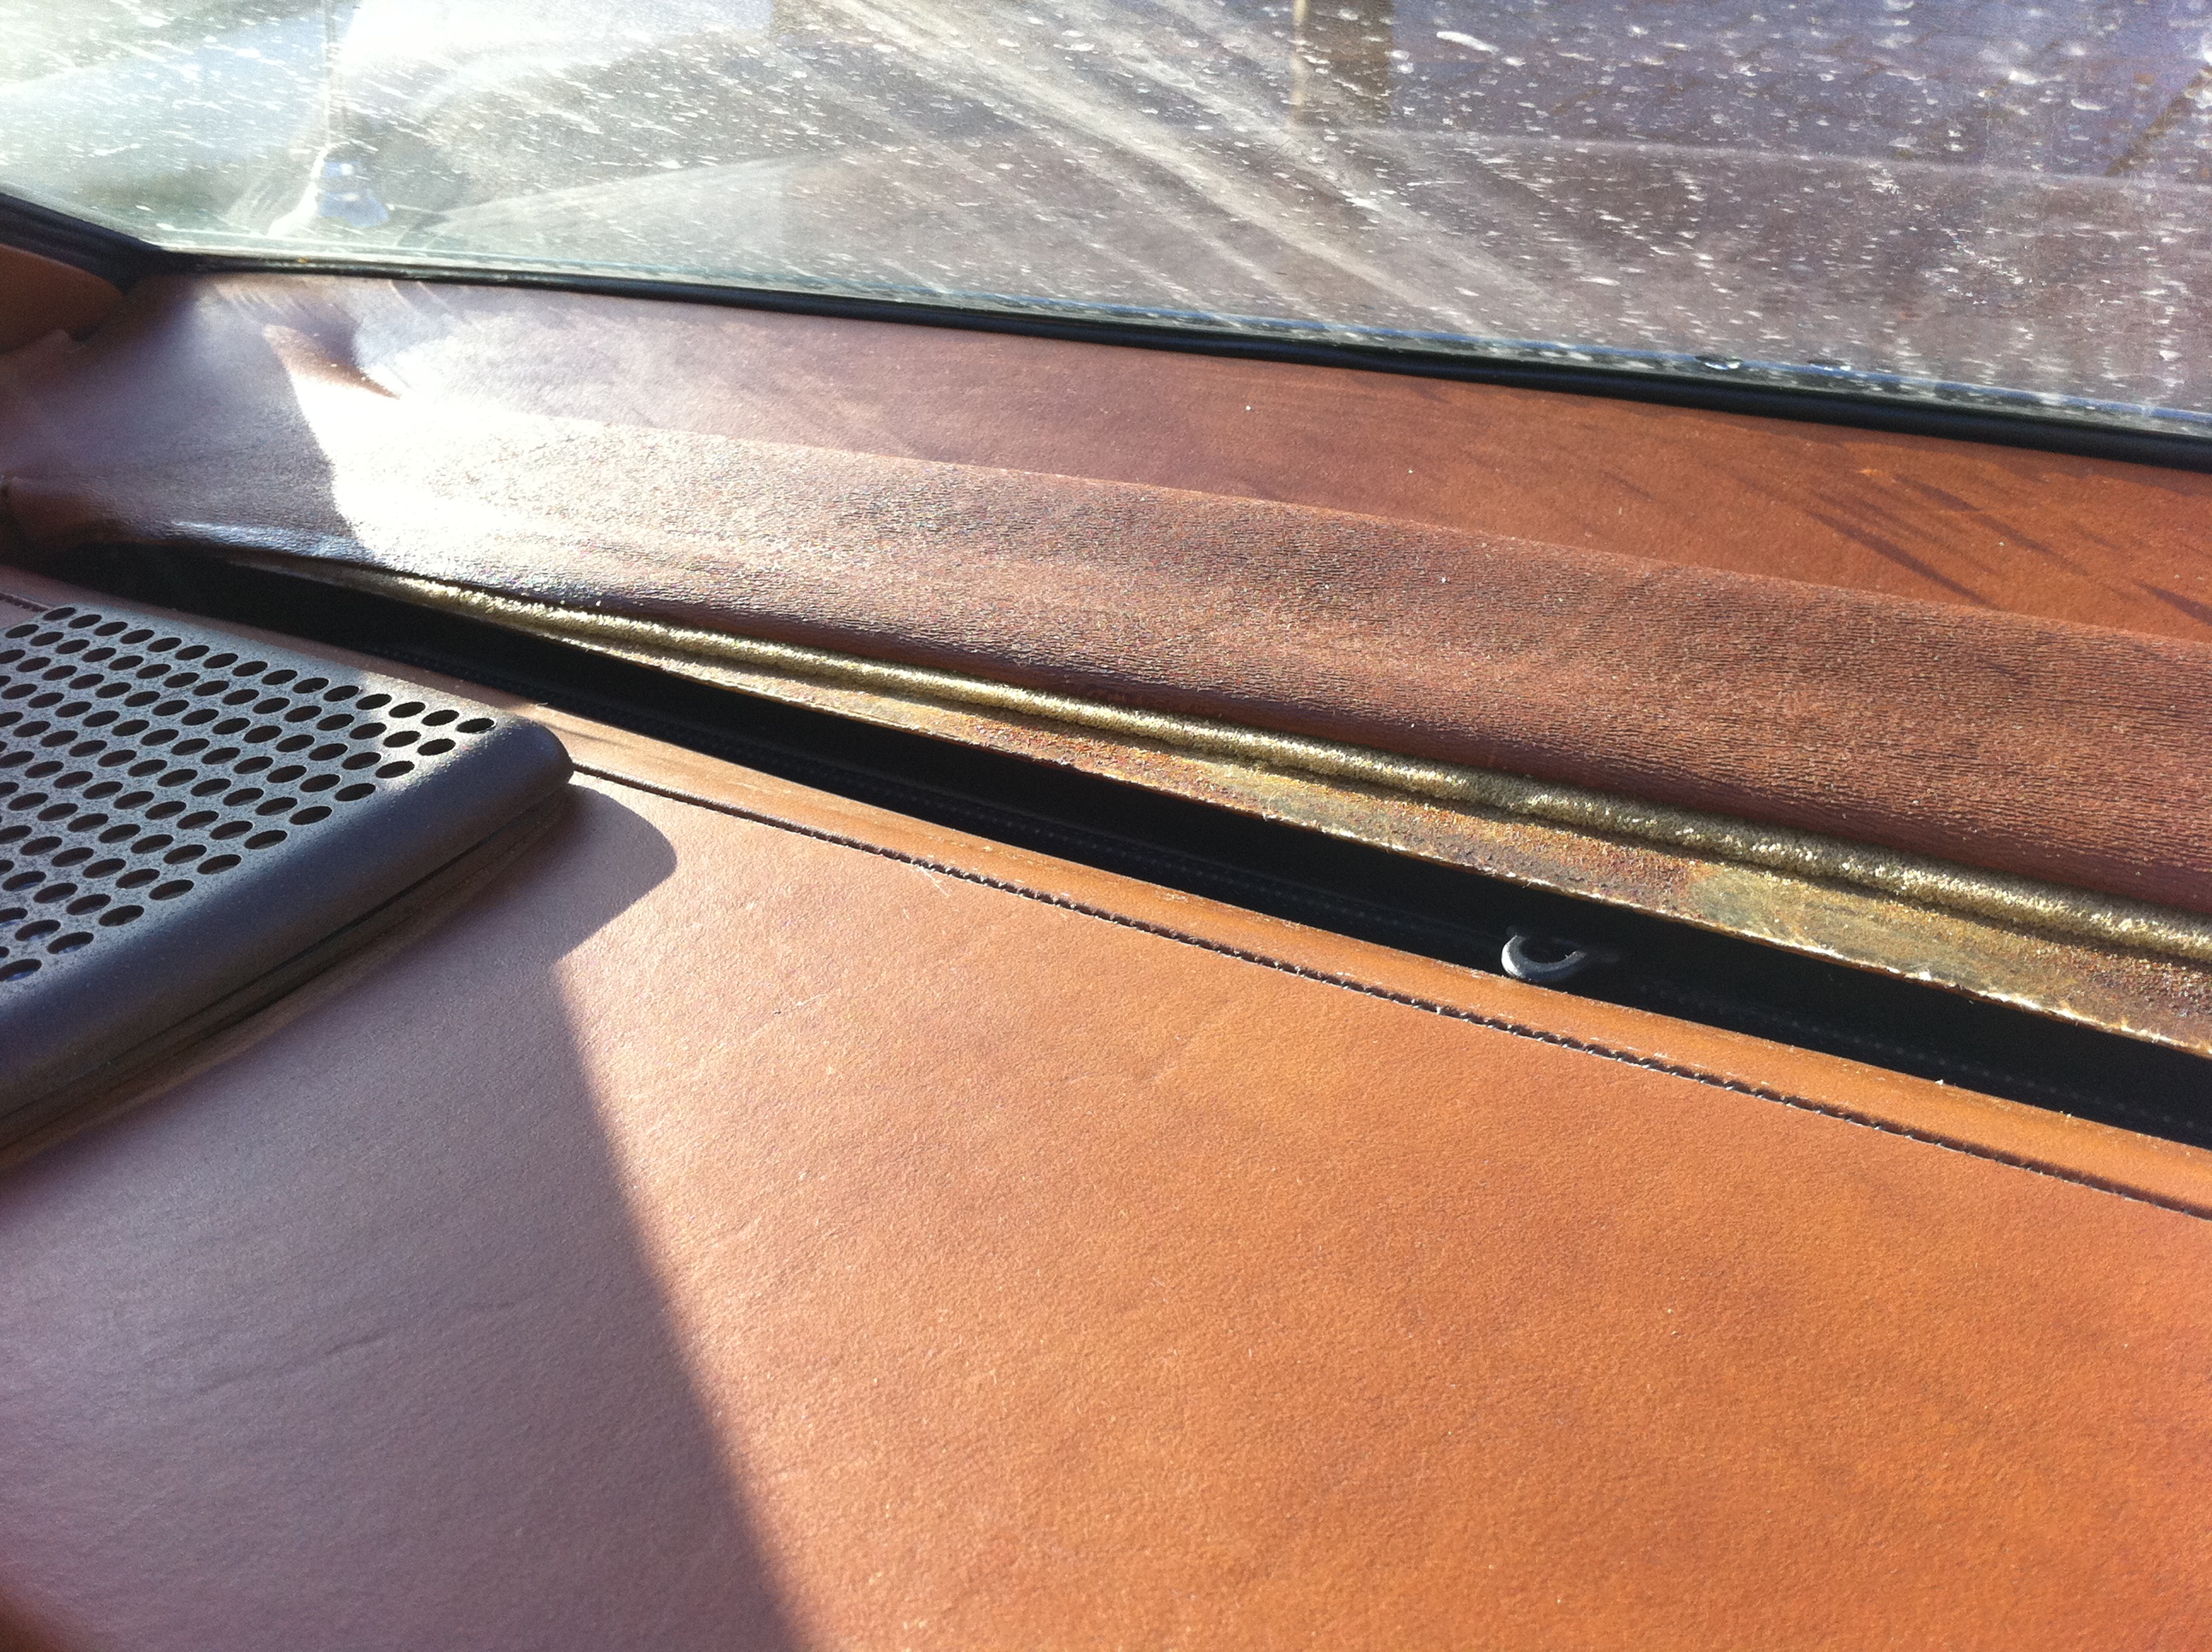
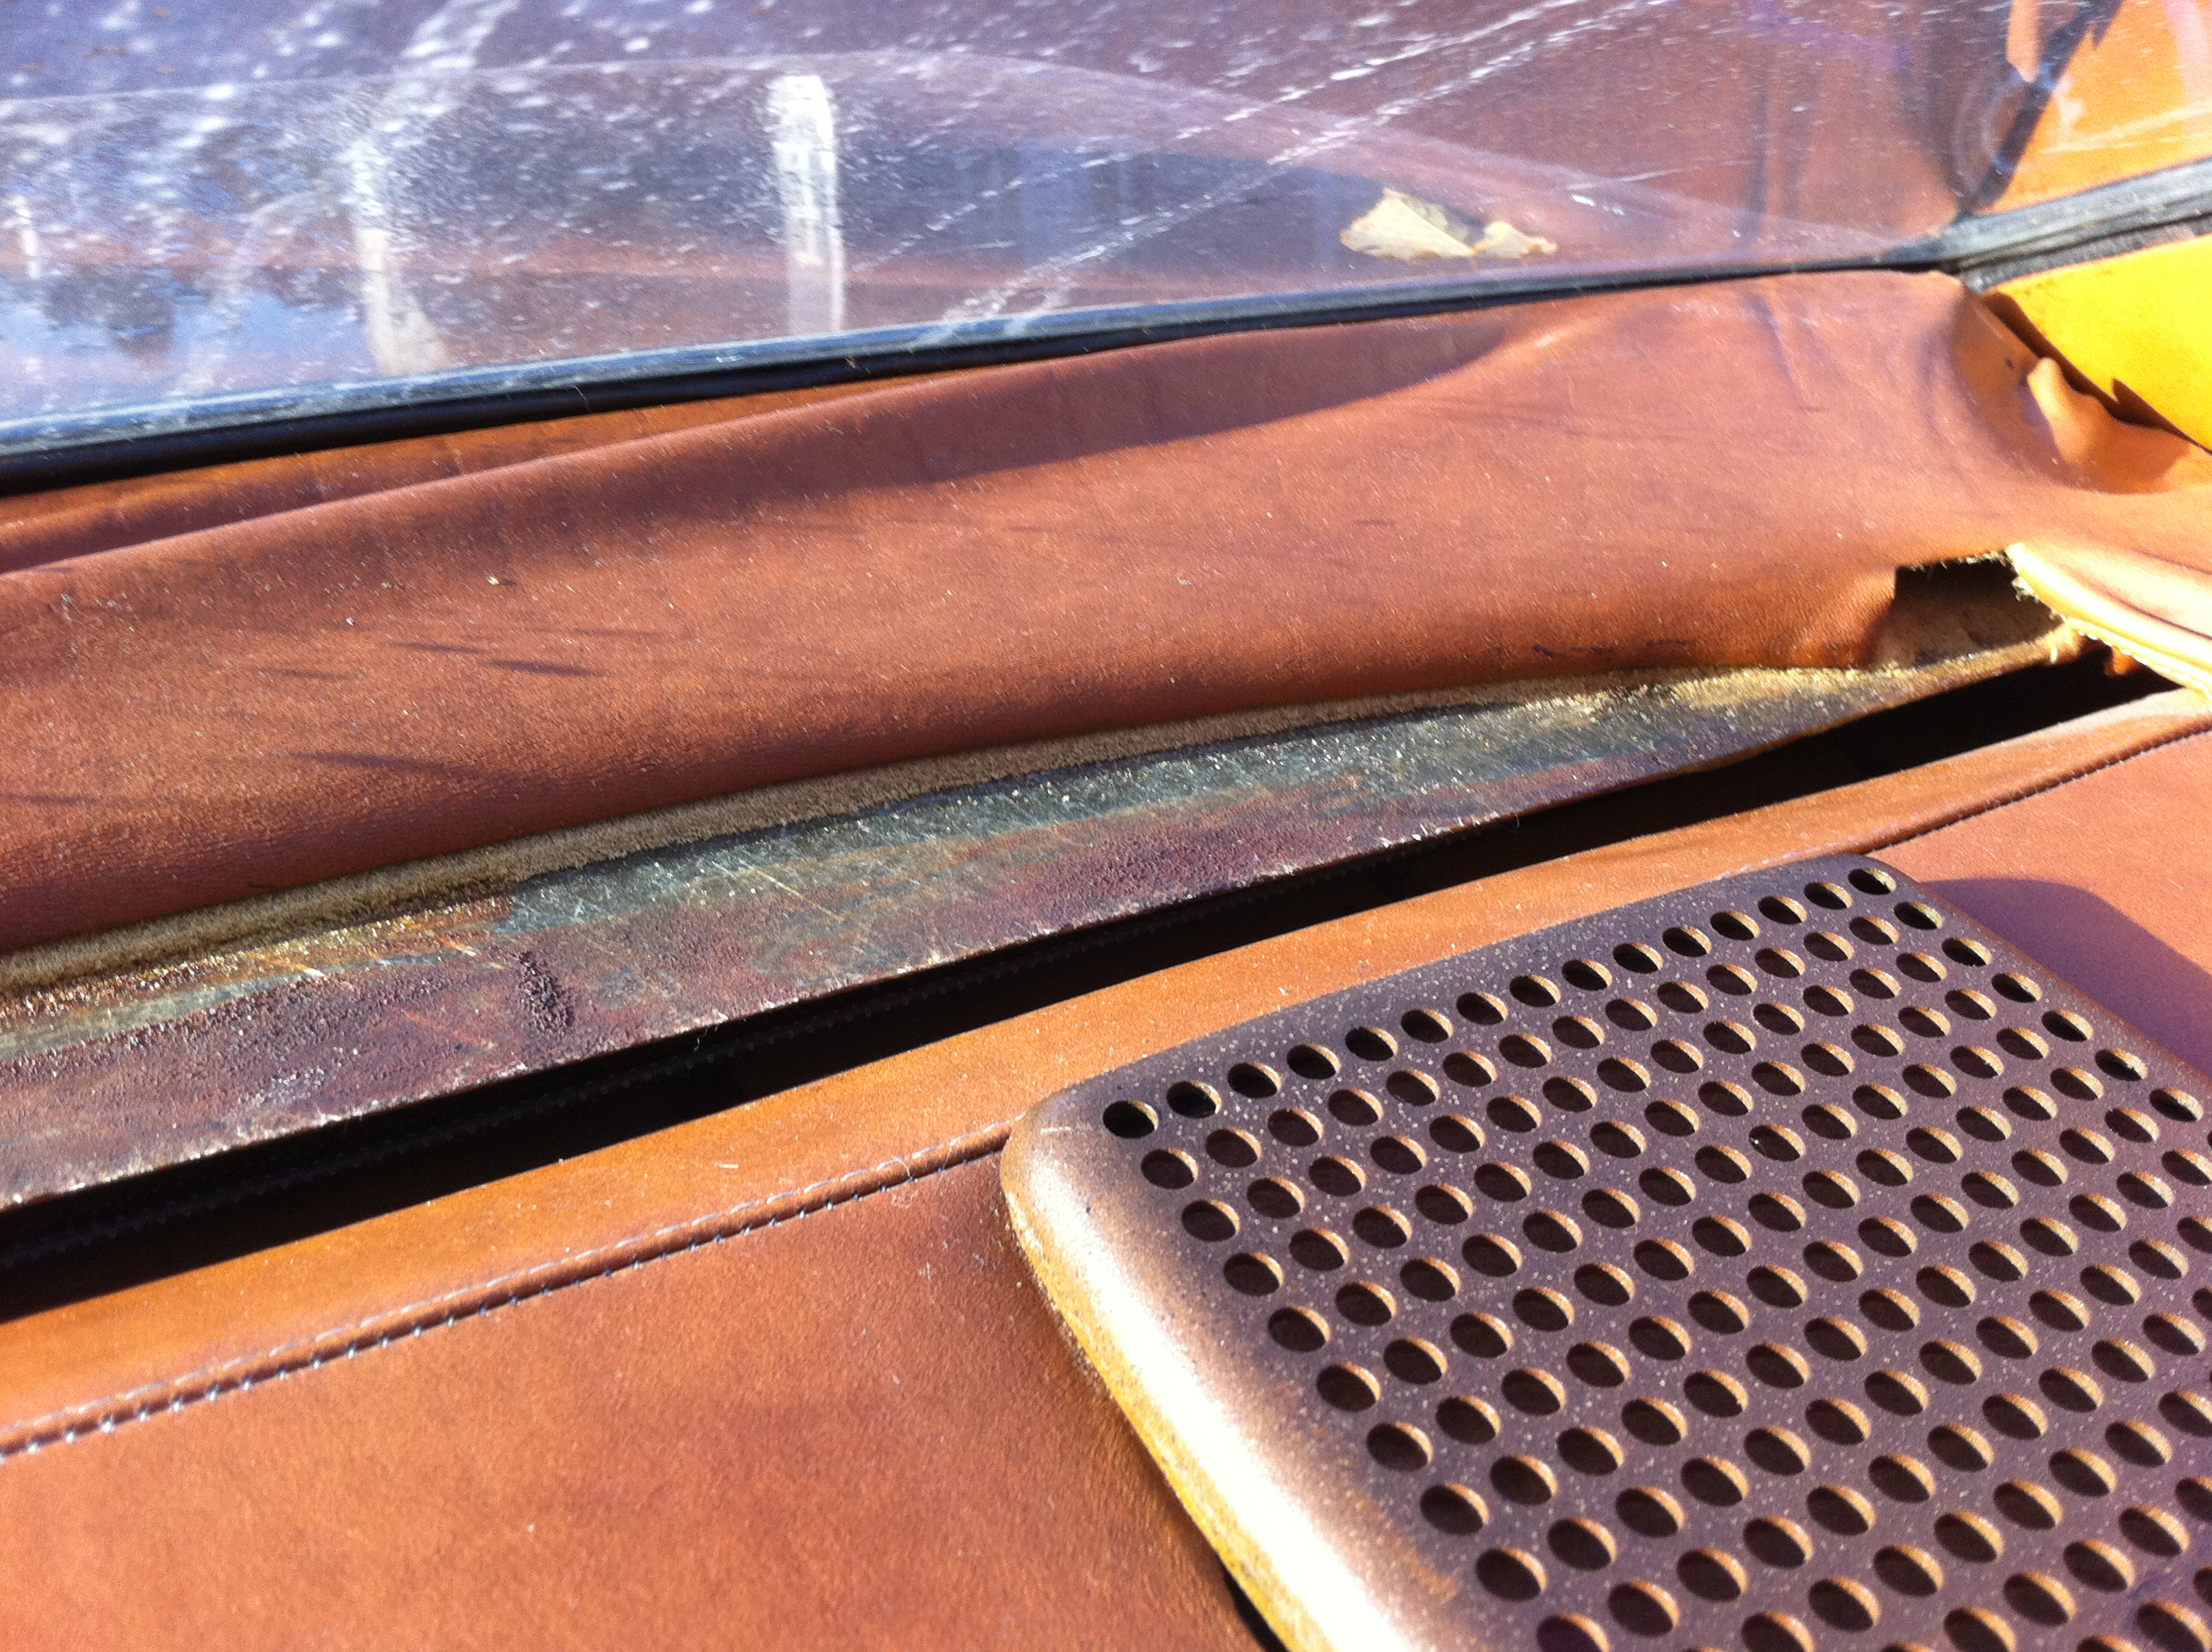
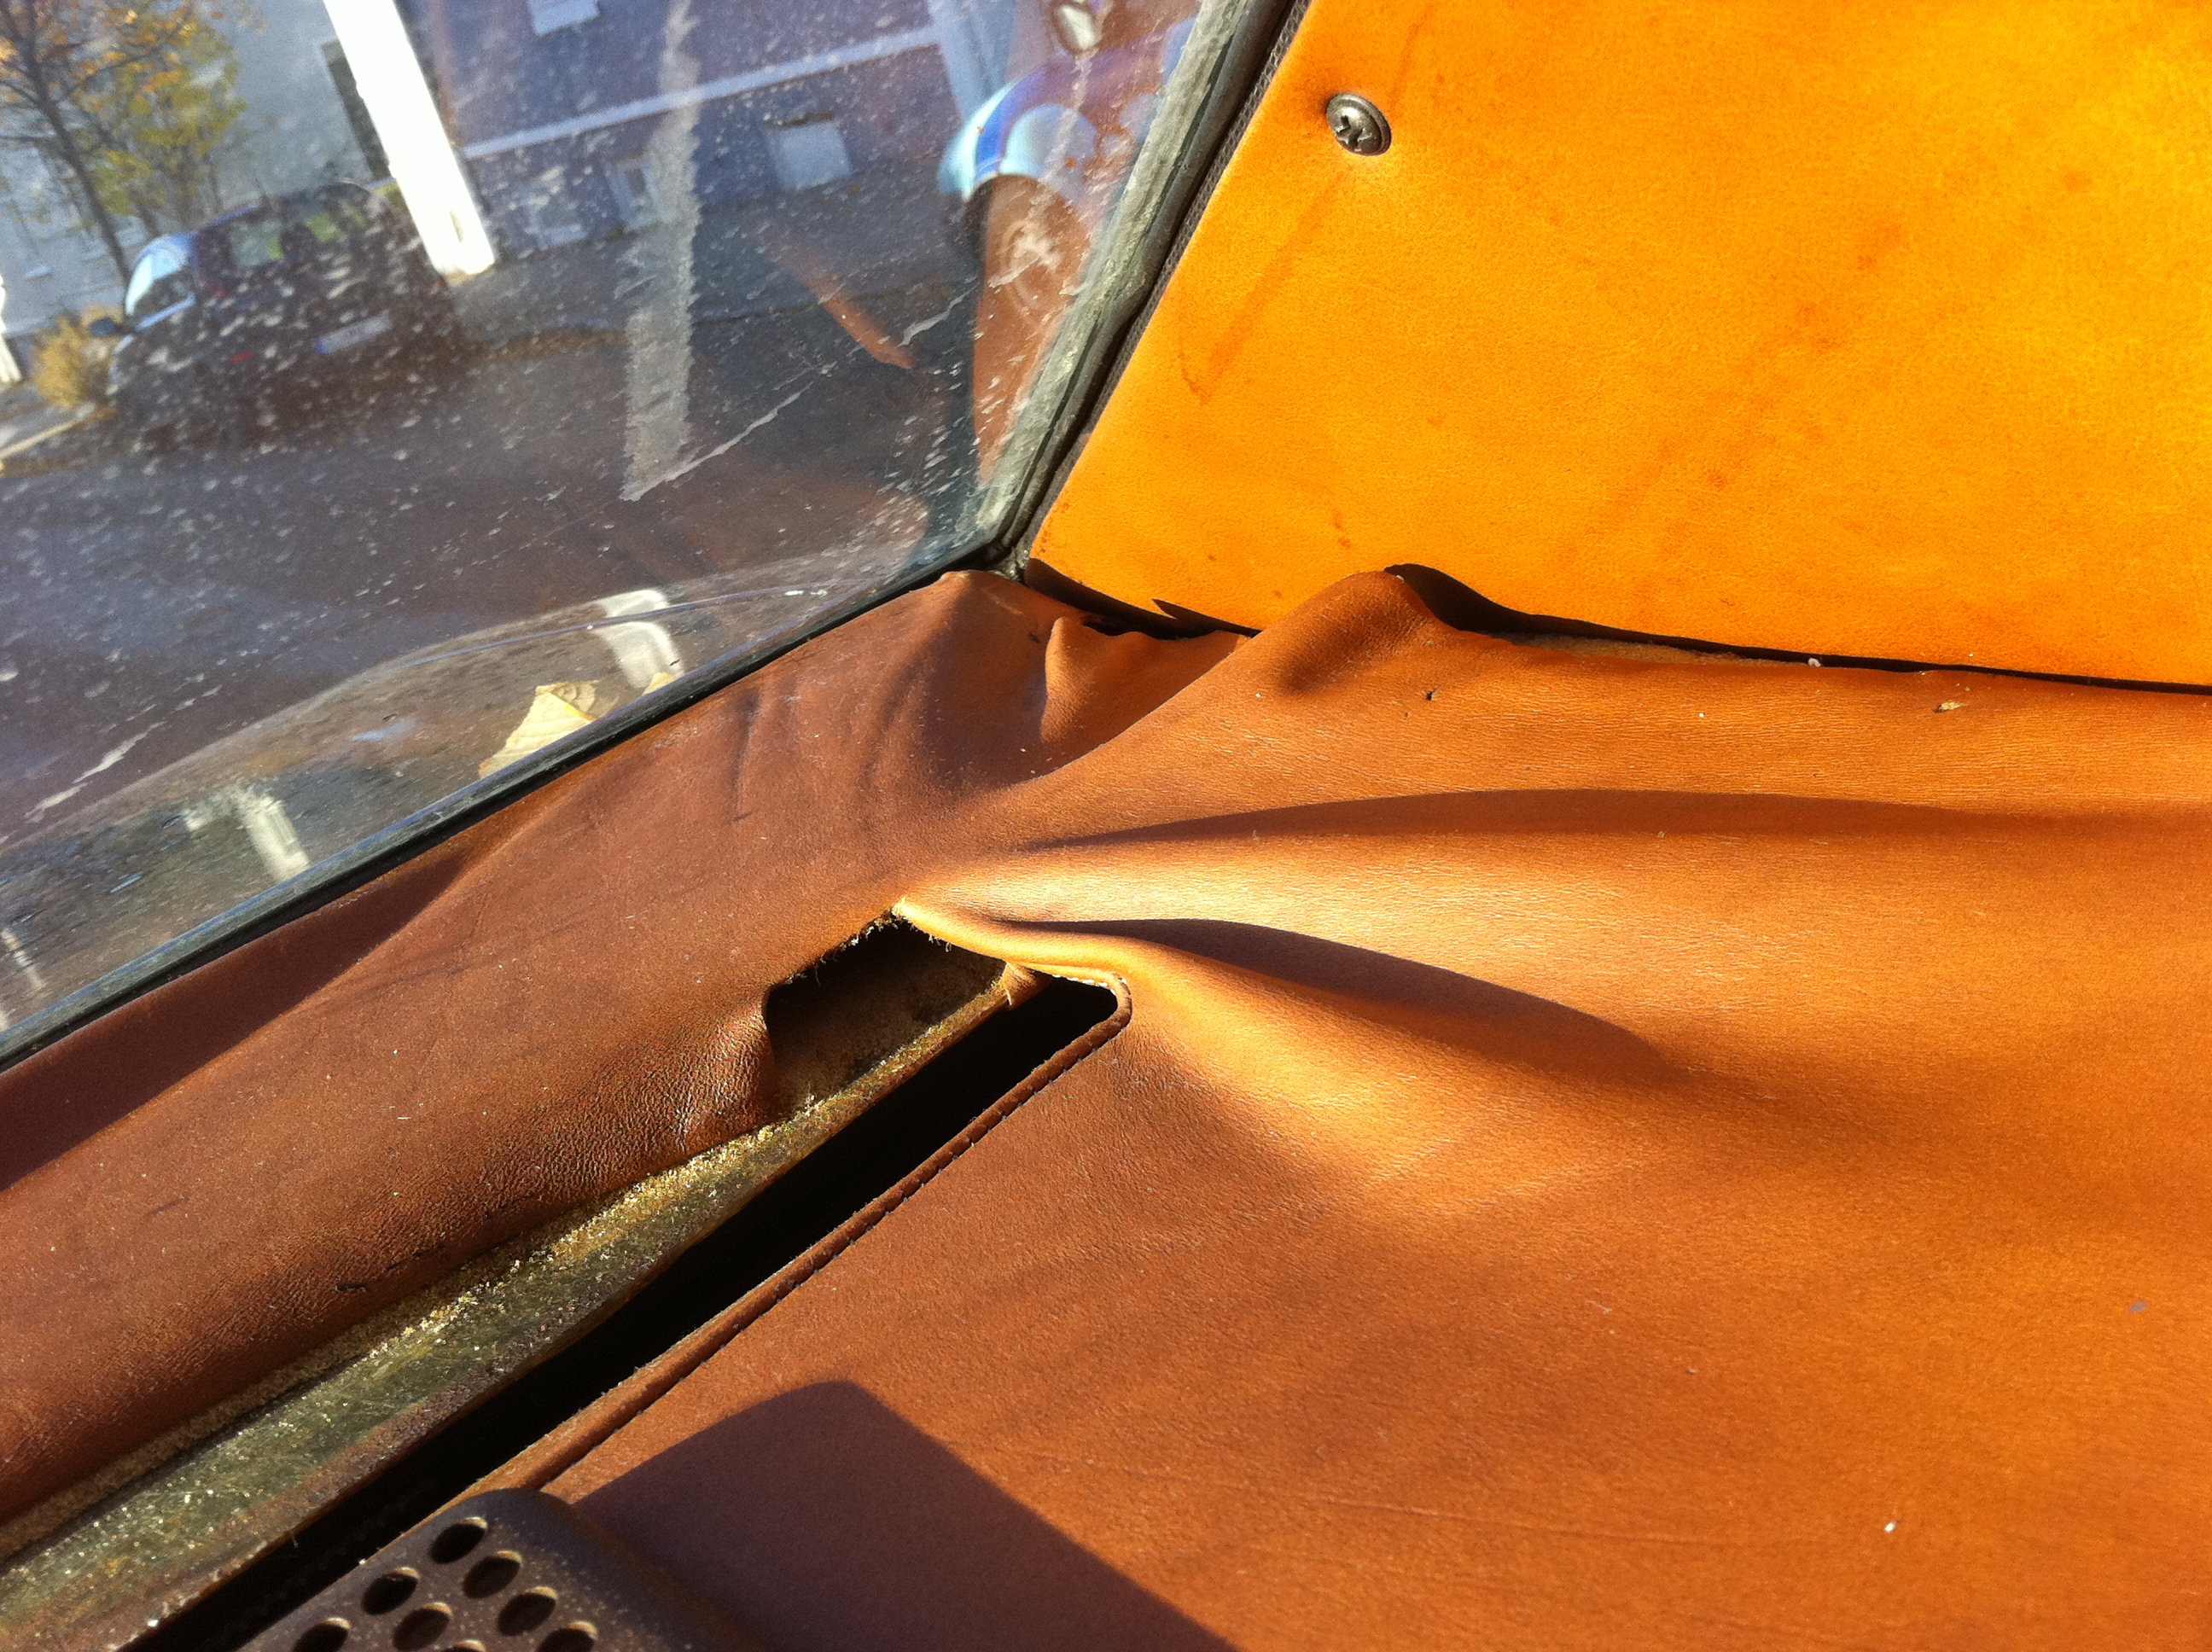
One thing none of the products available could help with was the rear parcel shelf. It was cracked, dried and looked like cardboard, or beef jerky, and had pulled away from the shelf it was glued to. Since the windows have to be removed for the paint job, it makes sense to have the rear shelf pulled at the same time and re-covered.
Both rear speakers were blown as well, and well, in a cruisin’ car you really need good tunes to drive to! So new speakers have been purchased and are waiting for installation. Not a whole lot to choose from in the size used here, but I want to keep things as original as possible.
JL Audio Evolution C2-525x
It would have been nice to find something that used the original or had optional square grilles, if anyone knows of a source, please leave a comment.
I’ve been leaning towards the original “blu sera met.”, a metallic midnight blue. Personally I think the car suits slightly darker colors to lighter ones, although I must admit it looks really nice in silver. Dark grey, metallic burgundy, even the metallic bronze all compliment the car nicely.
The older 60’s blu sera is even deeper and richer, with finer metallic flakes than the 80’s vintage, as technology changed (improved?), flakes became larger. Here’s an example of a Maserati 5000GT painted in a mid-60’s blu sera:
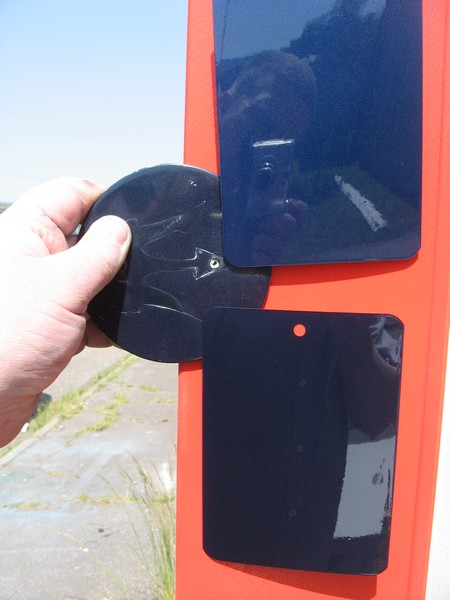
Here are a few paint chips. Ferrari blu sera top, my original blanking panel left middle (not sure if you can see the difference between the color where the trident was and the rest, but it’s there), and the model year-appropriate Maserati blu sera on the bottom:
Paint chips
There’s still time to consider other colors before paint hits body.
What color would you think shows off the car best? Comments are open!
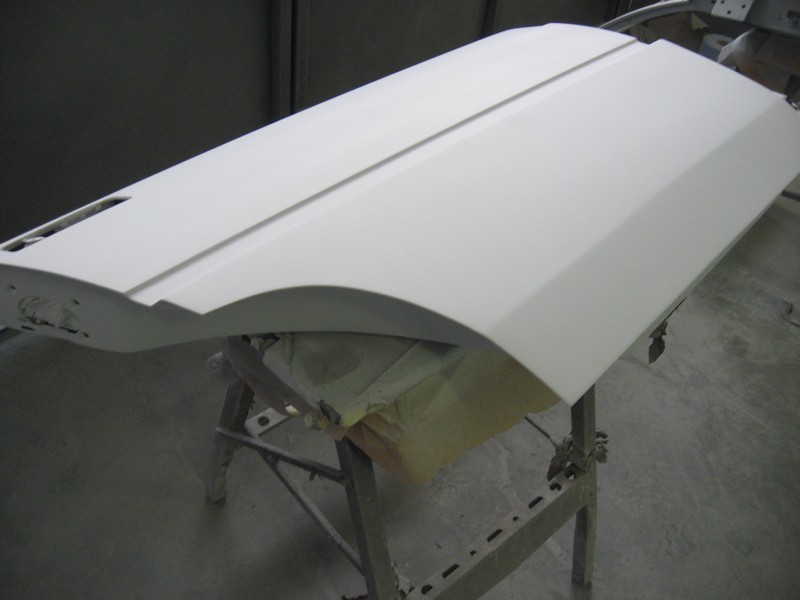
Every crease and detail in the body is pin sharp and precise. It’s always a pleasure to watch a master craftsman at their trade.
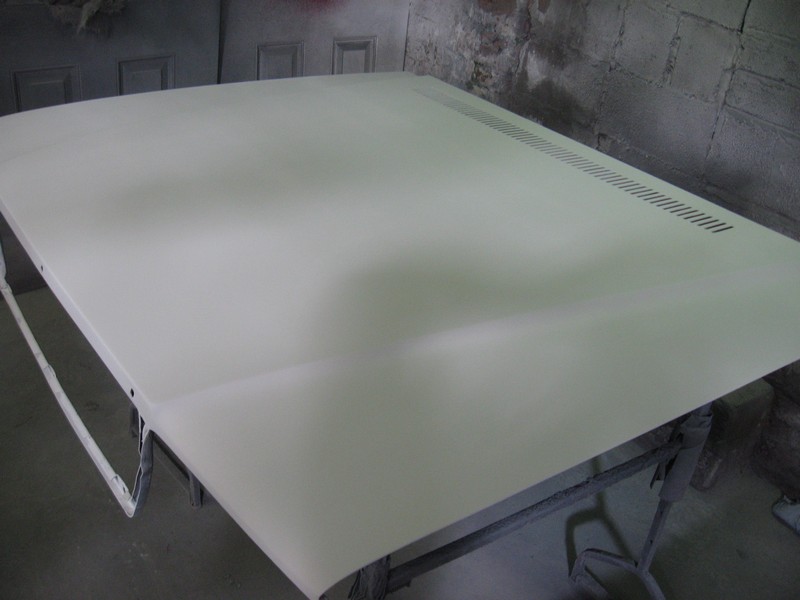
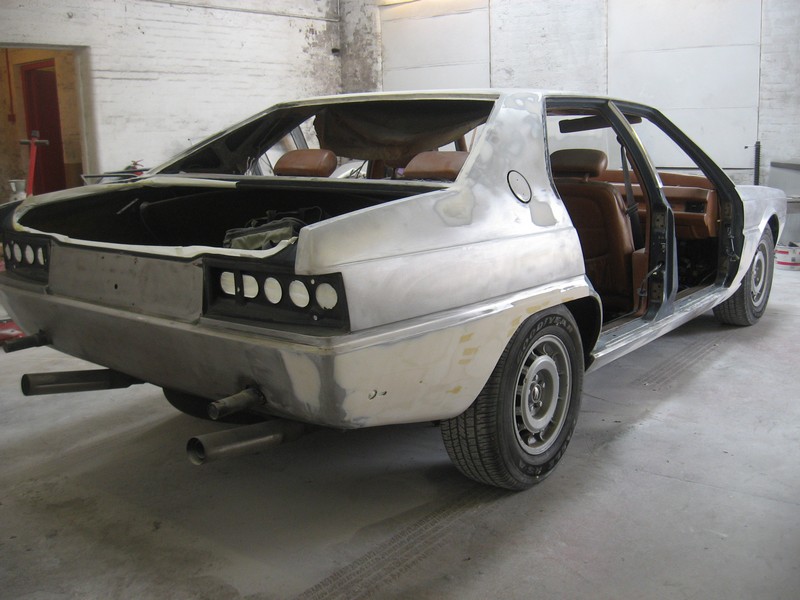
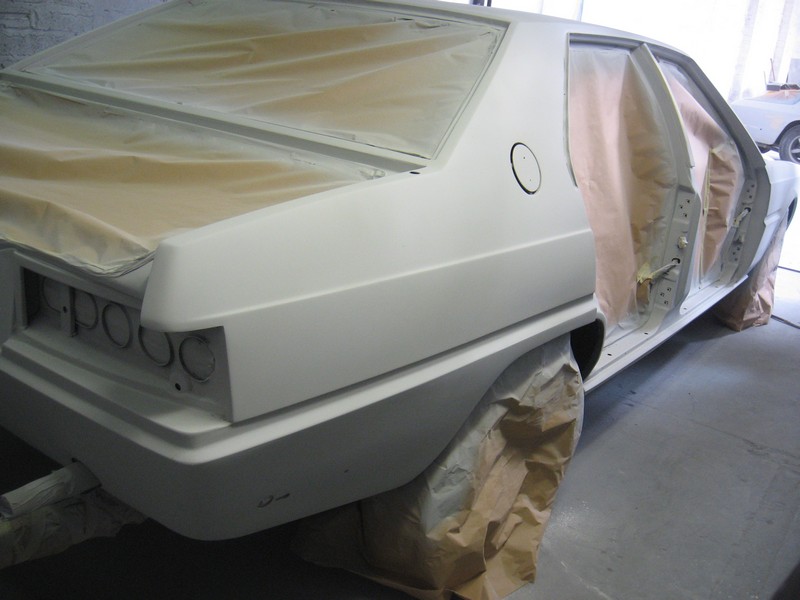
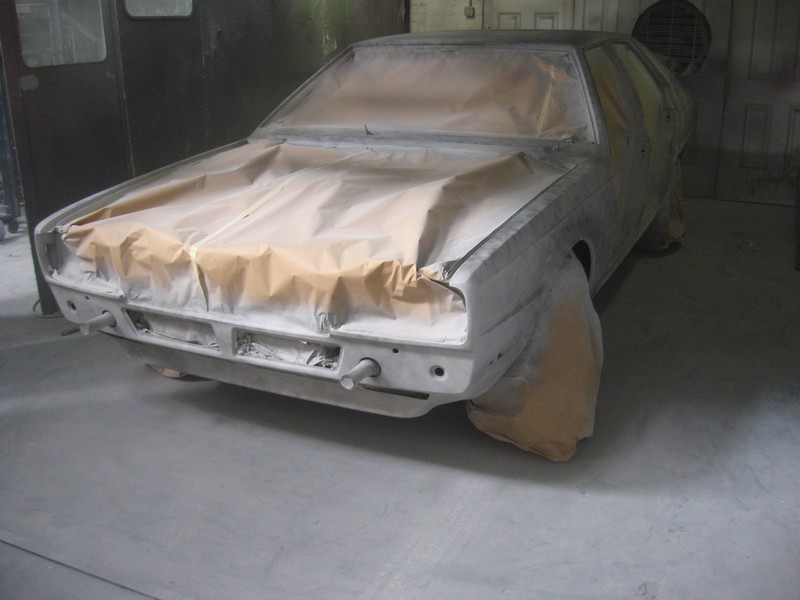
“Anyway, a few pics – but loads of progress – this week. Filling/shaping work completed, main body etch primed, high build primed and guide coated. Masking removed.”
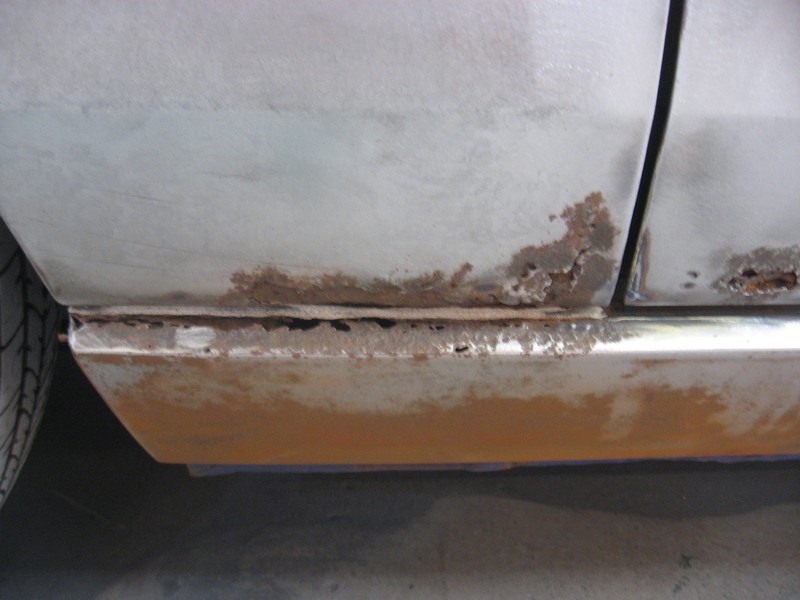
Rumor has it that the communist government in Italy during the 70’s – 80’s made a deal with the USSR for steel to supply their automobile production, resulting in cars that rust more readily than their competitors. Hopefully any historians in the audience will be able to verify or refute the accuracy of the rumor, but as anyone who’s ever owned an Italian car knows, they rust like no others. I don’t even think that a Jag could rust faster, and that’s saying something.
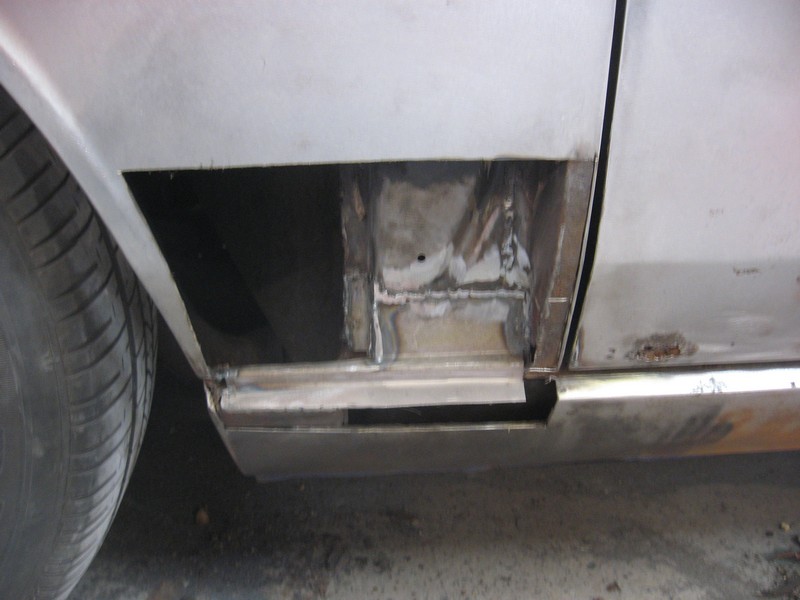
Meaning that 33 years on, mother nature has had her say in the matter, and the results aren’t pretty. The expert’s assessment is that this is no big deal and pretty common and far from the worse they’ve seen, and I’m comforted by the fact that they know their way around a pair of tin snips and welding machines. Blindfolded.
E.g. “The car is pretty well as I expected, PLEASE don’t feel in any way downhearted at the seeming extent of the metal repair work………….this is very much the norm.”
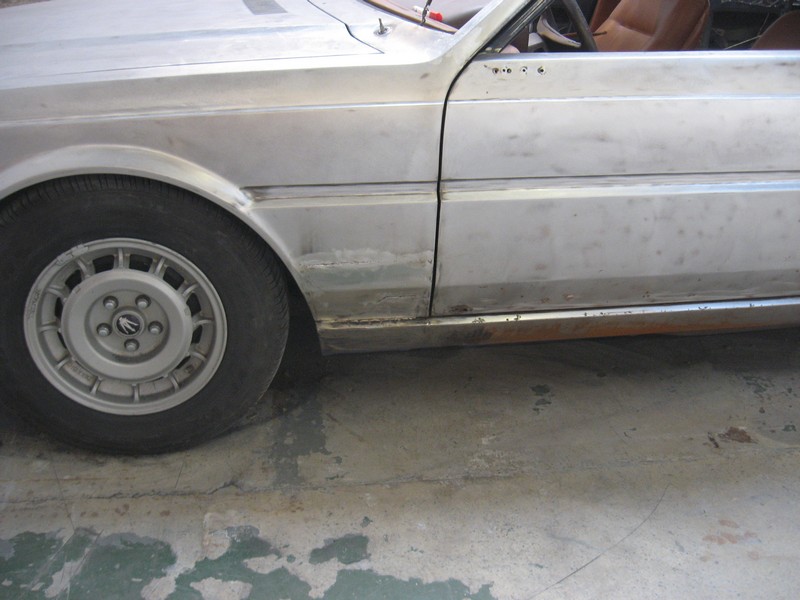
“First few pics show the stripping completed (including the ‘detail’ stripping of the body suages, glass reveals, rain gutters and all of the other difficult areas).”
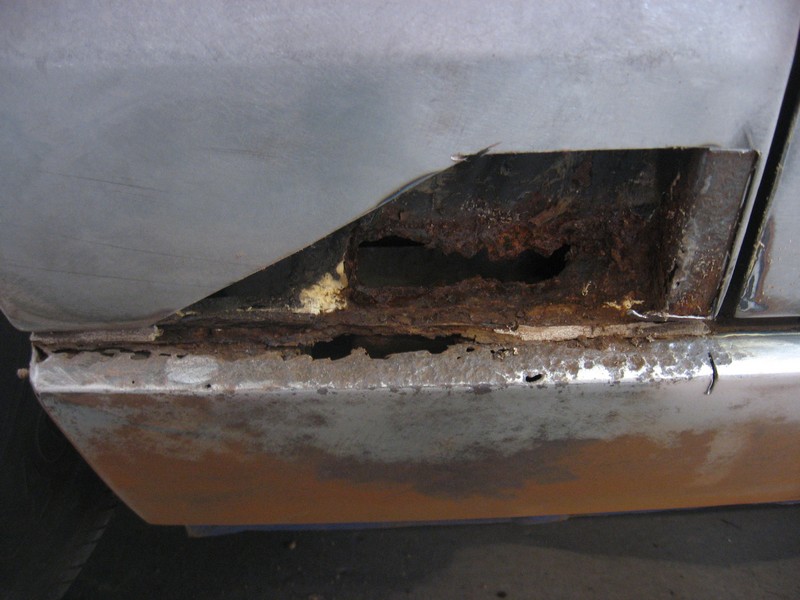
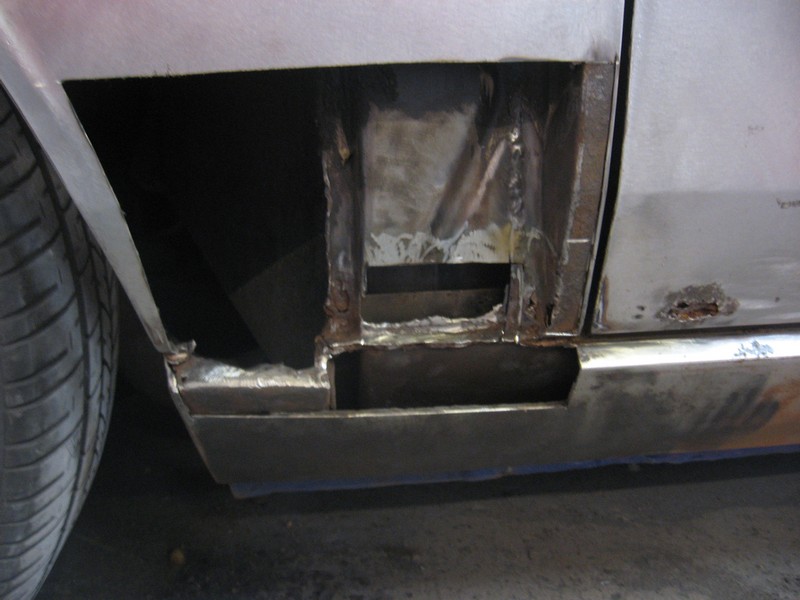
“As you can see I have begun the metalwork on the most complicated areas…….the lower front wing/sill structure and having cut away the corrosion on the left side we found the lower A panel support had rusted out also, so removed a larger section of the front wing to enable access to cut the rust out and repair properly. I have also drilled a hole in the support panel so that we can fully protect it with a cavity wax at the end of the job. Finally new sections made for the outer panelwork (sill and lower front wing) and welded in.
Next stage is to do the same on the right side.”
Excellent work. I’m looking forward to seeing how this continues.
The car was sold to me as a “rolling restoration”, i.e. fully drivable but needing work to bring it back to pristine condition.
Sylvia (the car) had been well taken care of mechanically and has a documented history going back over 20 years, but the interior had started coming undone and rust had reared it’s ugly head at a few spots on the body.
I found a guy who did wonders with the interior, basically disassembling both front seats and re-sewing them with new reinforcing tape, using the original holes. He’s currently re-covering two steering wheels for me, when done they’ll be better than brand new.
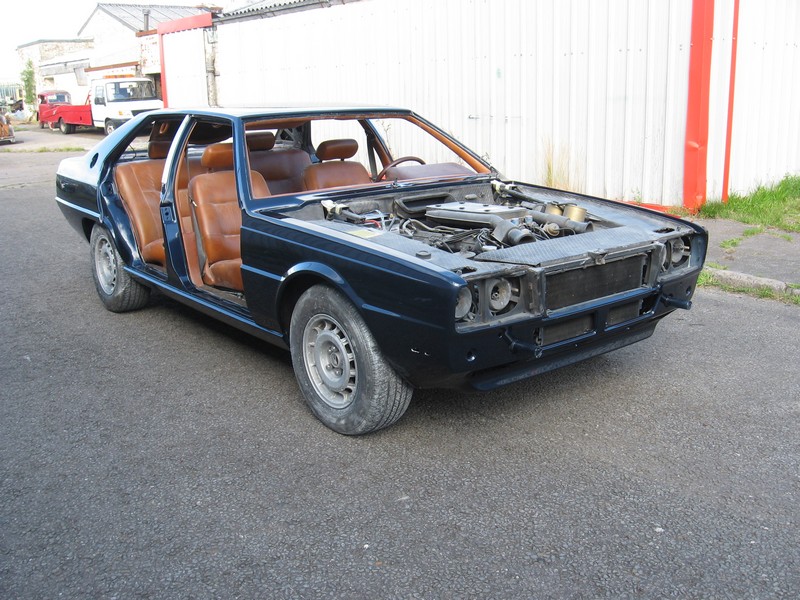
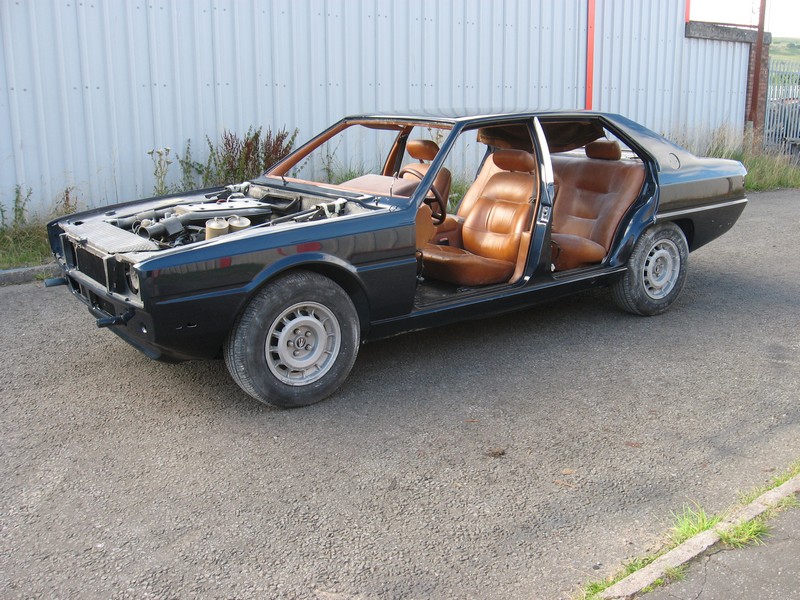
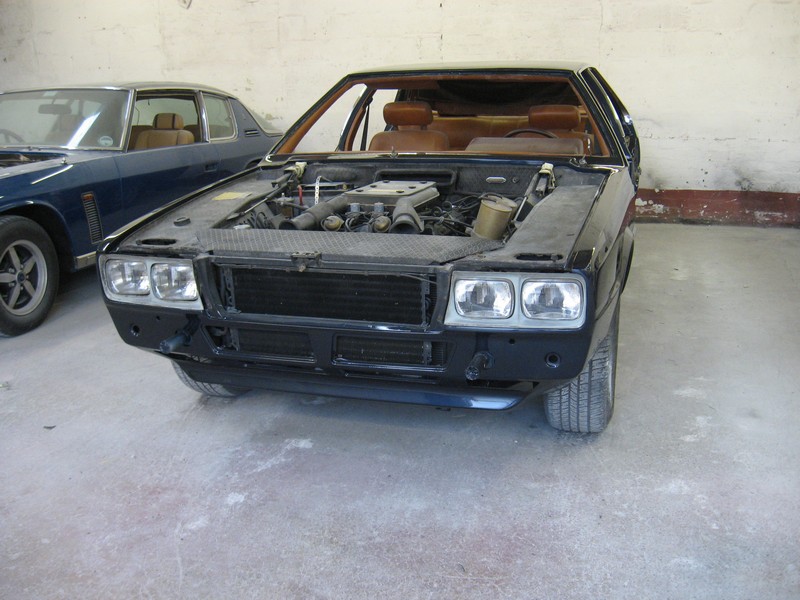
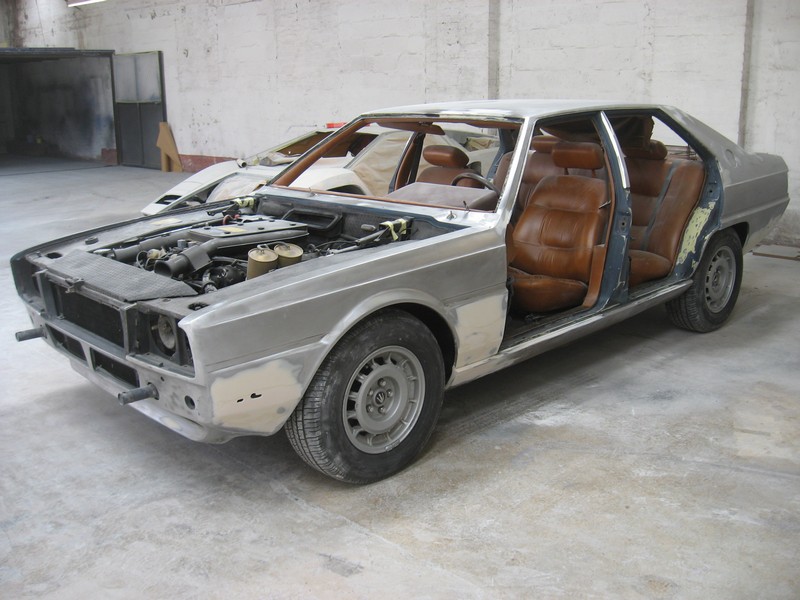
The remaining issue is the paint. To be frank, the paint was showing it’s age when I bought it, and while a good wash and polish with Autoglym helped a lot, 2 years on there isn’t a whole lot more that can be done to bring out any kind of shine. More importantly to me, especially living in a wet winter climate, is the rust areas that have grown significantly since I bought it. She’s parked in an indoor heated garage, I can only imagine what would have happened parked out on the street… Lastly, the BPO (before previous owner) had an engine fire (carb backfired and spit up gasoline that ignited under the hood, luckily nothing serious was damaged), and the hood (bonnet) repaint really didn’t match the rest of the car. It had also started showing cracks (probably wrong kind of paint on top of another type).
The only way to properly deal with these issues is to strip the car down completely to the bare metal, cut out the rust and replace with new, clean steel, straighten all panels, prime and paint. Luckily there happens to be a place that specializes in this kind of work and has already done 4 other Quattroporte IIIs, meaning they know all the ins and outs and details and what to expect (and what not to break, because it can’t be replaced!).
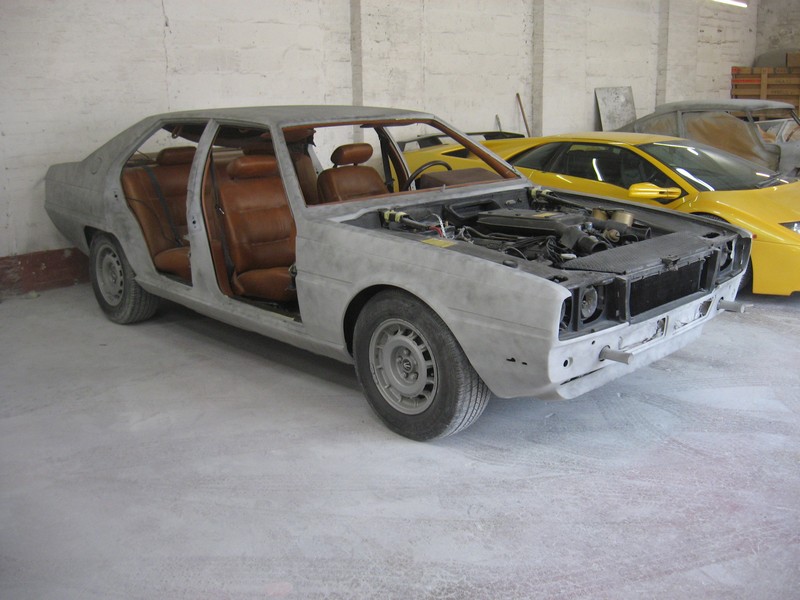
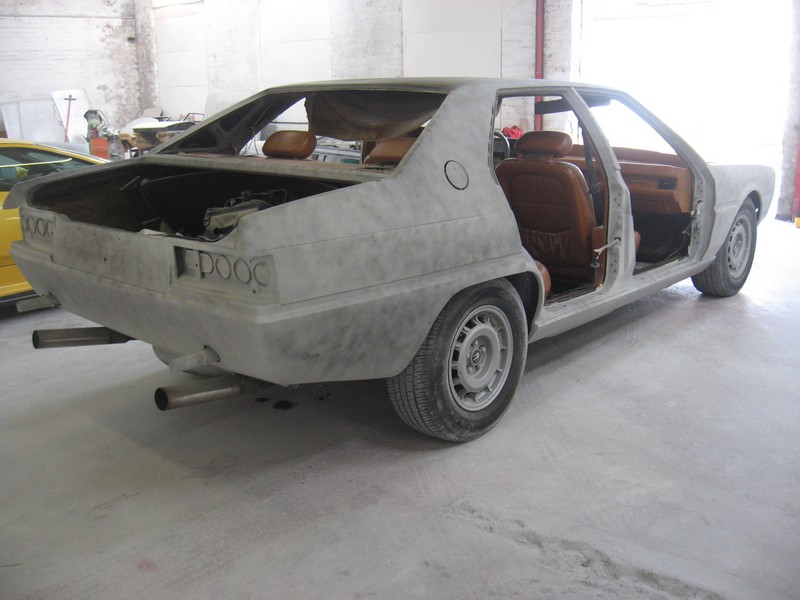
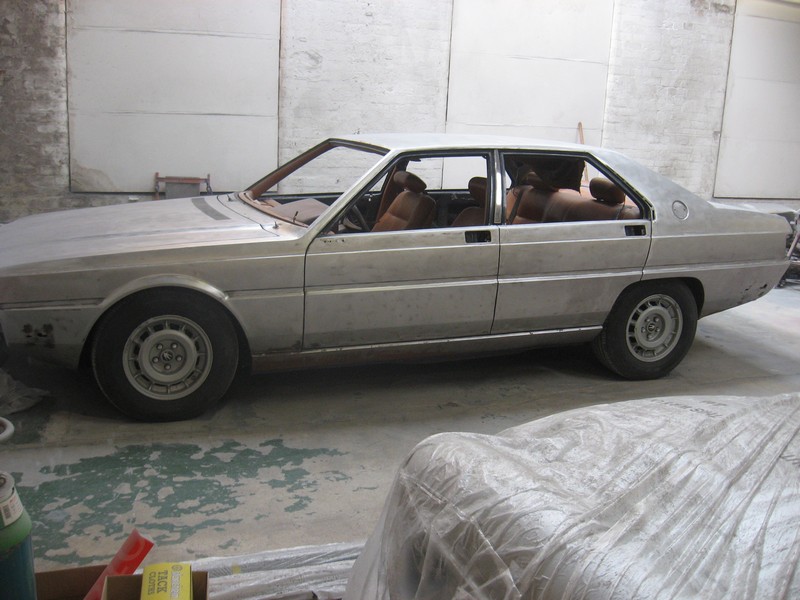
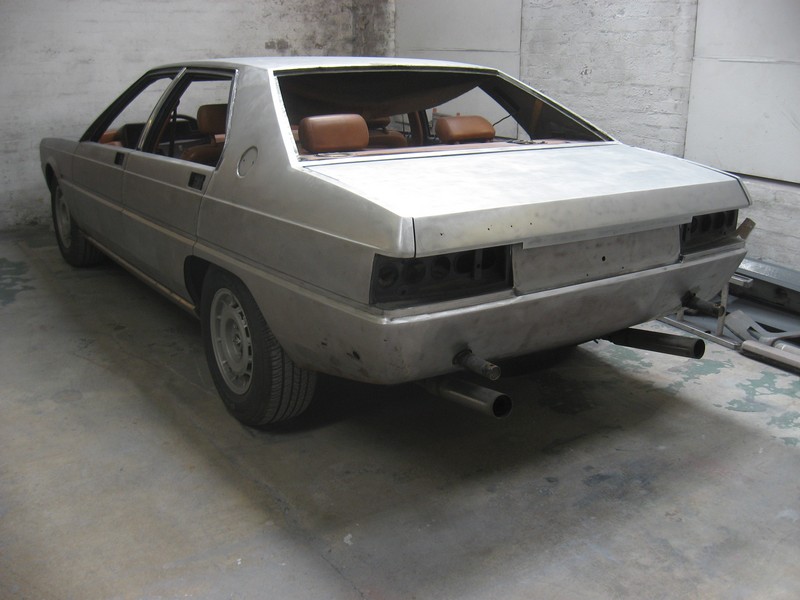
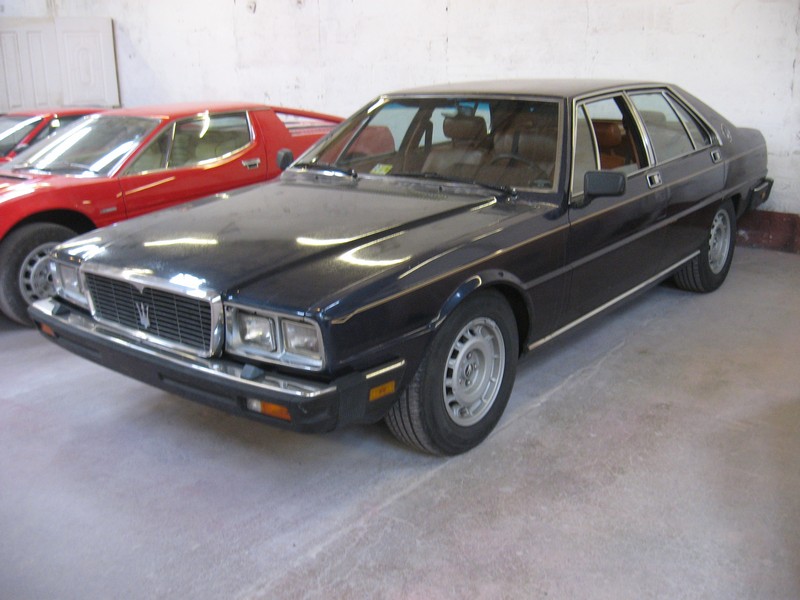
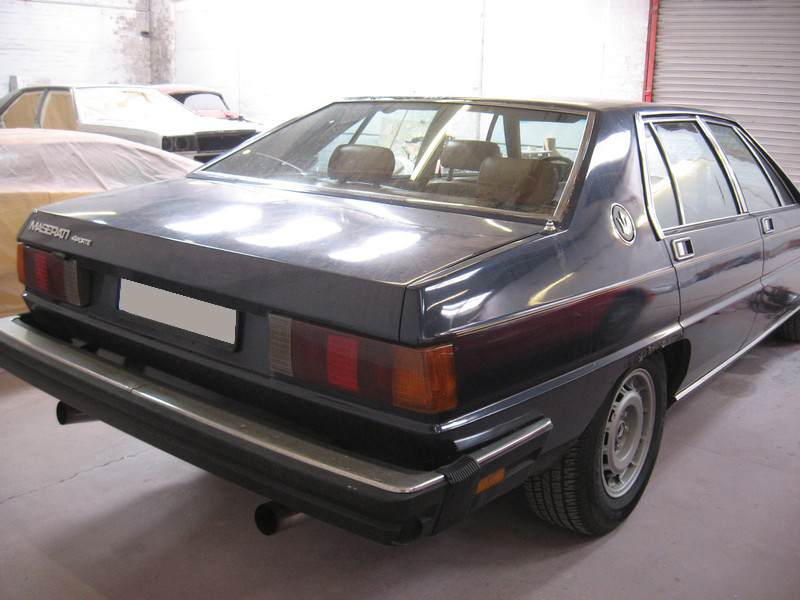
So this past Easter I drove the car down to said shop, had a very nice chat with the owner and went through the entire car, and am now practicing patience as best I can. The first pictures of the work arrived today, I thought I’d share some of them here.
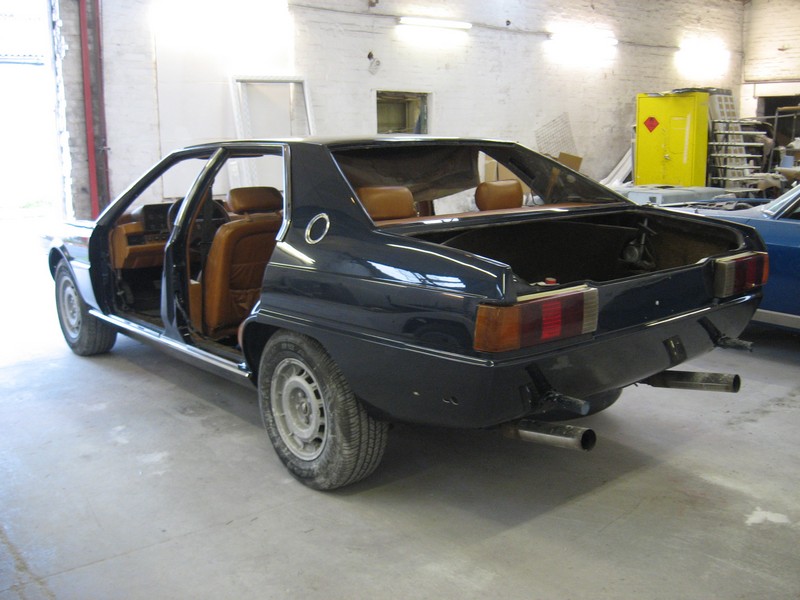
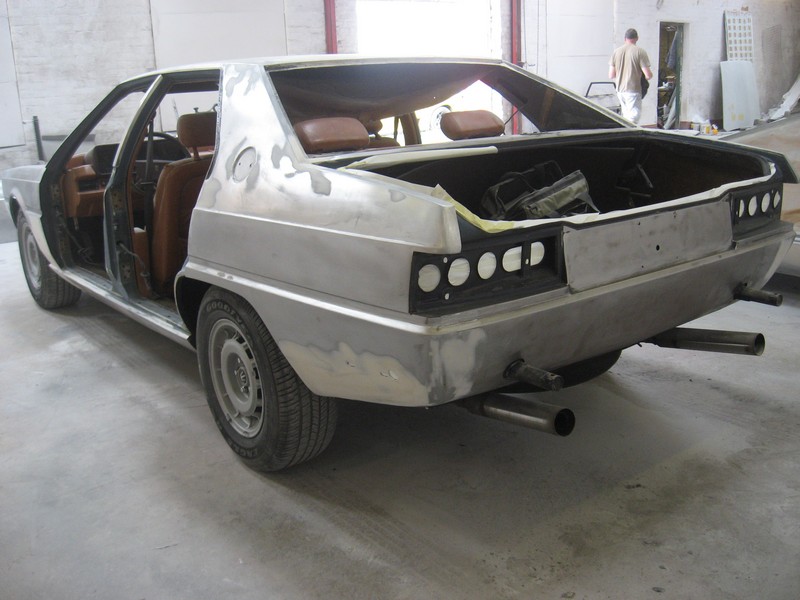
QP3 frontQP3 rearQP3 front sans chrome & bumperQP3 rear without bumper, lights and badges