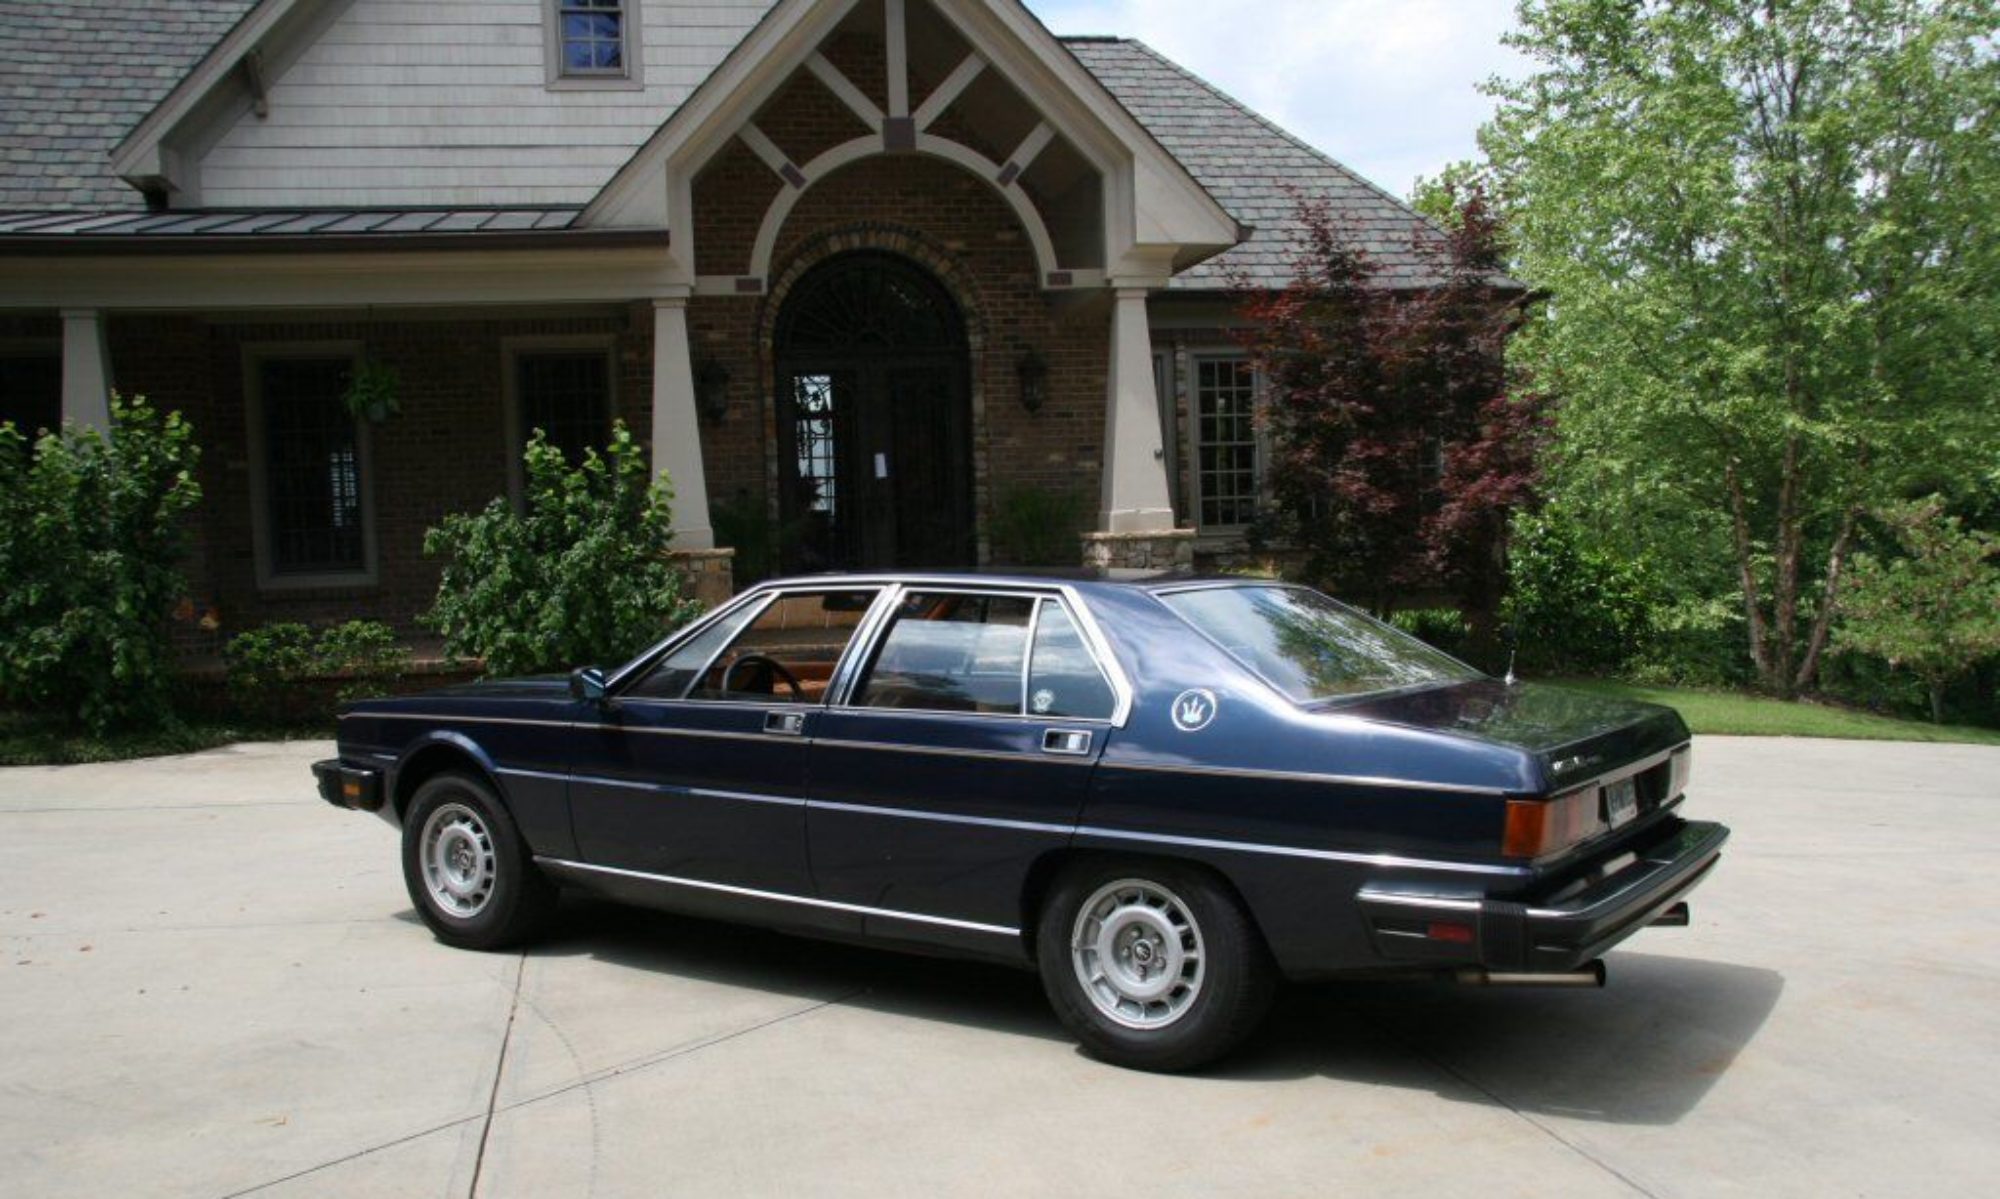
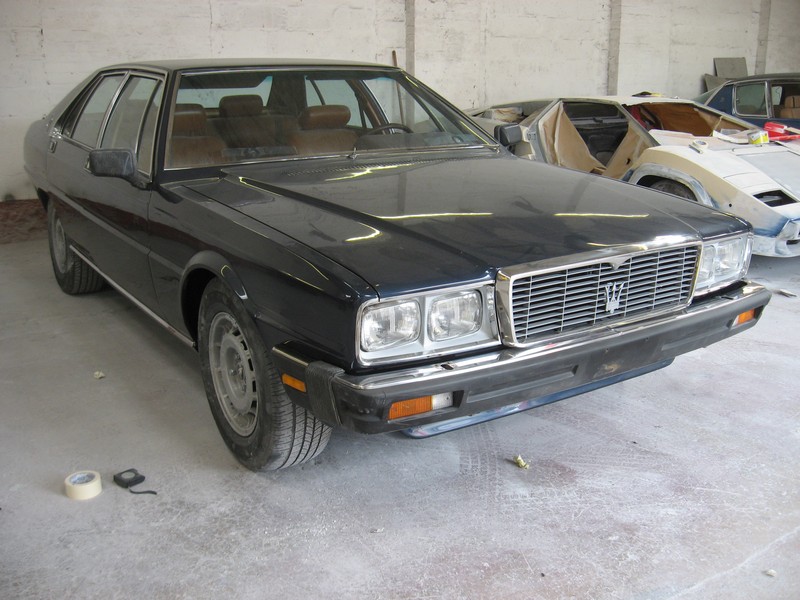
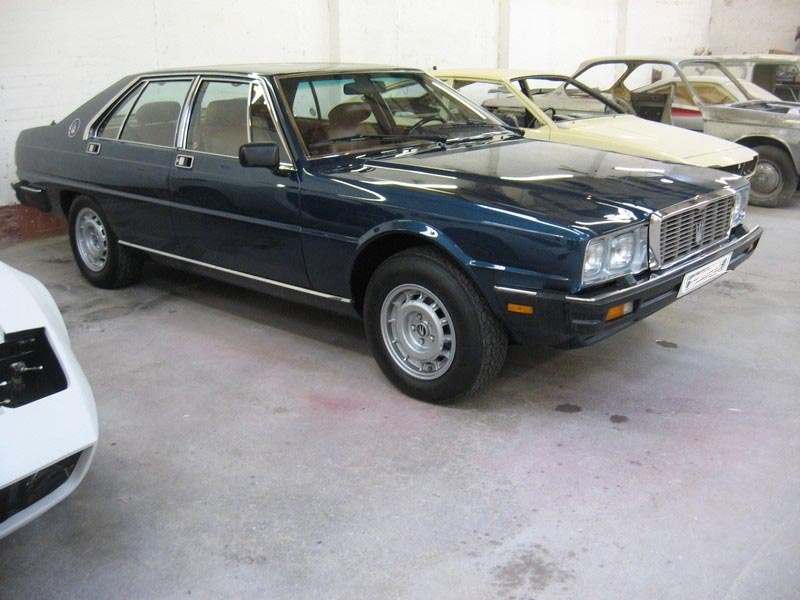
in place, EU spec. Note how the front and rear end look so much tidier and more integrated with the body. It changes the overall stance and look of the car, even though the difference is more subtle than say on the Bora, Merak, or Khamsin.
Forgot to put the EU spec front park/turn light lenses on, the US spec all-amber ones are still in place in the picture.
right now. Great tune, regardless of who really sang the backing vocals.
Sylvia’s slowly coming back together, it’s really good to see.
The front windscreen wiring is run and connected (and working!), both bumper beams and the four bumper corners painted/refreshed, under arch areas all cleaned off and re-stone chip protected with wax injection done, tires back on wheels and wheels back on car!
I had an auto electrician re-run the main battery leads as well, the way the connections were before left a lot to be desired.
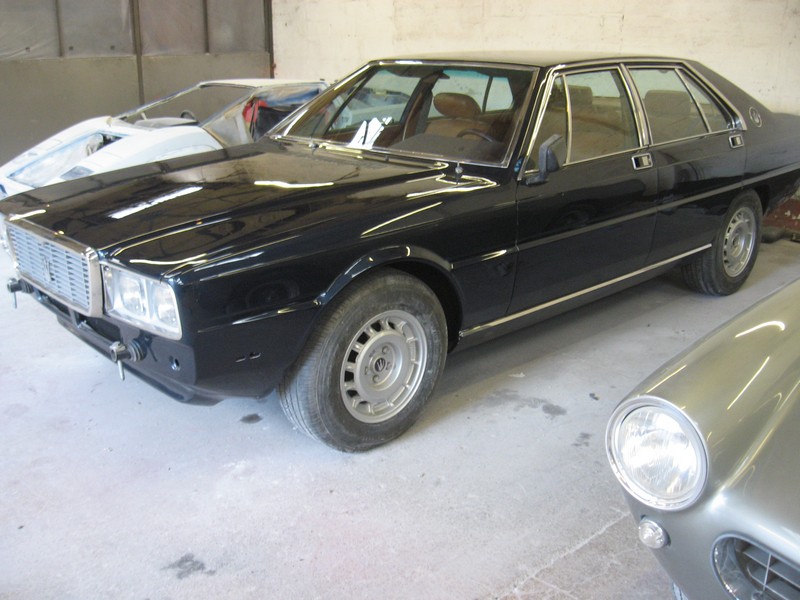
Looking more and more like a carRide height corrected, new windshield in place and wired up, approaching completion
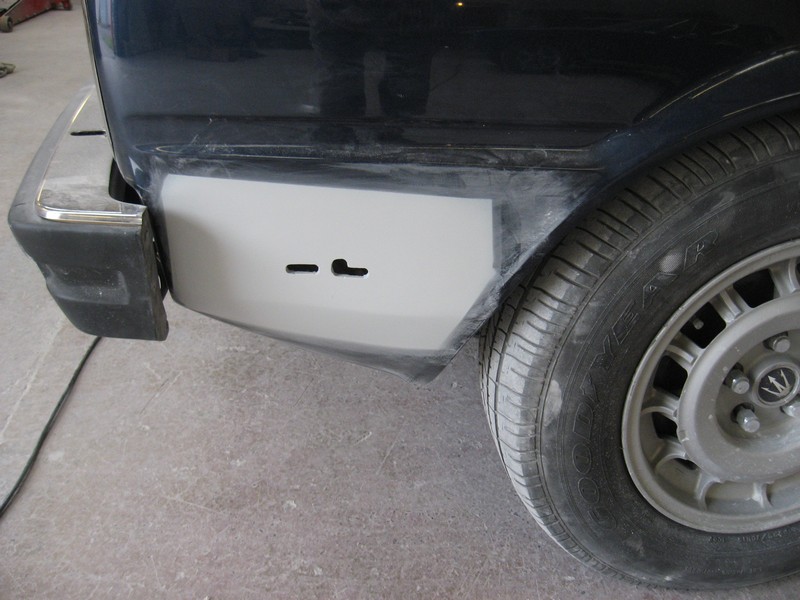
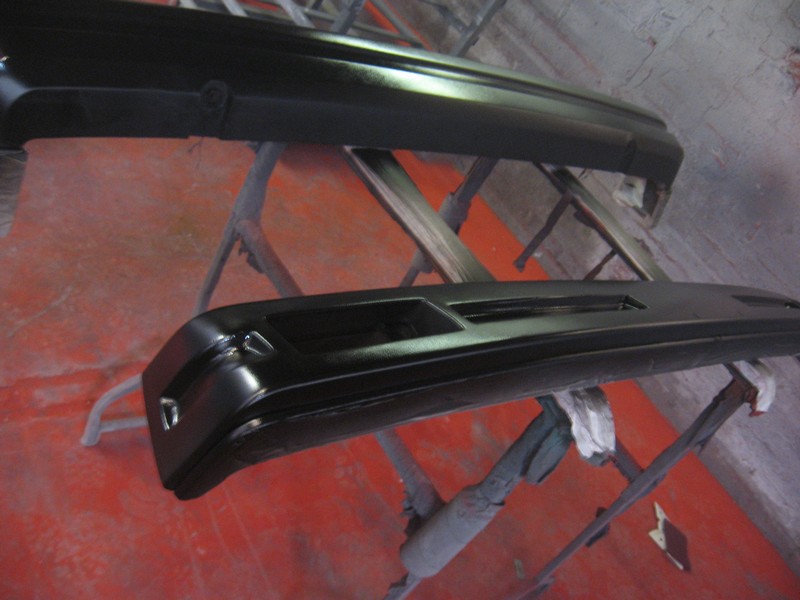
Front side bumperette mounts primed and ready for paint.
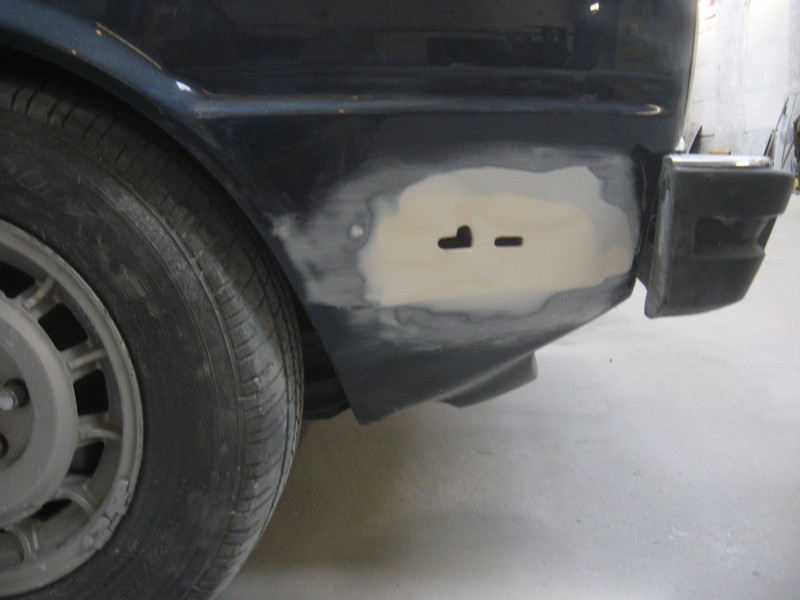
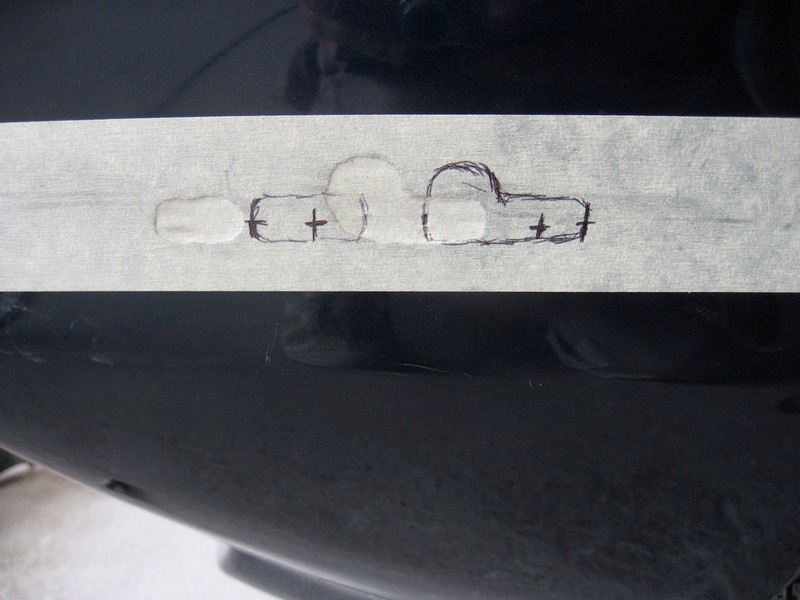
Hope it’s invisible when done
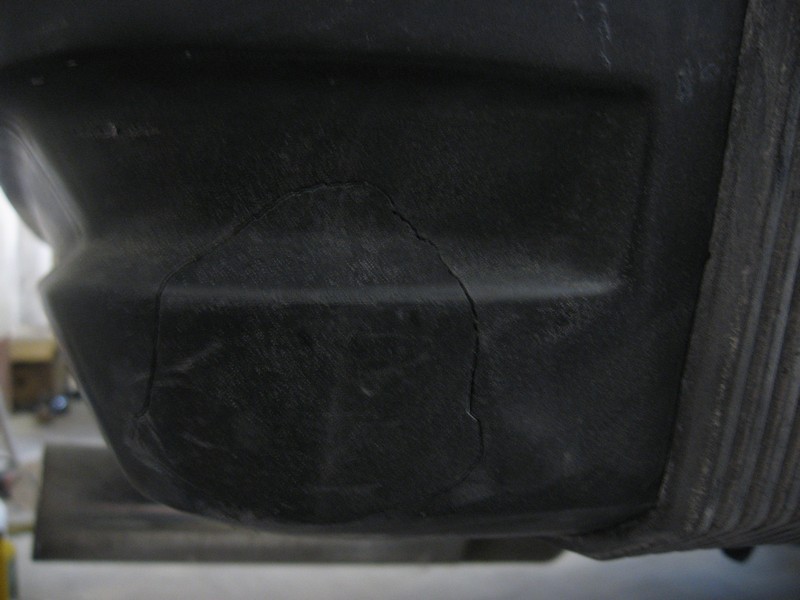
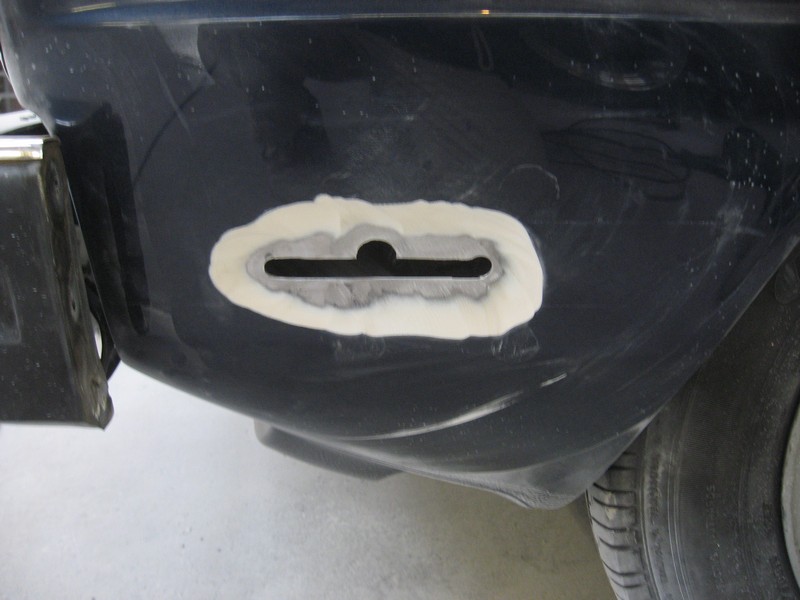
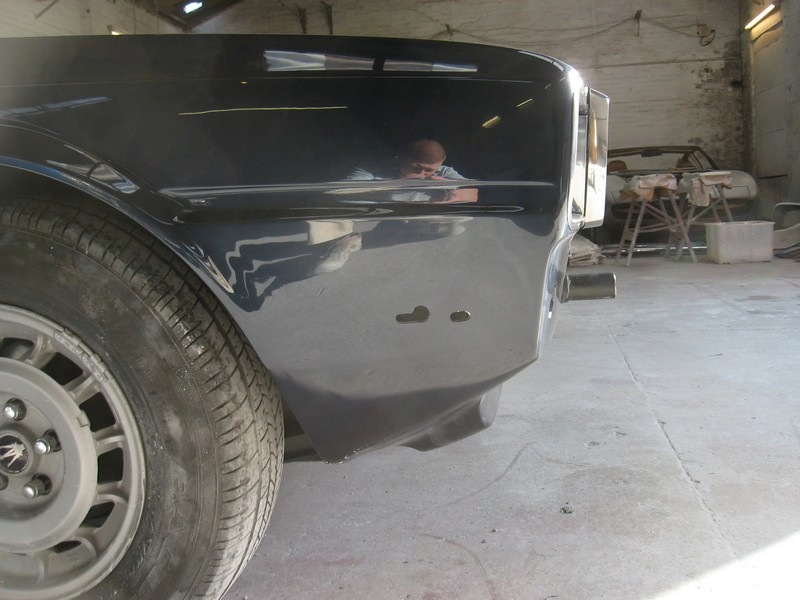
Lots of freshening up done on the bumpers themselves, and a largish chunk that had broken off is reattached and “welded” in, with all seams filled up. When done, there will be no trace at all.
Big honking’ chunk had broken off – no idea how, I received the car like thatGlued in and with rubber “welding compound” applied
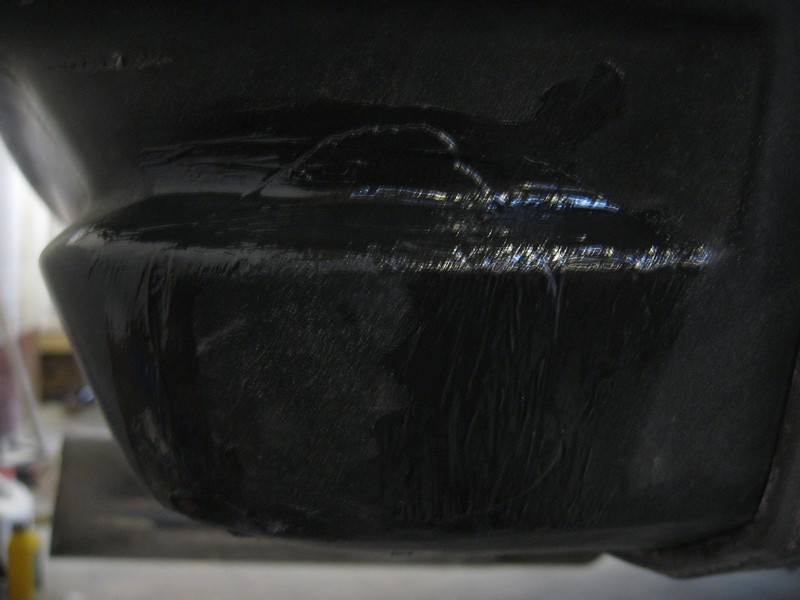
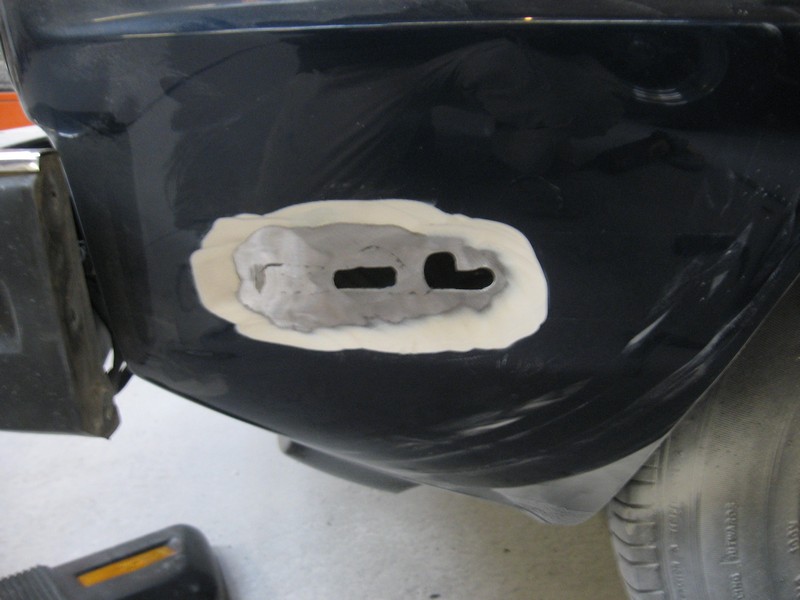
Sanded down, ready for a new coat and polish until like new
Magic rubber rejuvenator applied – like brand new!
Been a while since I’ve posted anything, but a lot has happened. Will do my best to fill in patient readers and followers of this humble blog.
I decided we needed to do the bumpers right, which meant re-doing some work.
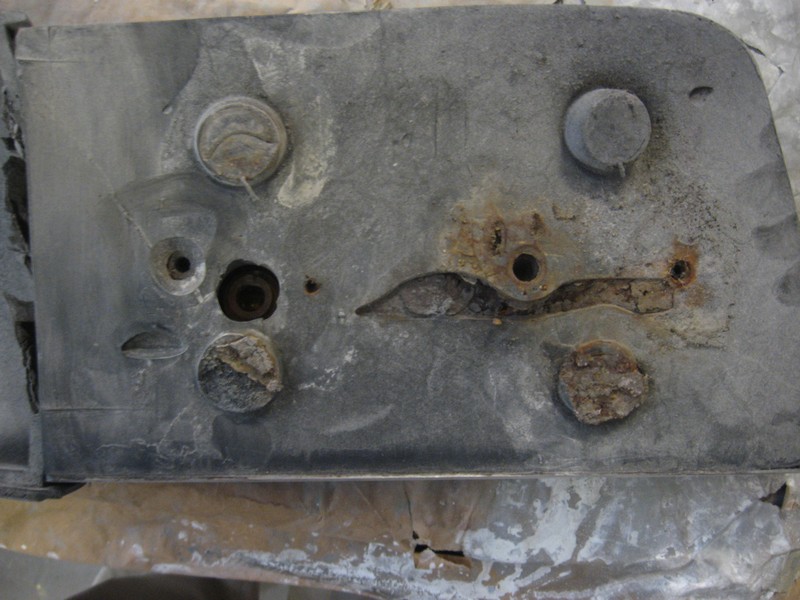
“front bumper mounts re-drilled/cut, new metal sections welded in to ‘fill’ the gaps and filled/shaped smooth ready for priming.”
Stripped and extendedSame on other end
“A little good news on the rear bumper corners – the holes in the body were the same measurements on Mr X’s car as yours which completely confused me for some time until I compared the rear bumper corners from your car with his, all of the rear bumper corners have provision for THREE mounting holes, even though only two are used and have threads fitted, this allows the bumper corners to be interchangeable and no need for different spaced holes from Euro to USA spec. Whilst the holes are there though, there is no thread for the bolt so we have spoken to the engineering company a few workshops down from us and they are going to fit thread inserts in both rear bumper corners to align with the existing holes in the rear of the body.”
Mounting system for rear side bumper bits.Primed and readyWaiting for paint
The shop and I both agree that the EU version looks much better than the US. While the differences are much more subtle than say on a Ghibli, Bora or Merak, the bumper placement and H4 lights does change the entire balance and feel of the car as a whole. All in all I’m glad we took the extra time and effort to complete the transformation.
(p.s. for those of you wondering if “Mr. X” is the same as “Racer X”, we can’t be 100% sure, but the fact that he drives a QP3 and not something more exotic and sporty would indicate that he probably isn’t the mysterious driver known only as Racer X)
we tried again. Looking better this time, but only measured and trial fitted so far.
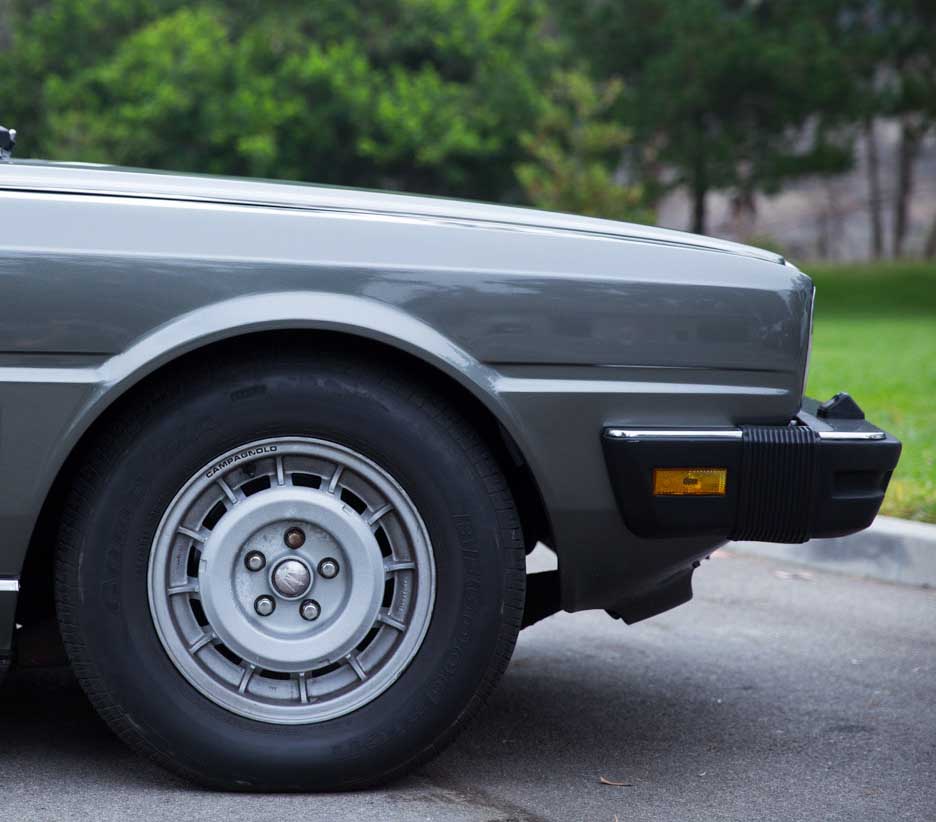
side bumperette moved back closer to wheel archtucked in correctly, looks much better this way
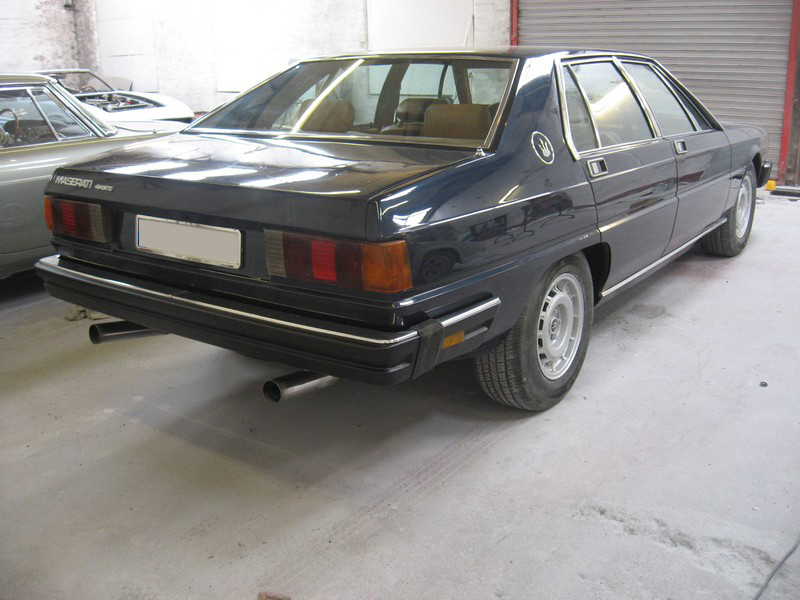
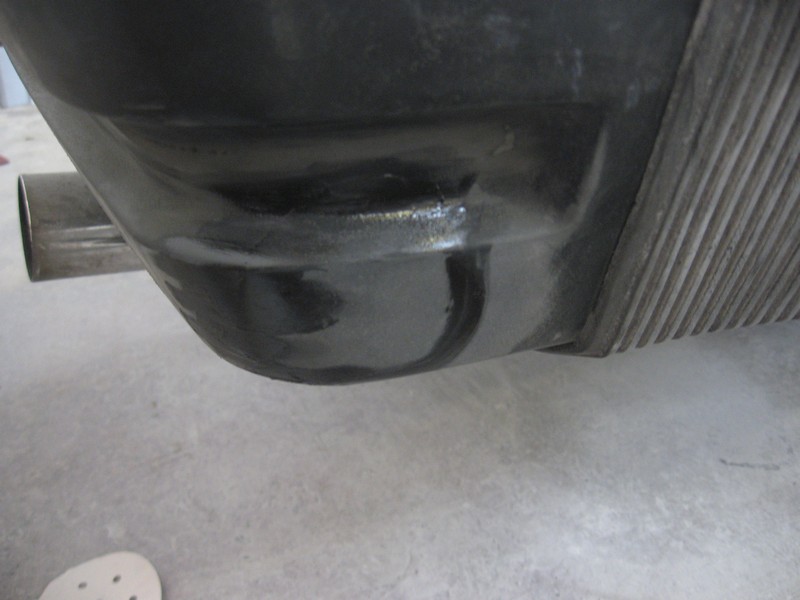
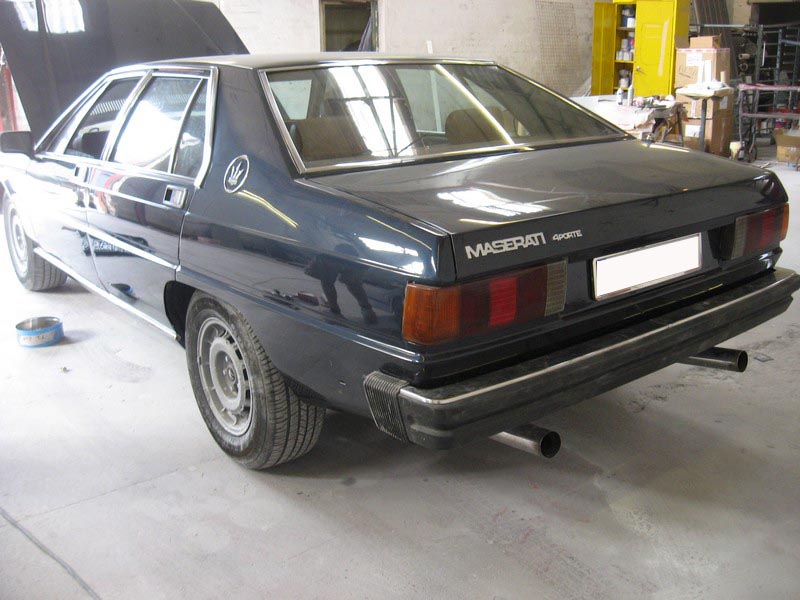
The rear bumper finally looks like a bumper, integrated with the body, whereas before it was more like a shelf sticking far out from the rear. At least it was handy to sit on at picnics 😉
Now to strip all the paint away, cut the mounts out and move them to the new positions, weld everything back up, prime, shape and prep the areas for paint.
..and they were all mine. This blog isn’t called “Automobiles for idiots” for nothing!
An old woodworking saying says “measure thrice, check twice, cut once”. There are wisdom in those words.
Much care was taken while doing the bodywork, tack welding in new sections temporarily to make sure everything fit correctly before committing the section to a permanent weld. Windows, doors, and other areas were all checked carefully. The front panel was also measured and checked carefully against a Euro model to ensure that the front lights and bezels would indeed fit with minimal modification. Looking at the bumper, it appeared that the two mounting posts projecting from the front and rear of the car ensured that the US spec cars’ bumpers stand further away from the body compared to the Euro spec version. Cutting them down to match the EU spec dimensions seemed the logical way to adjust the bumper for the Euro look, more integrated with the body.
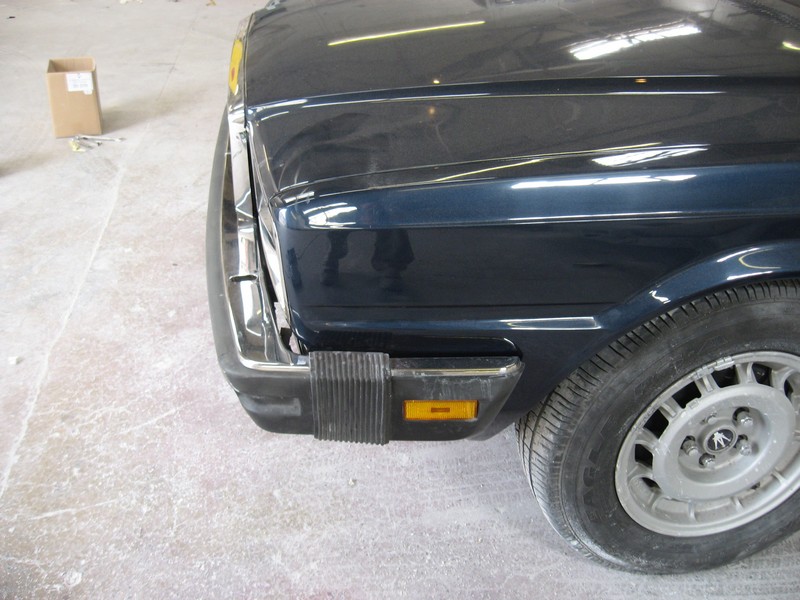
What we didn’t realize until it was too late, was that the side bumperettes are also offset together with the main bumper by the same amount, approximately 25mm/1″. So cutting the mounting posts down to size brings the bumper 25mm closer to the car, but the side mounting brackets are 25mm further forward on the US version than the EU version, meaning that there isn’t room for the “accordion” covers that provide a unified look of a wrap-around bumper. The bumper and side bumpers simply won’t fit, they crash.
Oops.
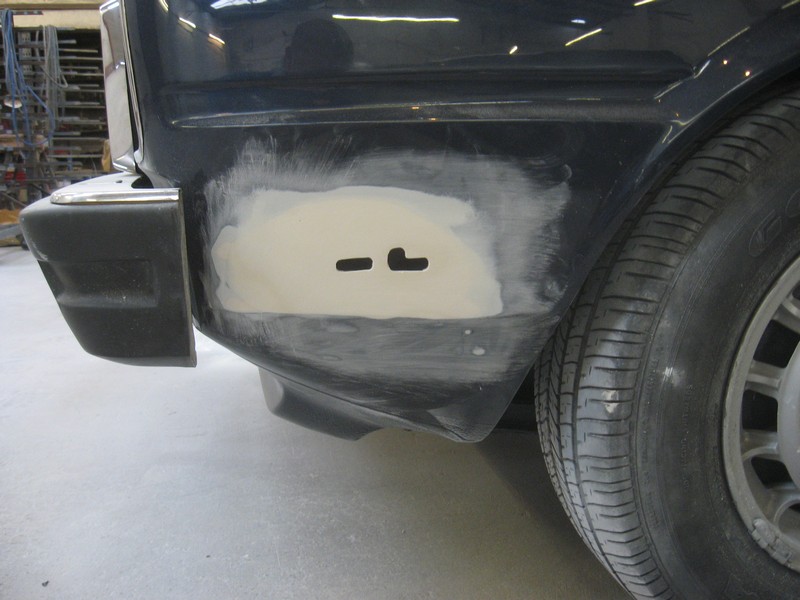
US bumper. Note the distance from the car, and the distance between the side piece and the wheel well.EU spec bumper. Note closer fit of bumper, and proximity of side bumper to wheel well. Bumper presents a more integrated appearance compared to the US spec model.Shortened bumper posts, but side mounting holes need to move back correspondingly…So close, and yet so far…
There are 2 options from here:
1. Fix the mounting posts so that they are as they were, i.e. the longer US version. Everything will fit. The car will have EU lights and front, but US bumper fit (further away from the body).
2. Strip the brand new paint and bodywork at each corner, cut out and move the new mounting brackets 25mm towards the rear of the car, fill the resulting holes, do body shaping, priming, guide coat, final shaping and repaint all over again. (and of course do the same thing for the rear mounting brackets as well, moving them forwards from the rear of the car by 25mm).
Should I do the right thing, or the easy thing, or are they the same thing? Thoughts?