A solid body

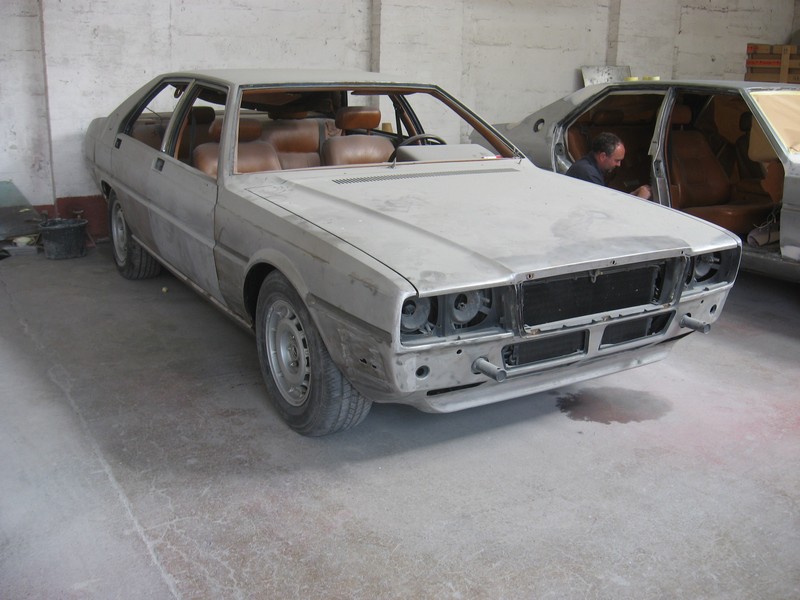
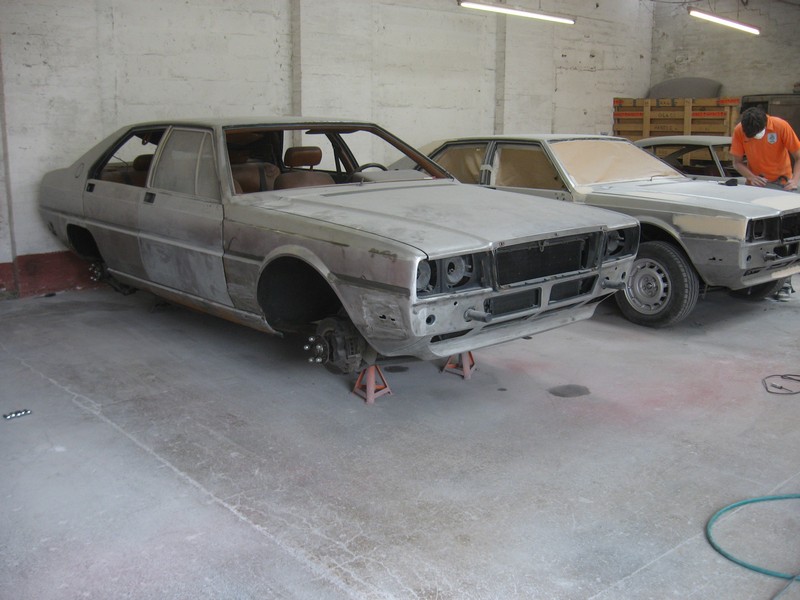
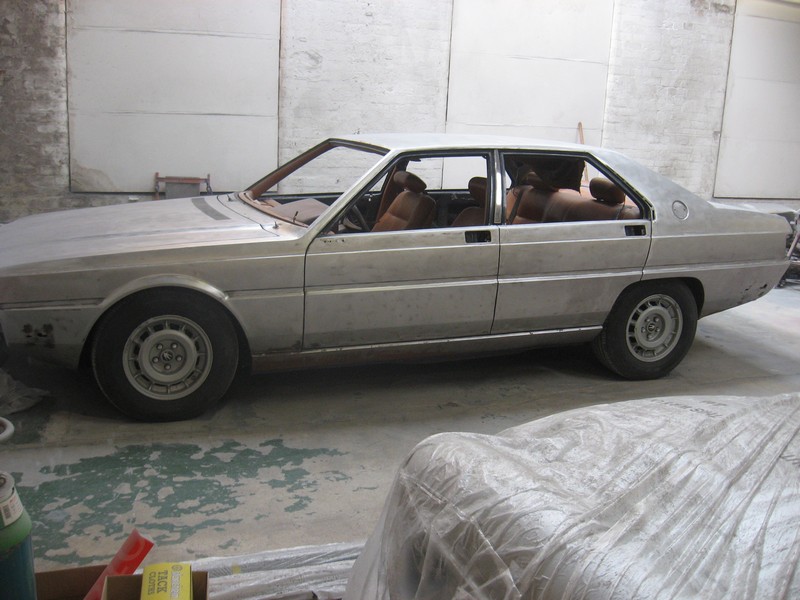
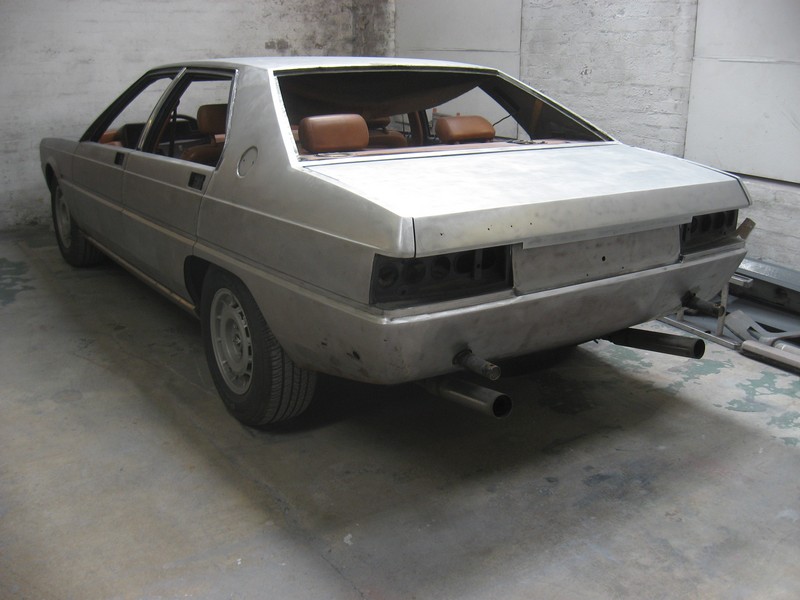
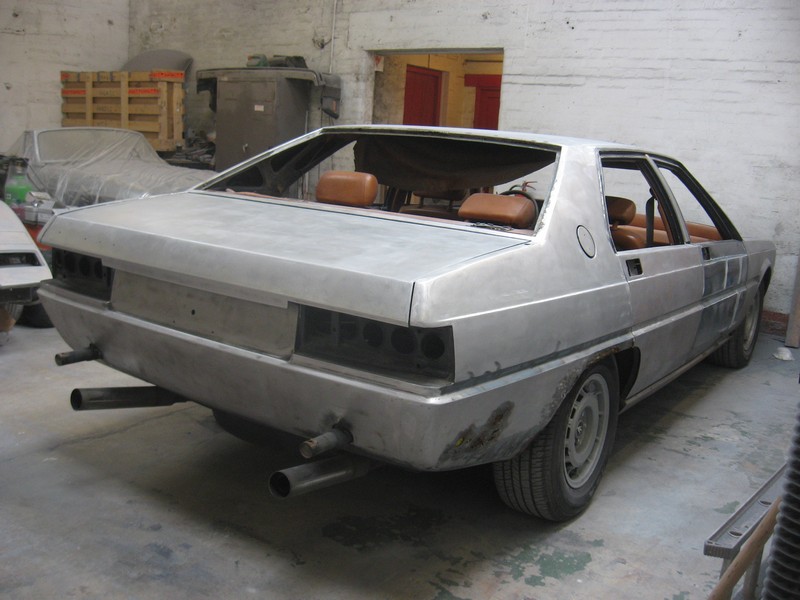
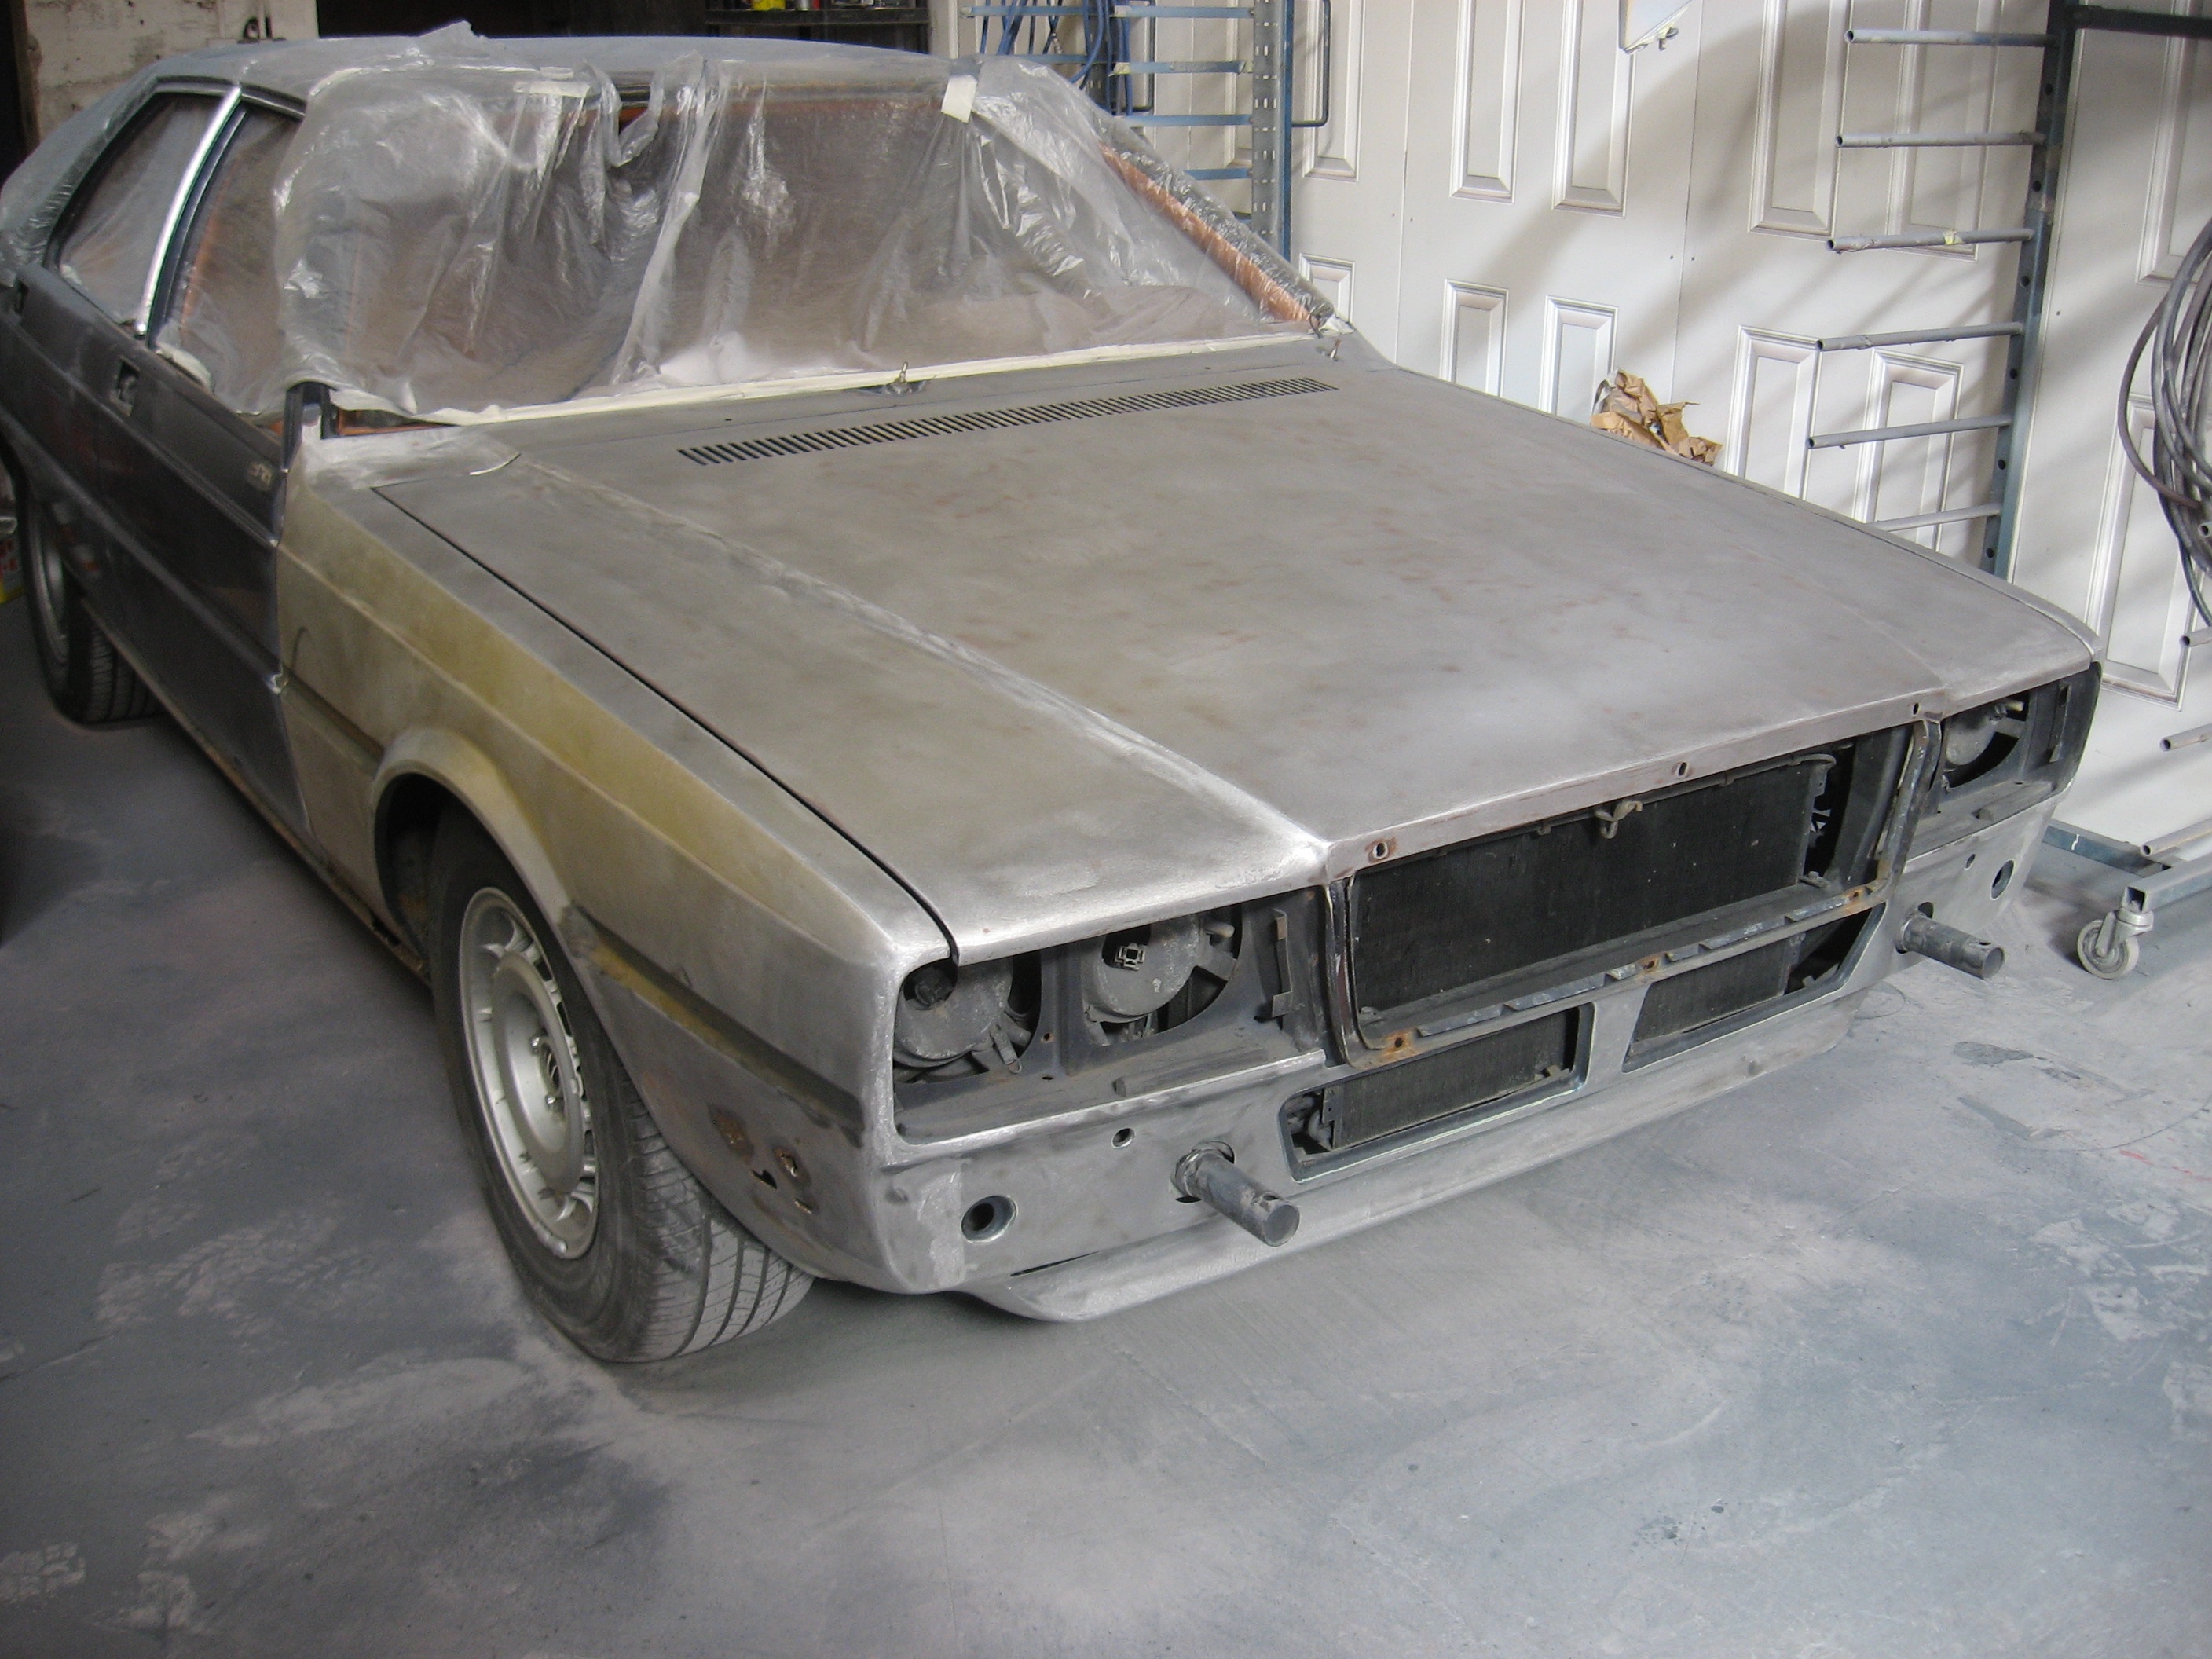
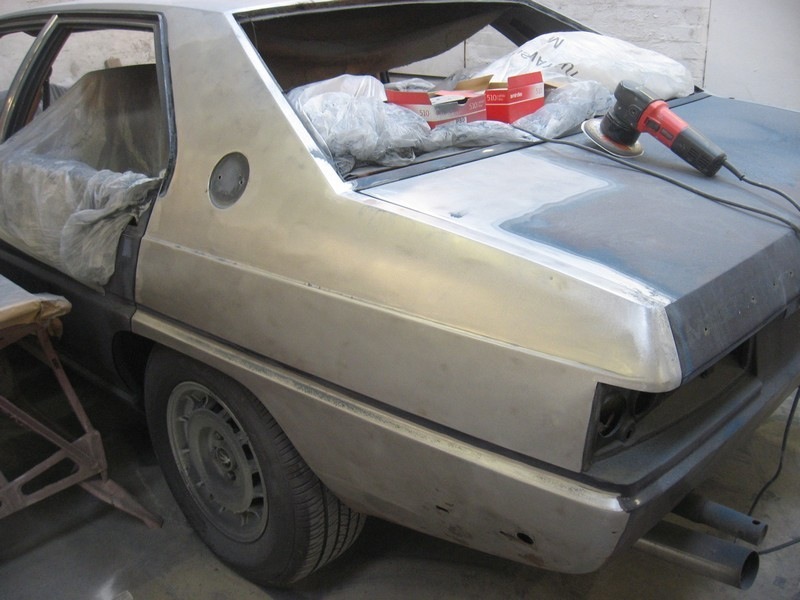
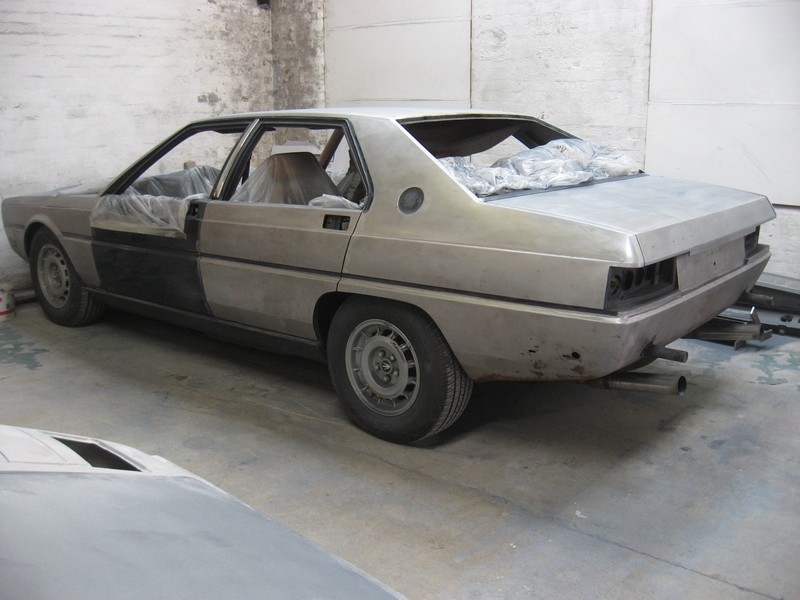
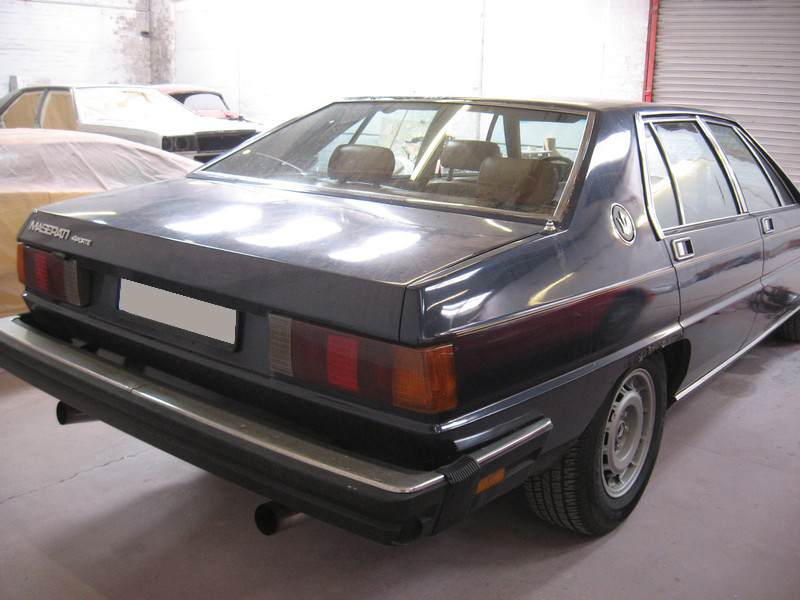
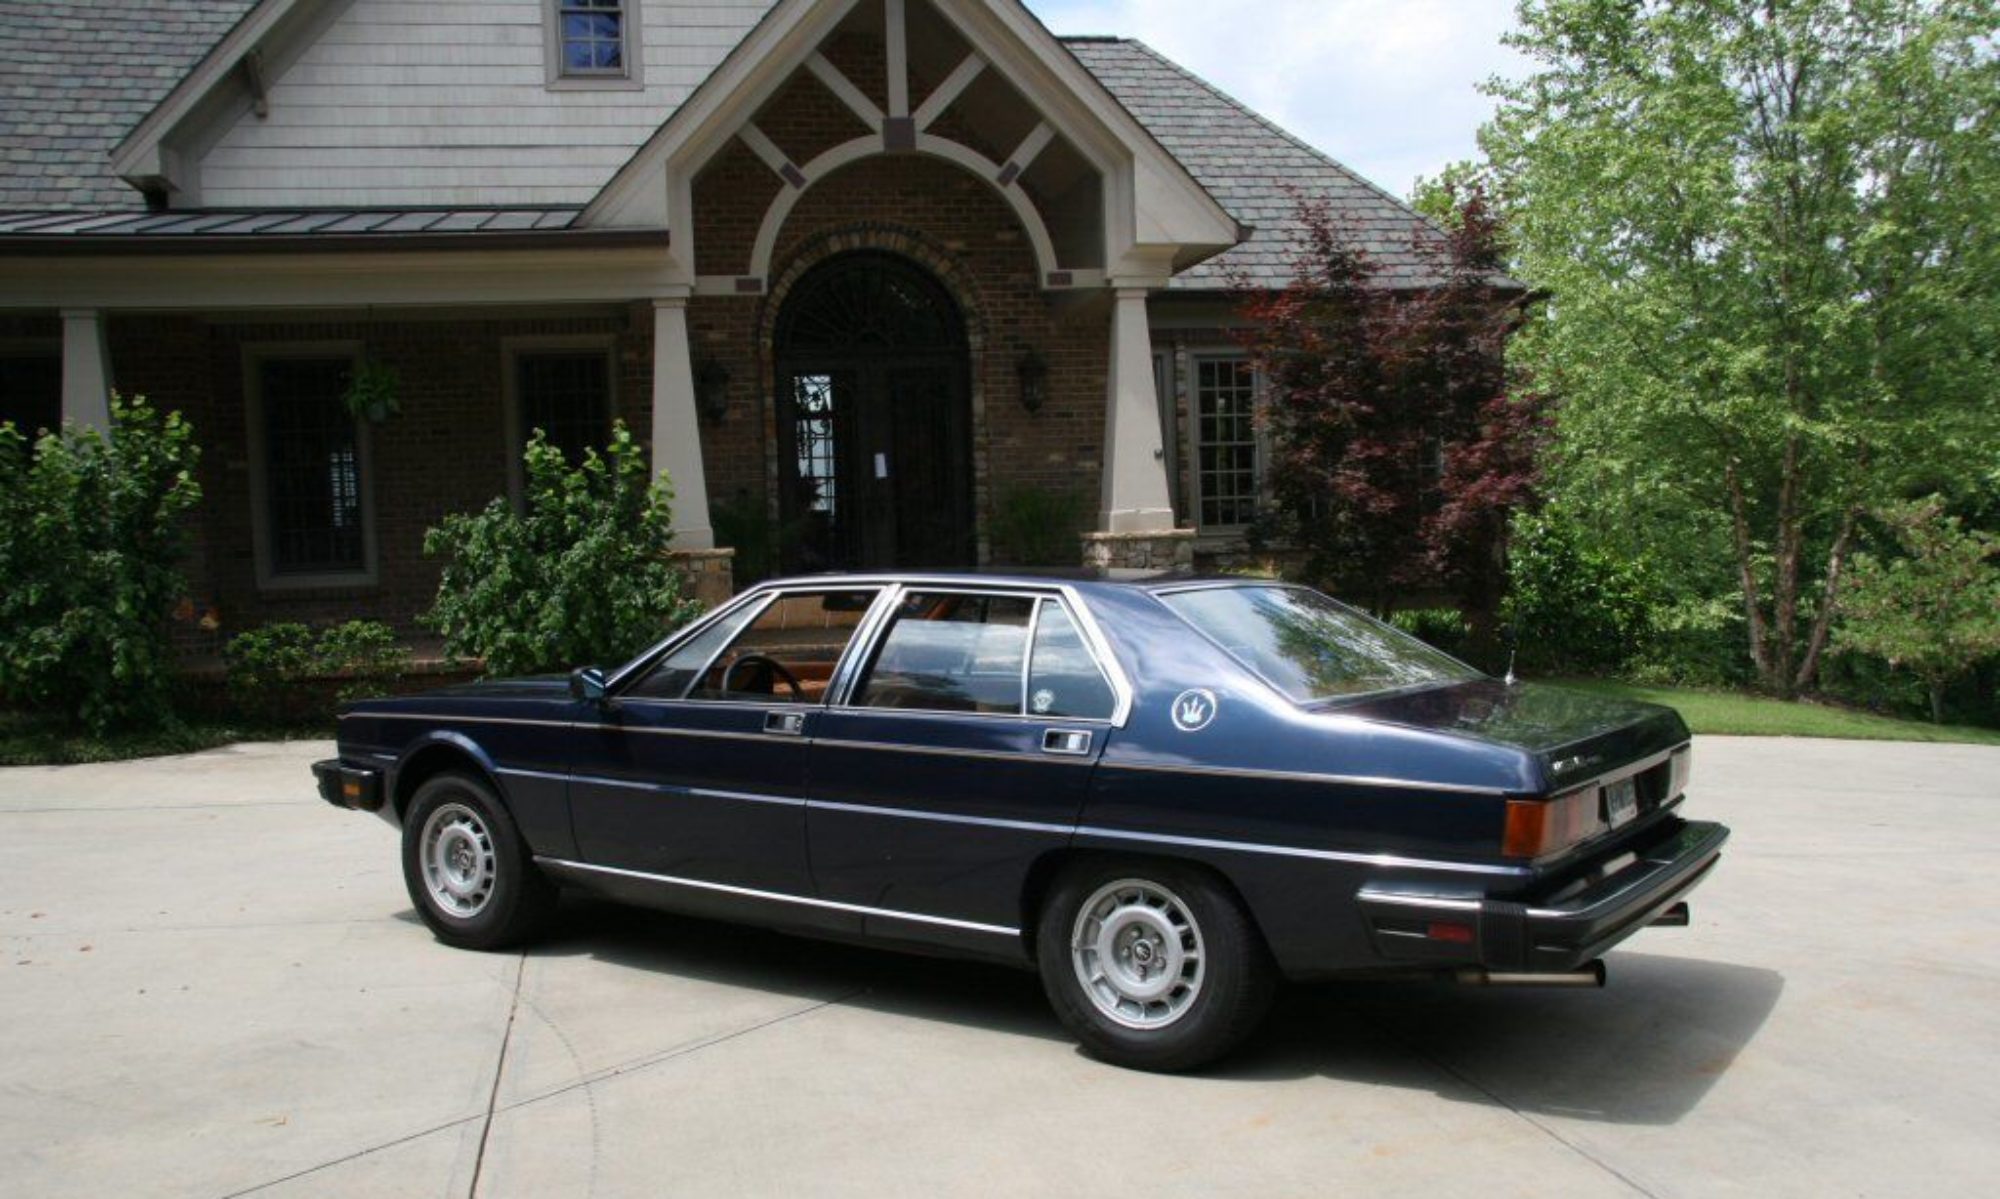
The car so far, with the exception of the front passenger door, has proven to be a solid and straight “what you see is what you get” car, no hidden surprises, patched-over accident repair or other confidence killers. A very good, well cared for car with documented ownership since new, all of whom kept her properly maintained.

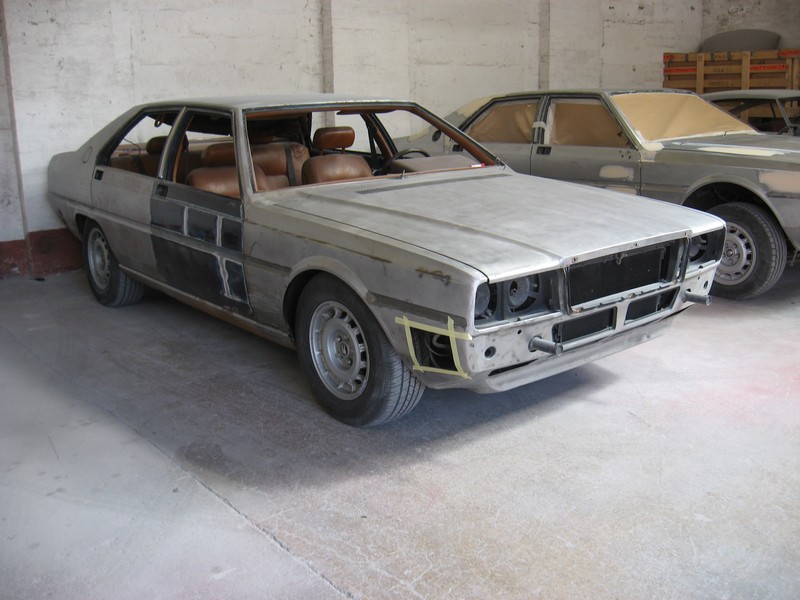
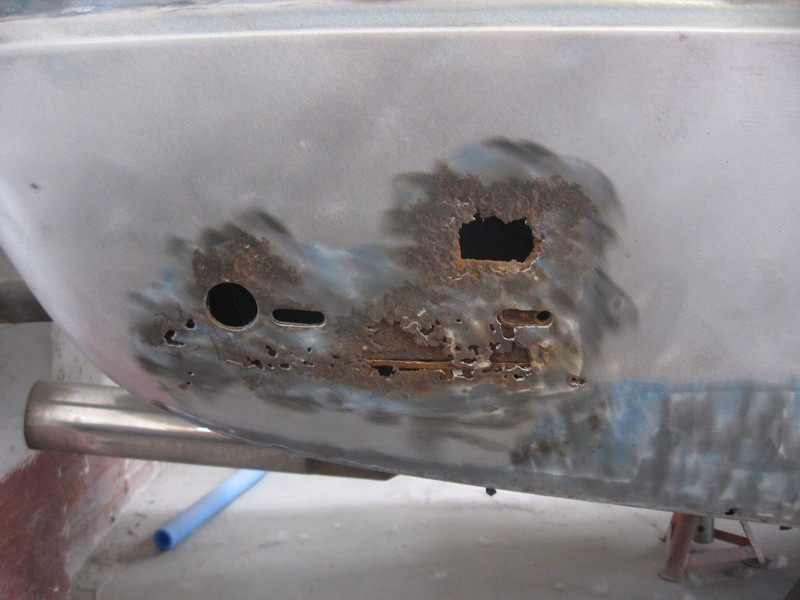
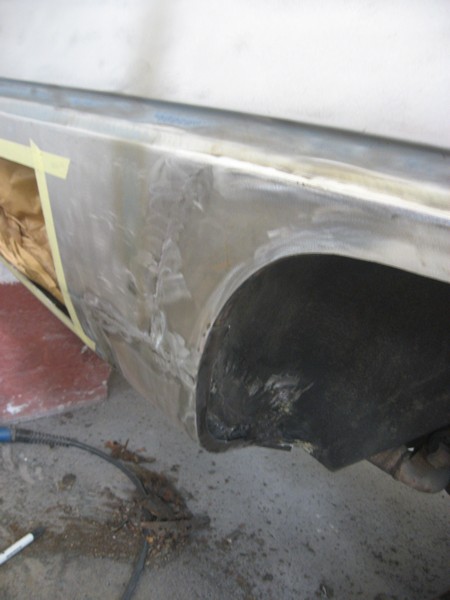
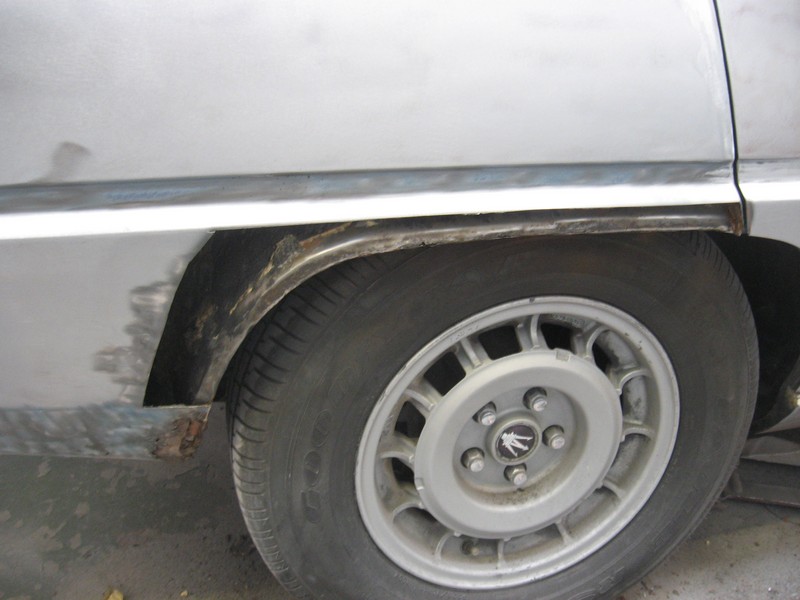
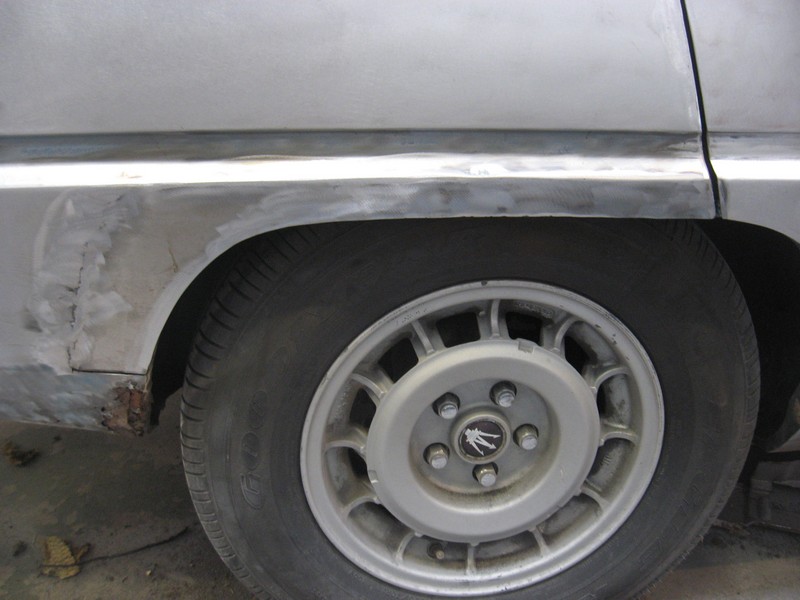
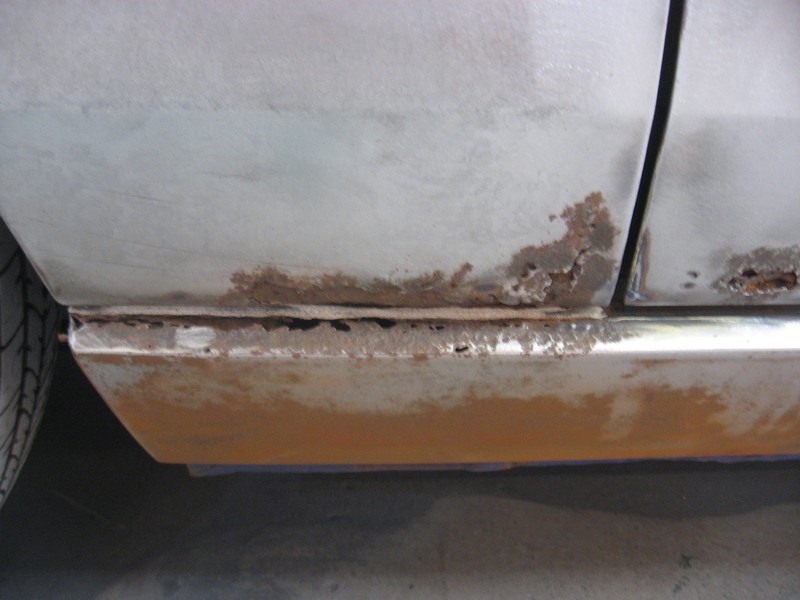
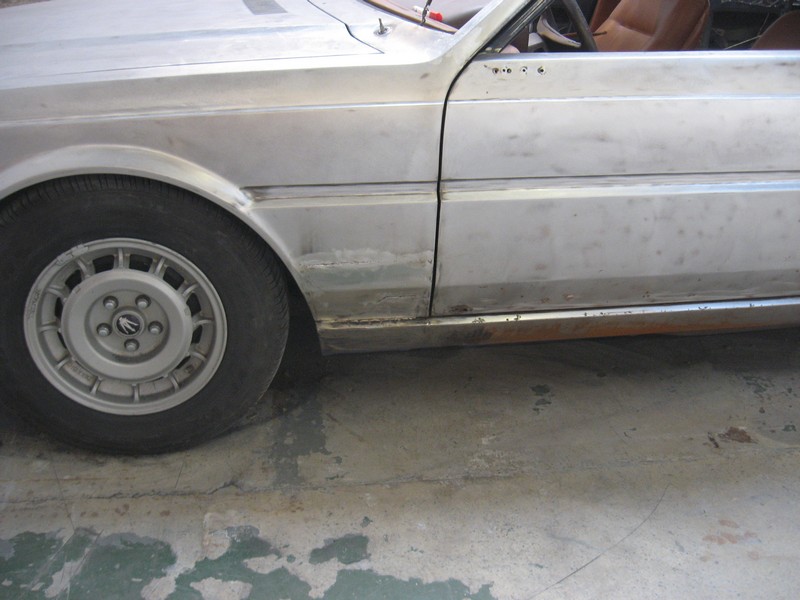
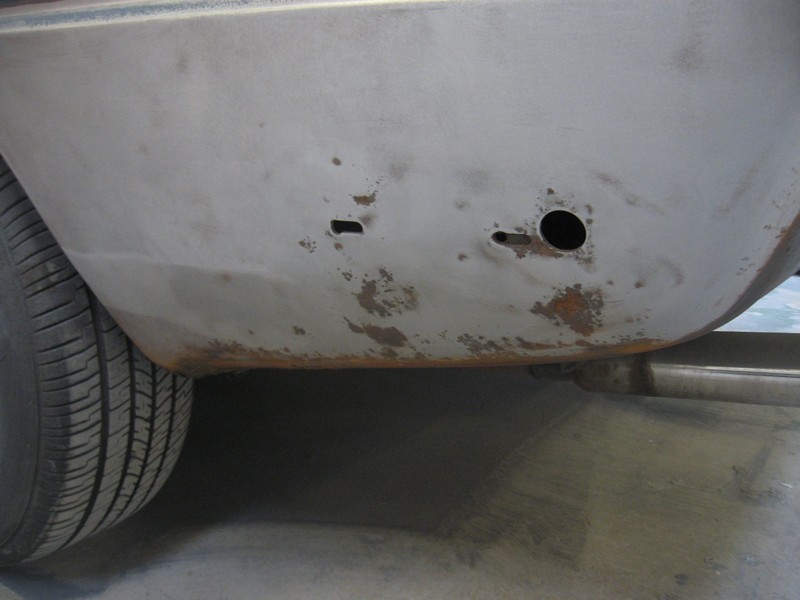
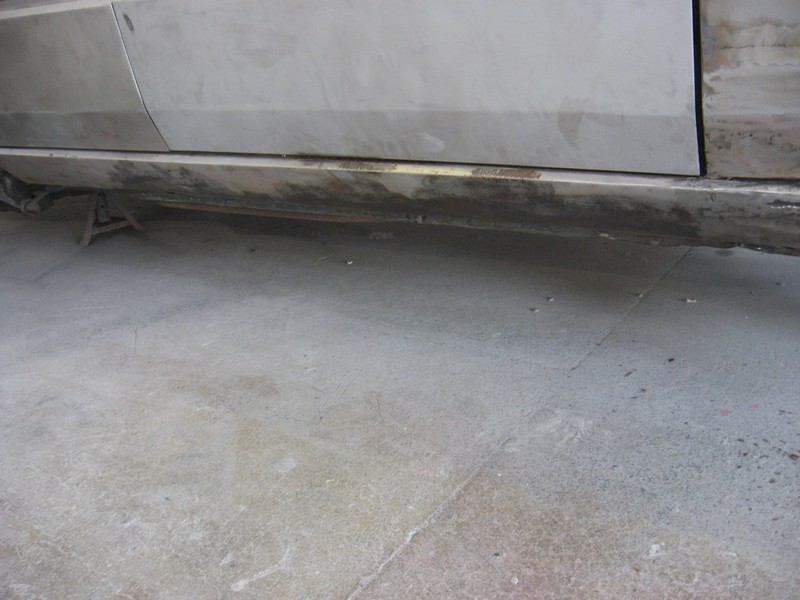
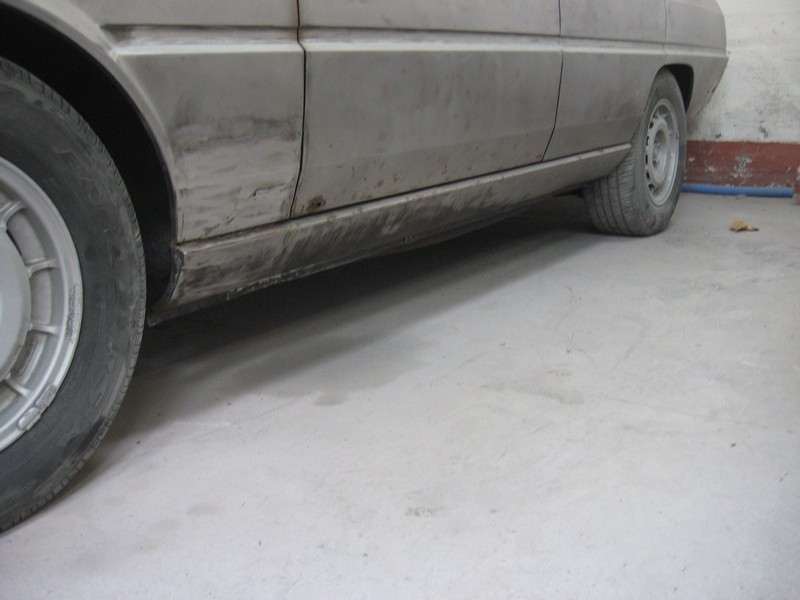
“..lower sill areas cleaned back, new right front door stripped out (glass removed etc) and light surface rust removed from sills.
To be fair to the guys who did the repairs previously and painted the lower sill area – had done a very thorough job of de-rusting. The sills are completely solid.”

Image

Image


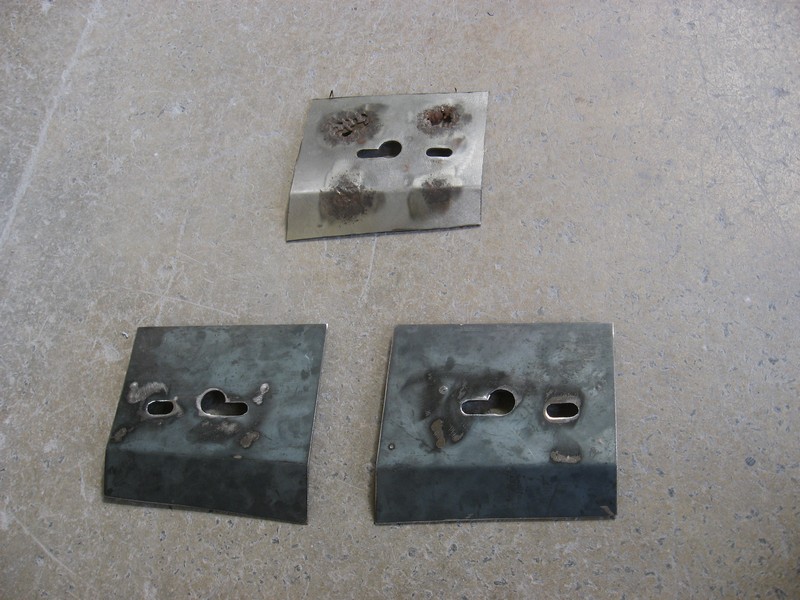
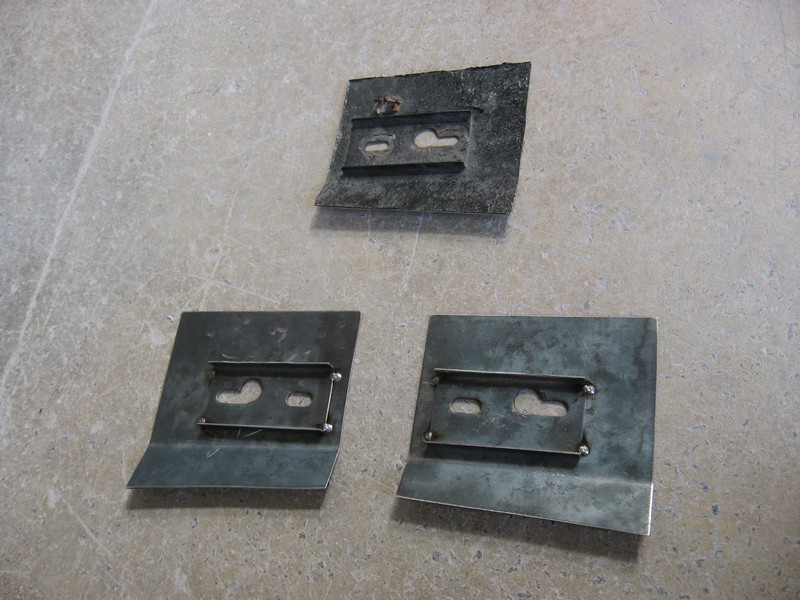
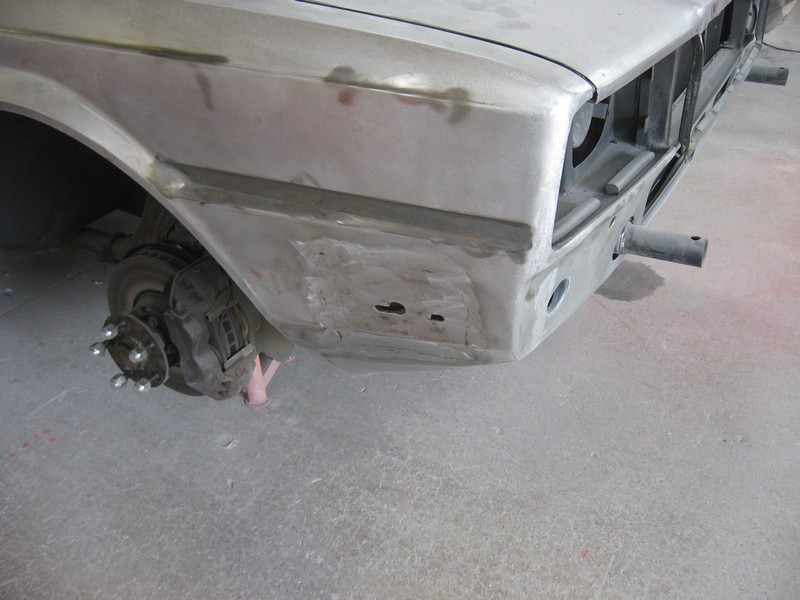
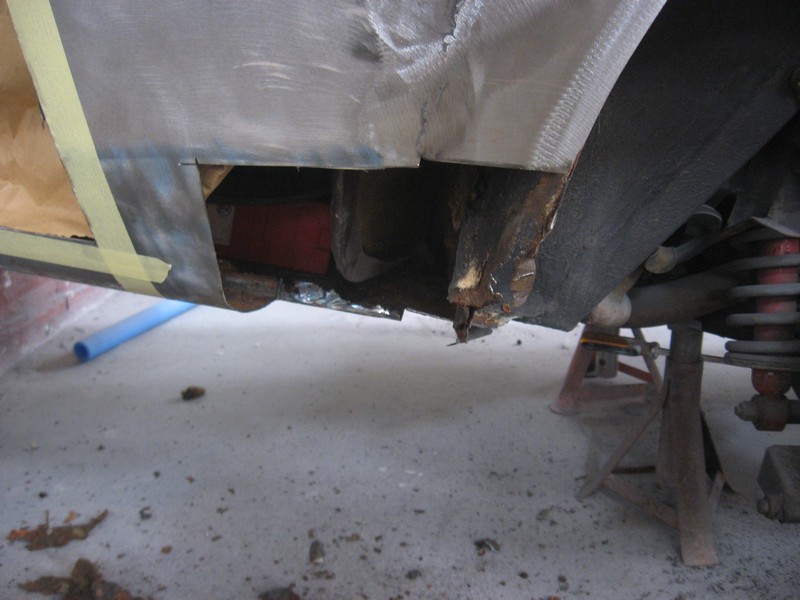
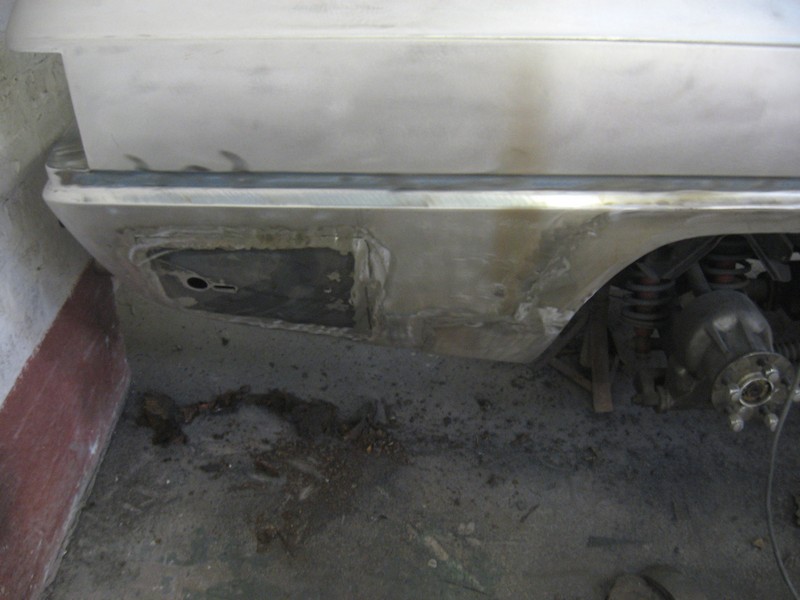
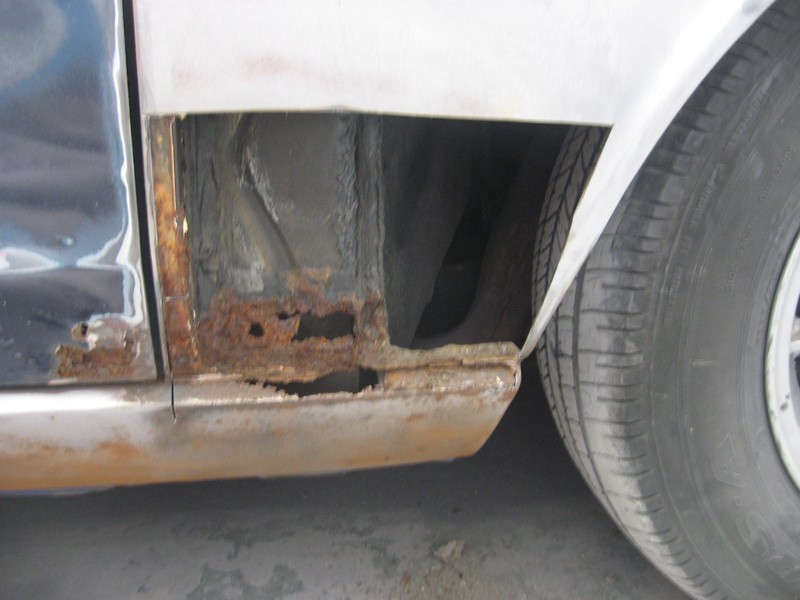
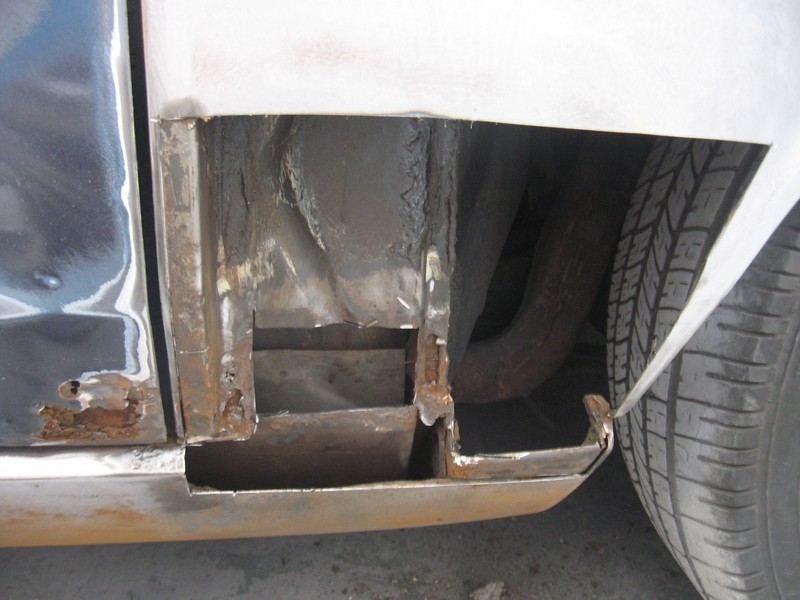
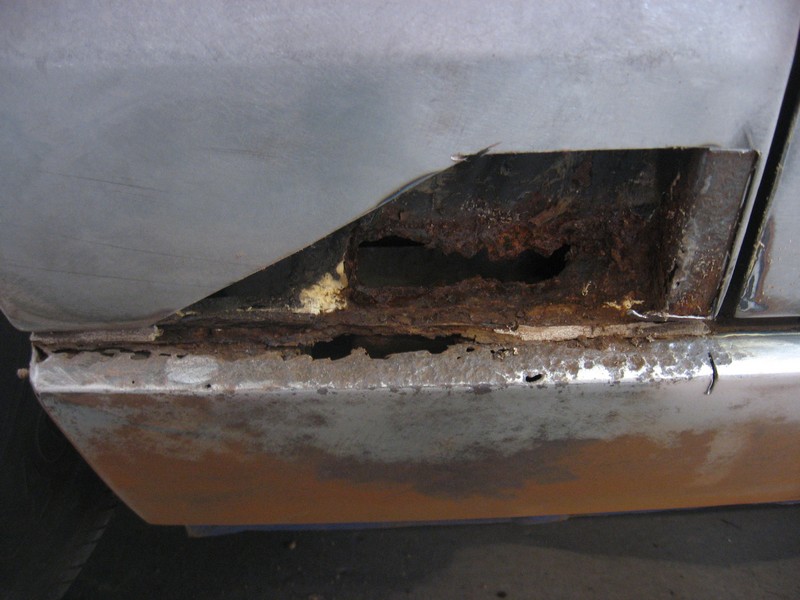
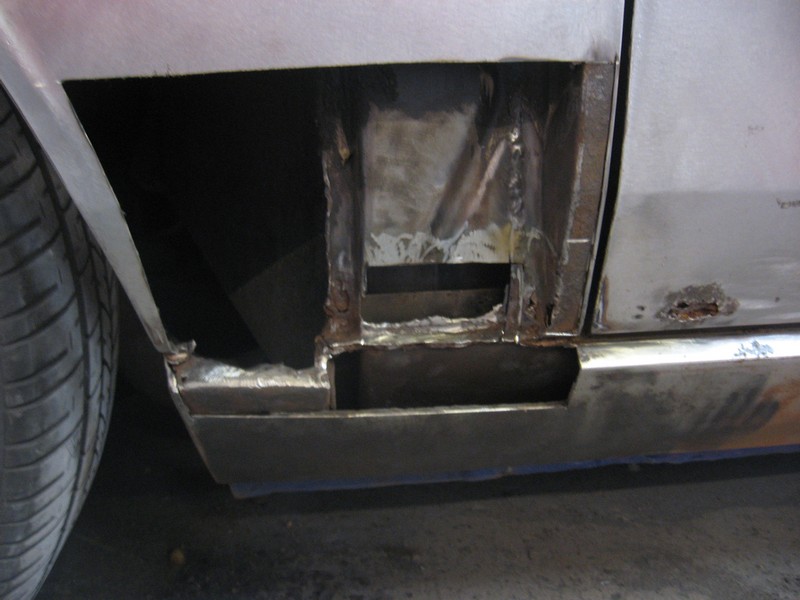
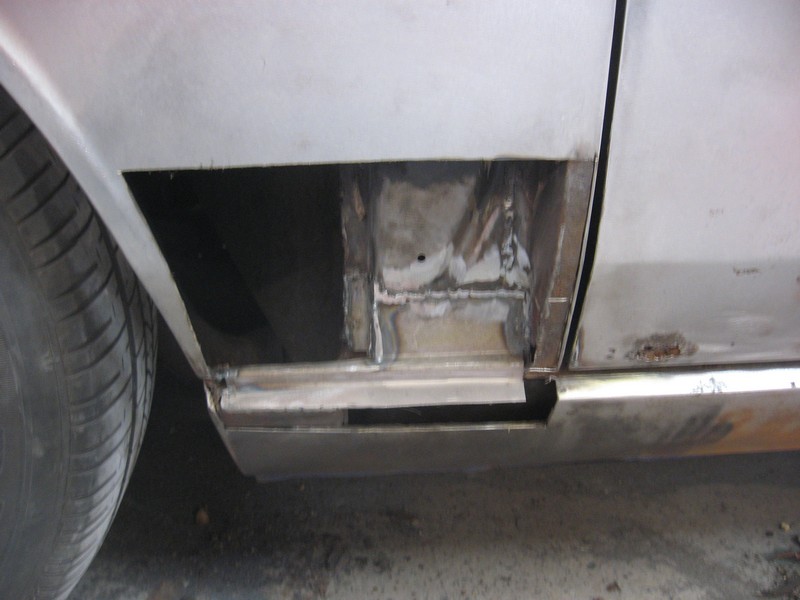
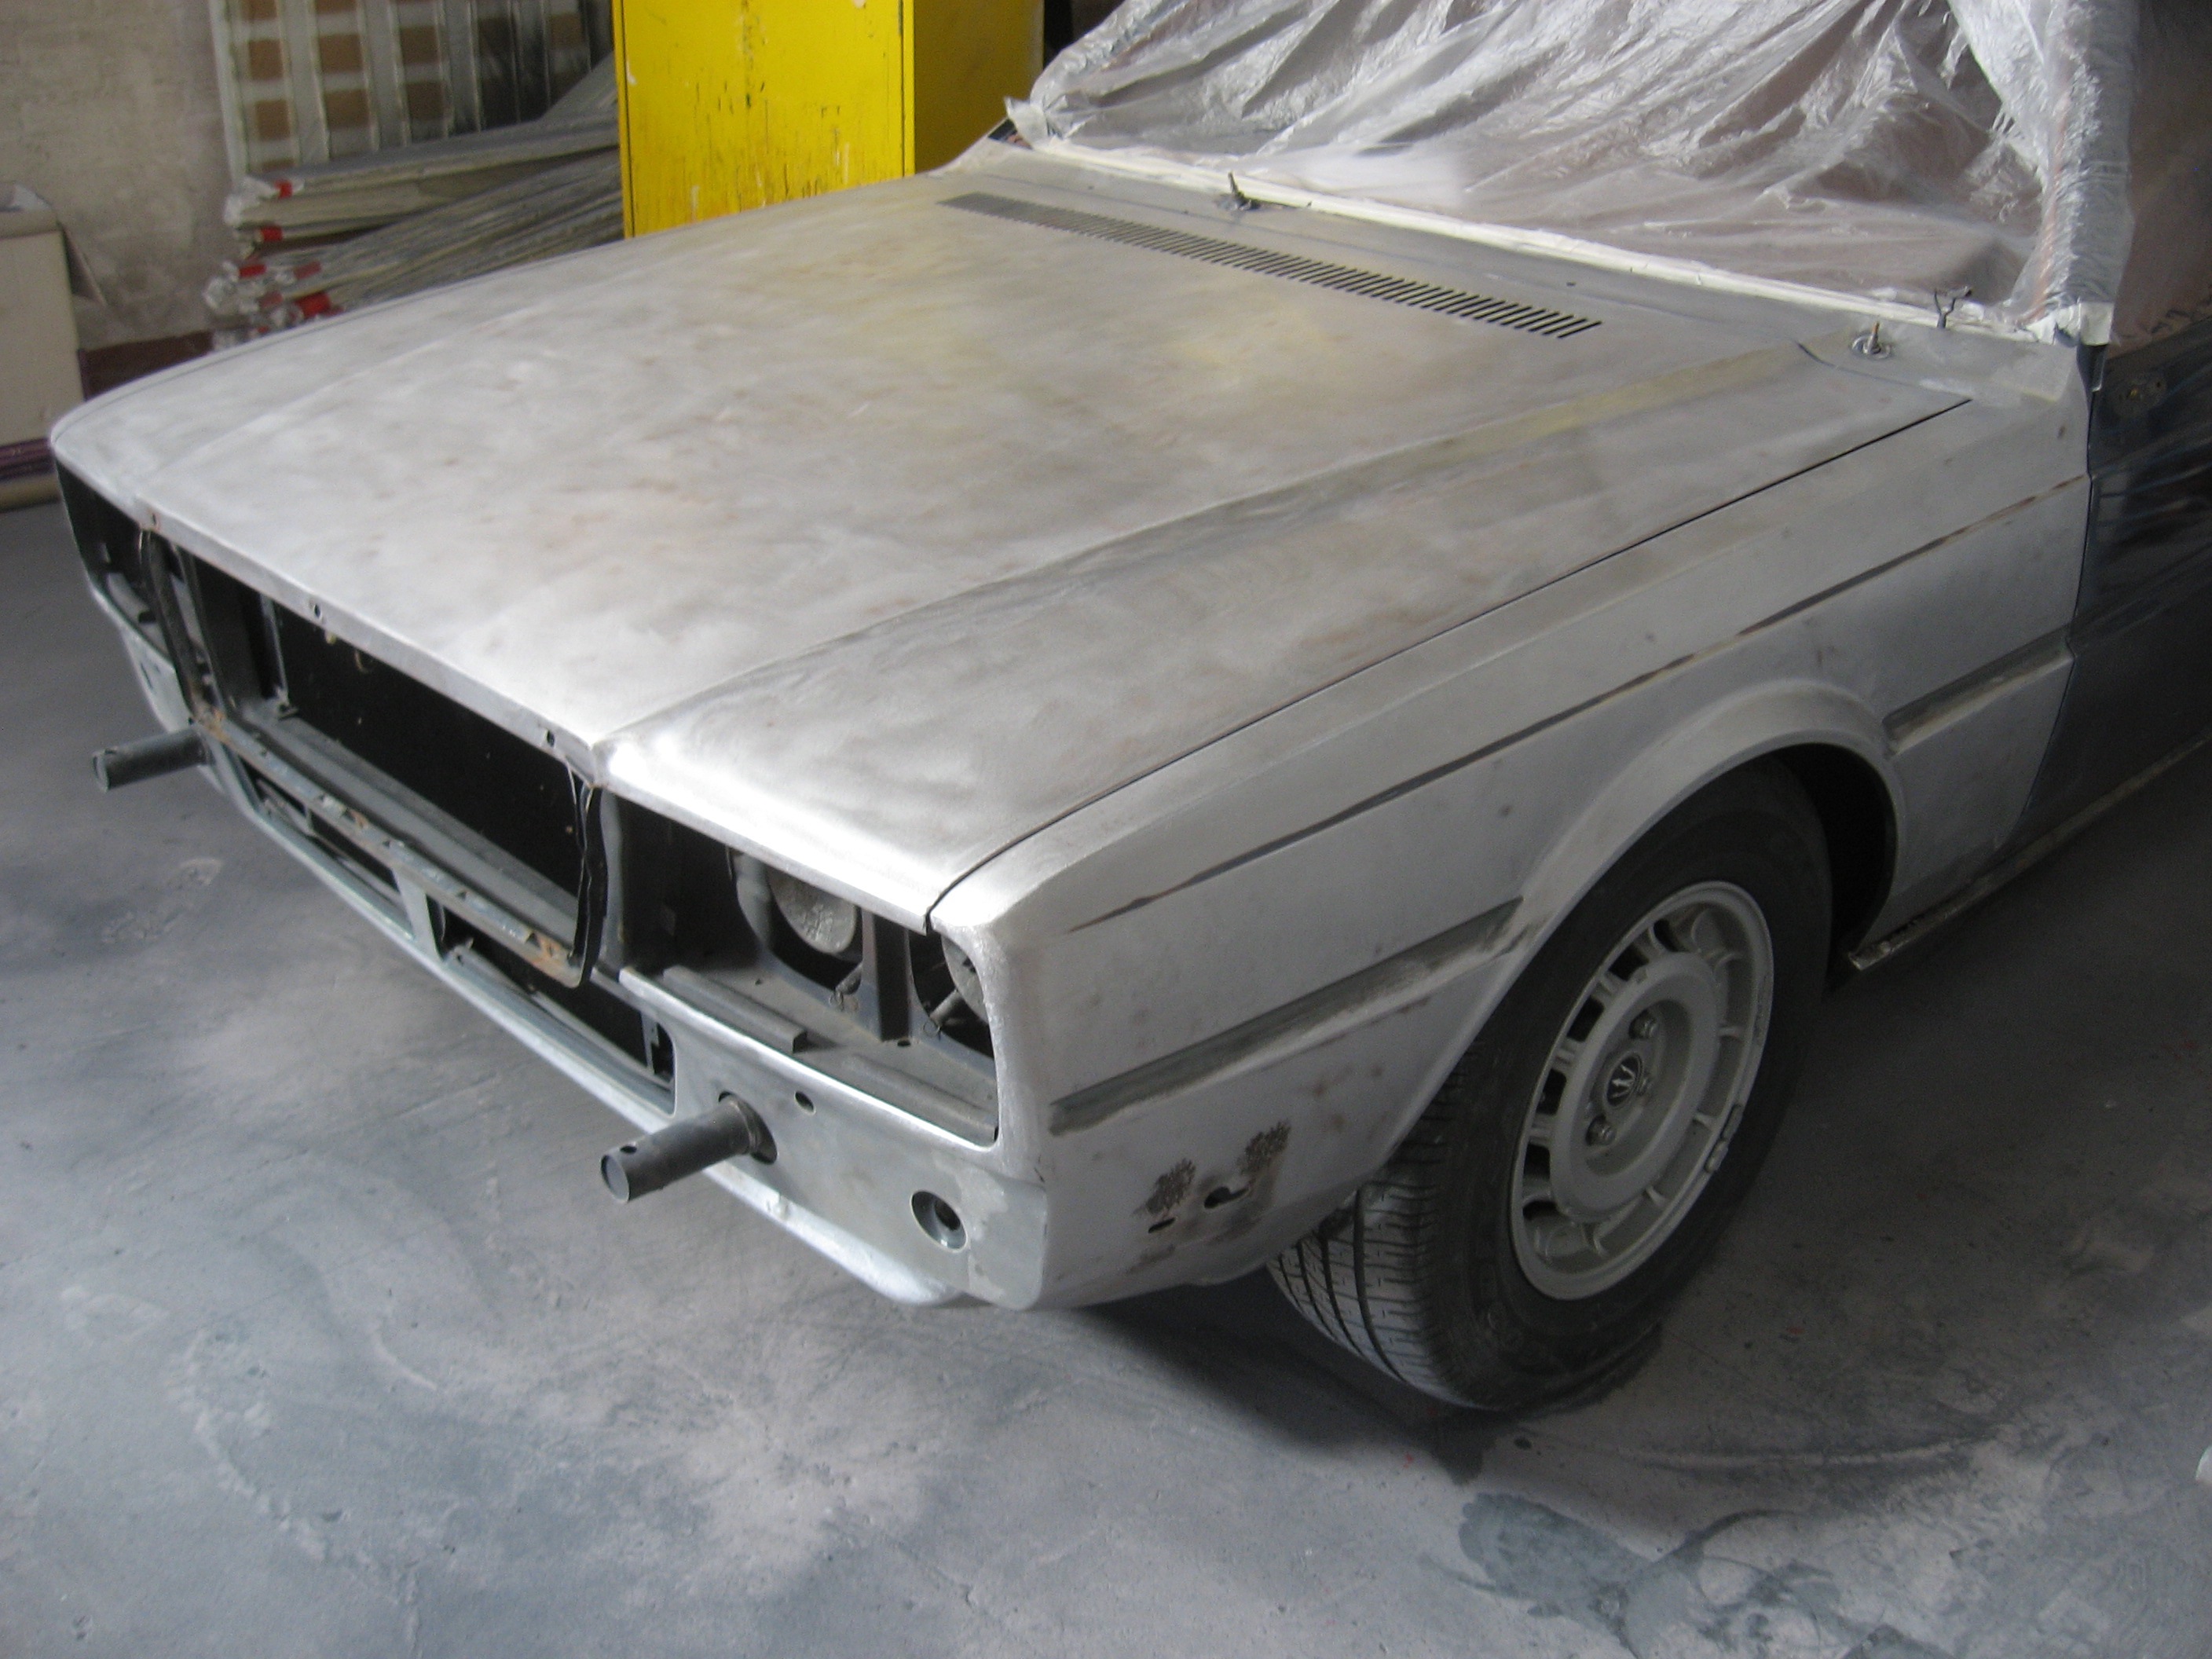
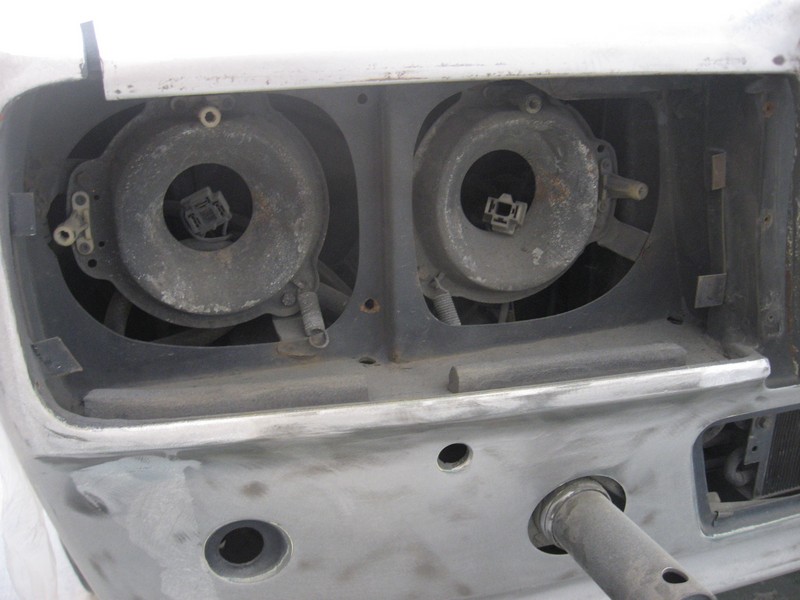
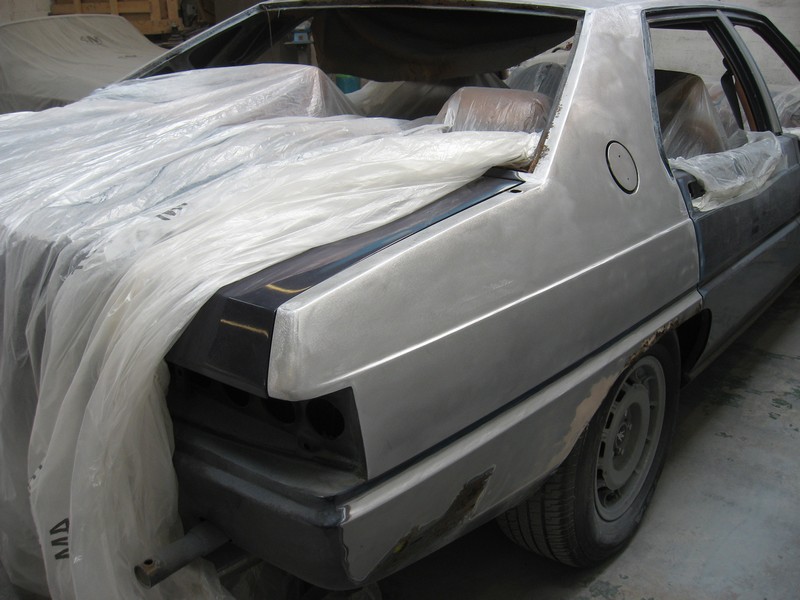
As to the bumper support areas replaced (see previous entry), the shop writes,

“I won’t be replacing the left rear bumper support area as it’s pretty perfect. I think the only reason the right side had gone was due to previous repair there which was tied up to the old right rear wheelarch repairs. (Which I’m certain happened a long time ago and certainly wasn’t a more recent ‘cover up’ job).”

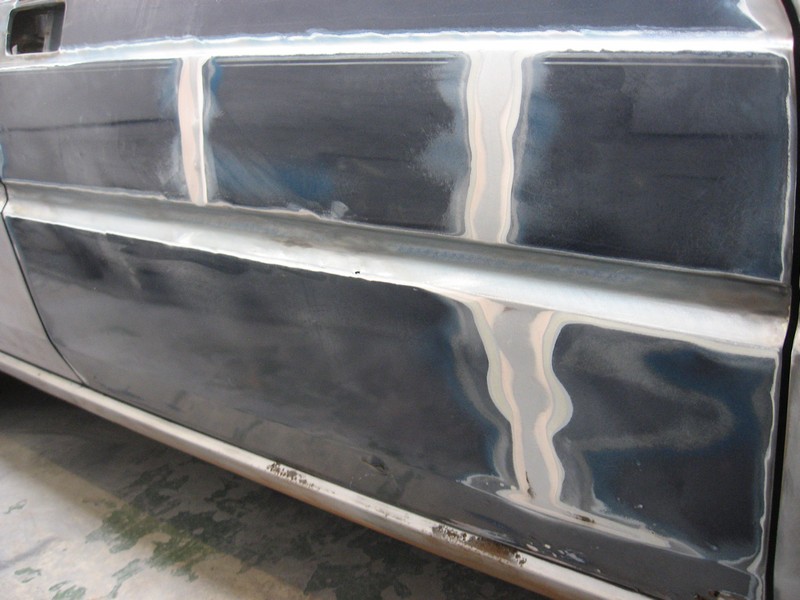
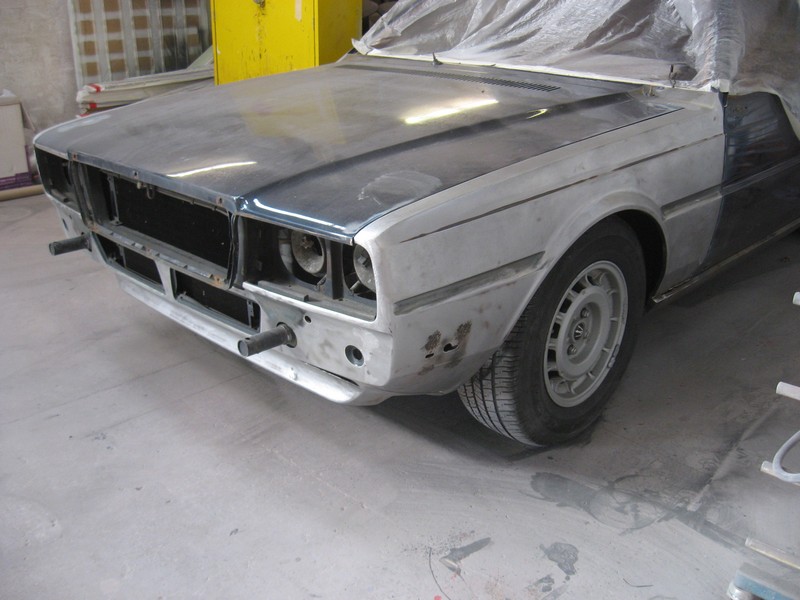
The new door has been trial fitted and looks pretty good already, but will need minor adjustments to give perfect panel gaps.

Image

Thoroughness

I’m pleased to find that the shop doing the work is not content with merely dealing with the worst of the visible imperfections, be it rust, dings or otherwise. They also tend to areas no one will ever see, and make sure that the structural integrity of the car is maintained. Even nicer is the fact that their perspective is long term, and the work they perform they expect to last for years.

“A quick update today………front bumper corner support area cut out and sent to my fabricator as it has a strengthener section spot welded in behind, I have asked him to make me a new pair as the left one was just beginning to rust also and I don’t see the point of just doing the one as the other would undoubtedly have needed doing in a few years time.”

Old front bumper support removed
New front bumper supports
New front bumper supports, rear
Front bumper brace welded in
Closeup
Closeup

“both front corners now completed, new panel made for the right rear bumper corner mounting area, right rear wheelearch completed.”

The attention to detail continues on the rear quarter panels.

Rear bumper support
Rear bumper support
Now you see it, now you don't
Now you see it, now you don’t
Old rusted rear support. Note insulation, which is both hydrophilic and readily flammable
Rear wheel arch and trunk bottom being renewed
Better than new
Better than new
Right quarter panel complete

Most shops today think it’s too much work and too expensive to actually cut the rusted parts out and weld new metal in. They either hammer the rusted section in and weld a new piece of metal over it, or simply brush it out and cover it with filler. I.e. basically just postponing the problem, potentially making it much worse in the long run.

Do you have a story about amazing body work, or a link to some place you’d recommend? Add it in the comments section!

Artistry in metal (I)

” a few more pics of progress from yesterday and today……the areas of repair are becoming less complicated!”

“Right hand lower front wing/sill and A panel support repaired; right hand rear wheelarch repaired. I still need to complete the wheelarch repair with a lower section that ties into the boot floor, but we have also made and fitted a new wheelarch lip which can’t be seen in the pics.”

A pillar support rust
A pillar support, rust removed
A pillar support, new metal welded in and covered


Rear wheel arch rust removed


New rear wheel arch
New rear wheel arch

Euro vs US front end/lights

Overall, the QP3 was pretty much the same car regardless of where it was delivered. Besides the obvious changes for specific markets (e.g. right hand drive in the UK, Australia, Japan, South Africa), there were also subtle differences between the US and EU market.

The US required ‘more bumper’ due to their safety regulations compared to the EU, resulting in bumpers that stick a bit out from the body front and rear. The US lights are 165mm x 100mm sealed beams as found in a wide range of US cars of the same era, while the Euro models used slightly larger Bosch and Marchal H2/H4 lights with replaceable bulbs.

US (left) & EU QP3 headlights

US front end:

US spec QP3 front end

Euro front:

800px-Maserati_Quattroporte_III_Royale_1987-1990

Thanks to Roger, whomever he is, for the pic, found on  Enrico's Maserati website
Thanks to Roger, whomever he is, for the pic, found on Enrico’s Maserati website

It may not be obvious from the pictures, but the Euro headlights are larger and with rounded edges. The bumper sits almost flush to the front of the car, whereas the US version sticks out a few inches in the front, and enough in the back to provide a convenient ledge to sit on.

Not a big deal, but one that subtly changes the overall “look” the car has and results in a different overall impression.

Which do you prefer, and why? Leave a comment and let me know!

The usual suspects (rust)

Rumor has it that the communist government in Italy during the 70’s – 80’s made a deal with the USSR for steel to supply their automobile production, resulting in cars that rust more readily than their competitors. Hopefully any historians in the audience will be able to verify or refute the accuracy of the rumor, but as anyone who’s ever owned an Italian car knows, they rust like no others. I don’t even think that a Jag could rust faster, and that’s saying something.

Meaning that 33 years on, mother nature has had her say in the matter, and the results aren’t pretty. The expert’s assessment is that this is no big deal and pretty common and far from the worse they’ve seen, and I’m comforted by the fact that they know their way around a pair of tin snips and welding machines. Blindfolded.

E.g. “The car is pretty well as I expected, PLEASE don’t feel in any way downhearted at the seeming extent of the metal repair work………….this is very much the norm.”

“First few pics show the stripping completed (including the ‘detail’ stripping of the body suages, glass reveals, rain gutters and all of the other difficult areas).”

TL37QP TL36QP


“As you can see I have begun the metalwork on the most complicated areas…….the lower front wing/sill structure and having cut away the corrosion on the left side we found the lower A panel support had rusted out also, so removed a larger section of the front wing to enable access to cut the rust out and repair properly. I have also drilled a hole in the support panel so that we can fully protect it with a cavity wax at the end of the job. Finally new sections made for the outer panelwork (sill and lower front wing) and welded in.
Next stage is to do the same on the right side.”


TL43QP TL44QP TL45QP TL46QP TL47QP


Excellent work. I’m looking forward to seeing how this continues.

Problems

Most of the body stripping went without incident and didn’t take long at all. Until the shop got to the front passenger door…

“We have come across an issue with the front right door……..it’s had some significant damage in the past and I wondered if it might be worth you asking Mr NNN what his plans are with the spare doors he has stored with me – the front right is straight and sound, though does require a small amount of welding to the outer skin (in rust terms it is much the same as yours); I’m not terribly happy with re-repairing your existing door as it has a considerable depth of filler (bondo) in it at the moment – see pics – and although we do use shaping filler I really don’t like using it in that sort of quantity. Let me know your thoughts.”

TL39QP

TL38QP


Thankfully, Mr. NNN was very generous and offered to sell me his door at a mutually agreeable price.

Thus the work continues.


Progress

“some more stripping done……..front end now completely bare steel”

ImageImage

“more stripping done……….roof completed and right rear quarter done”

ImageImage

“nearly there on stripping……just three doors left”

ImageImageImage

Work is moving along at a good clip. This was up until around the end of May, when problems surfaced…

Stay tuned.

Headlights

The QP3 uses 2 different headlight systems depending on the market the car is sold to, in the US it’s a sealed beam type, in the EU it’s a H4/H2 combo (for main beams and high beams).

As I’ve found driving evenings the last year or two, the US sealed beams don’t do a whole lot except let other motorists know that you’re there. As far as illuminating the road in front of you, not really. The high beams do a much better job, but are both irritating and dangerous to oncoming traffic.

The knowledgable staff at Daniel Stern Lighting suggested replacing the sealed beam units with Bosch H4 on the outside (main/high beam combo) and Marchal H2 high beam for the inner pair. These headlamps use replaceable bulbs, and there are many to choose from, with much higher output and better focusing and illumination than the stock sealed beam units.

The big question is whether to change the front of the car from US to EU spec. It will entail drilling new screw holes in the front panel (behind the headlight assembly) as well as sourcing new surrounds, buckets and bezels, not to mention the new lights themselves.

I haven’t yet decided if I’ll do it or not, and welcome any comments and suggestions on the matter here.

US headlight panel with buckets
EU headlight panel
EU headlight panel


Sylvia stripped

Well, almost.

The shop is making progress, as the photos show. So far there aren’t any major or unexpected surprises, just regular rust in the usual places. The body looks clean and straight.

According to the shop, “she’s had one repaint previously (but a very long time ago) and doesn’t look like it was for anything major at this point…..probably just a ‘refresh’ job; second pic shows the additional layers on the bonnet of which you were already fully aware.
No unexpected areas of corrossion found either – my opinion so far is that she’s a very honest ‘what you see is what you get’ car.”

Further, “The worst corrossion around the glass apetures is actually (and bizarrely) at the top of the rear screen, there is a section down both sides, but the base is pretty good. The front apeture is excellent.”

TL17MQ TL16MQ TL19MQ TL23MQ TL29MQ

Bare Metal Respray

The car was sold to me as a “rolling restoration”, i.e. fully drivable but needing work to bring it back to pristine condition.

Sylvia (the car) had been well taken care of mechanically and has a documented history going back over 20 years, but the interior had started coming undone and rust had reared it’s ugly head at a few spots on the body.

I found a guy who did wonders with the interior, basically disassembling both front seats and re-sewing them with new reinforcing tape, using the original holes. He’s currently re-covering two steering wheels for me, when done they’ll be better than brand new.

The remaining issue is the paint. To be frank, the paint was showing it’s age when I bought it, and while a good wash and polish with Autoglym helped a lot, 2 years on there isn’t a whole lot more that can be done to bring out any kind of shine. More importantly to me, especially living in a wet winter climate, is the rust areas that have grown significantly since I bought it. She’s parked in an indoor heated garage, I can only imagine what would have happened  parked out on the street… Lastly, the BPO (before previous owner) had an engine fire (carb backfired and spit up gasoline that ignited under the hood, luckily nothing serious was damaged), and the hood (bonnet) repaint really didn’t match the rest of the car. It had also started showing cracks (probably wrong kind of paint on top of another type).

The only way to properly deal with these issues is to strip the car down completely to the bare metal, cut out the rust and replace with new, clean steel, straighten all panels, prime and paint. Luckily there happens to be a place that specializes in this kind of work and has already done 4 other Quattroporte IIIs, meaning they know all the ins and outs and details and what to expect (and what not to break, because it can’t be replaced!).

So this past Easter I drove the car down to said shop, had a very nice chat with the owner and went through the entire car, and am now practicing patience as best I can. The first pictures of the work arrived today, I thought I’d share some of them here.

QP3 front
QP3 front
QP3 rear
QP3 rear
QP3 front stripped
QP3 front sans chrome & bumper
QP3 rear stripped
QP3 rear without bumper, lights and badges