Starter motor

Having replaced the starter motor in the car with the one thoughtfully provided by the PO when I overhauled the transmission, I was surprised to be getting the “click – nothing” sound after only 6 or so months.

It can mean many things, but seeing as how I was getting power, all instruments checked out, and I could hear the starter relay clicking, the finger seemed to be pointing at the starter. Sometimes she would start right up on the very first try, other times it took a few repeat attemps, and lately I had on occasion been spending 10 or 15 minutes before suddenly it would catch and the engine would roar to life.

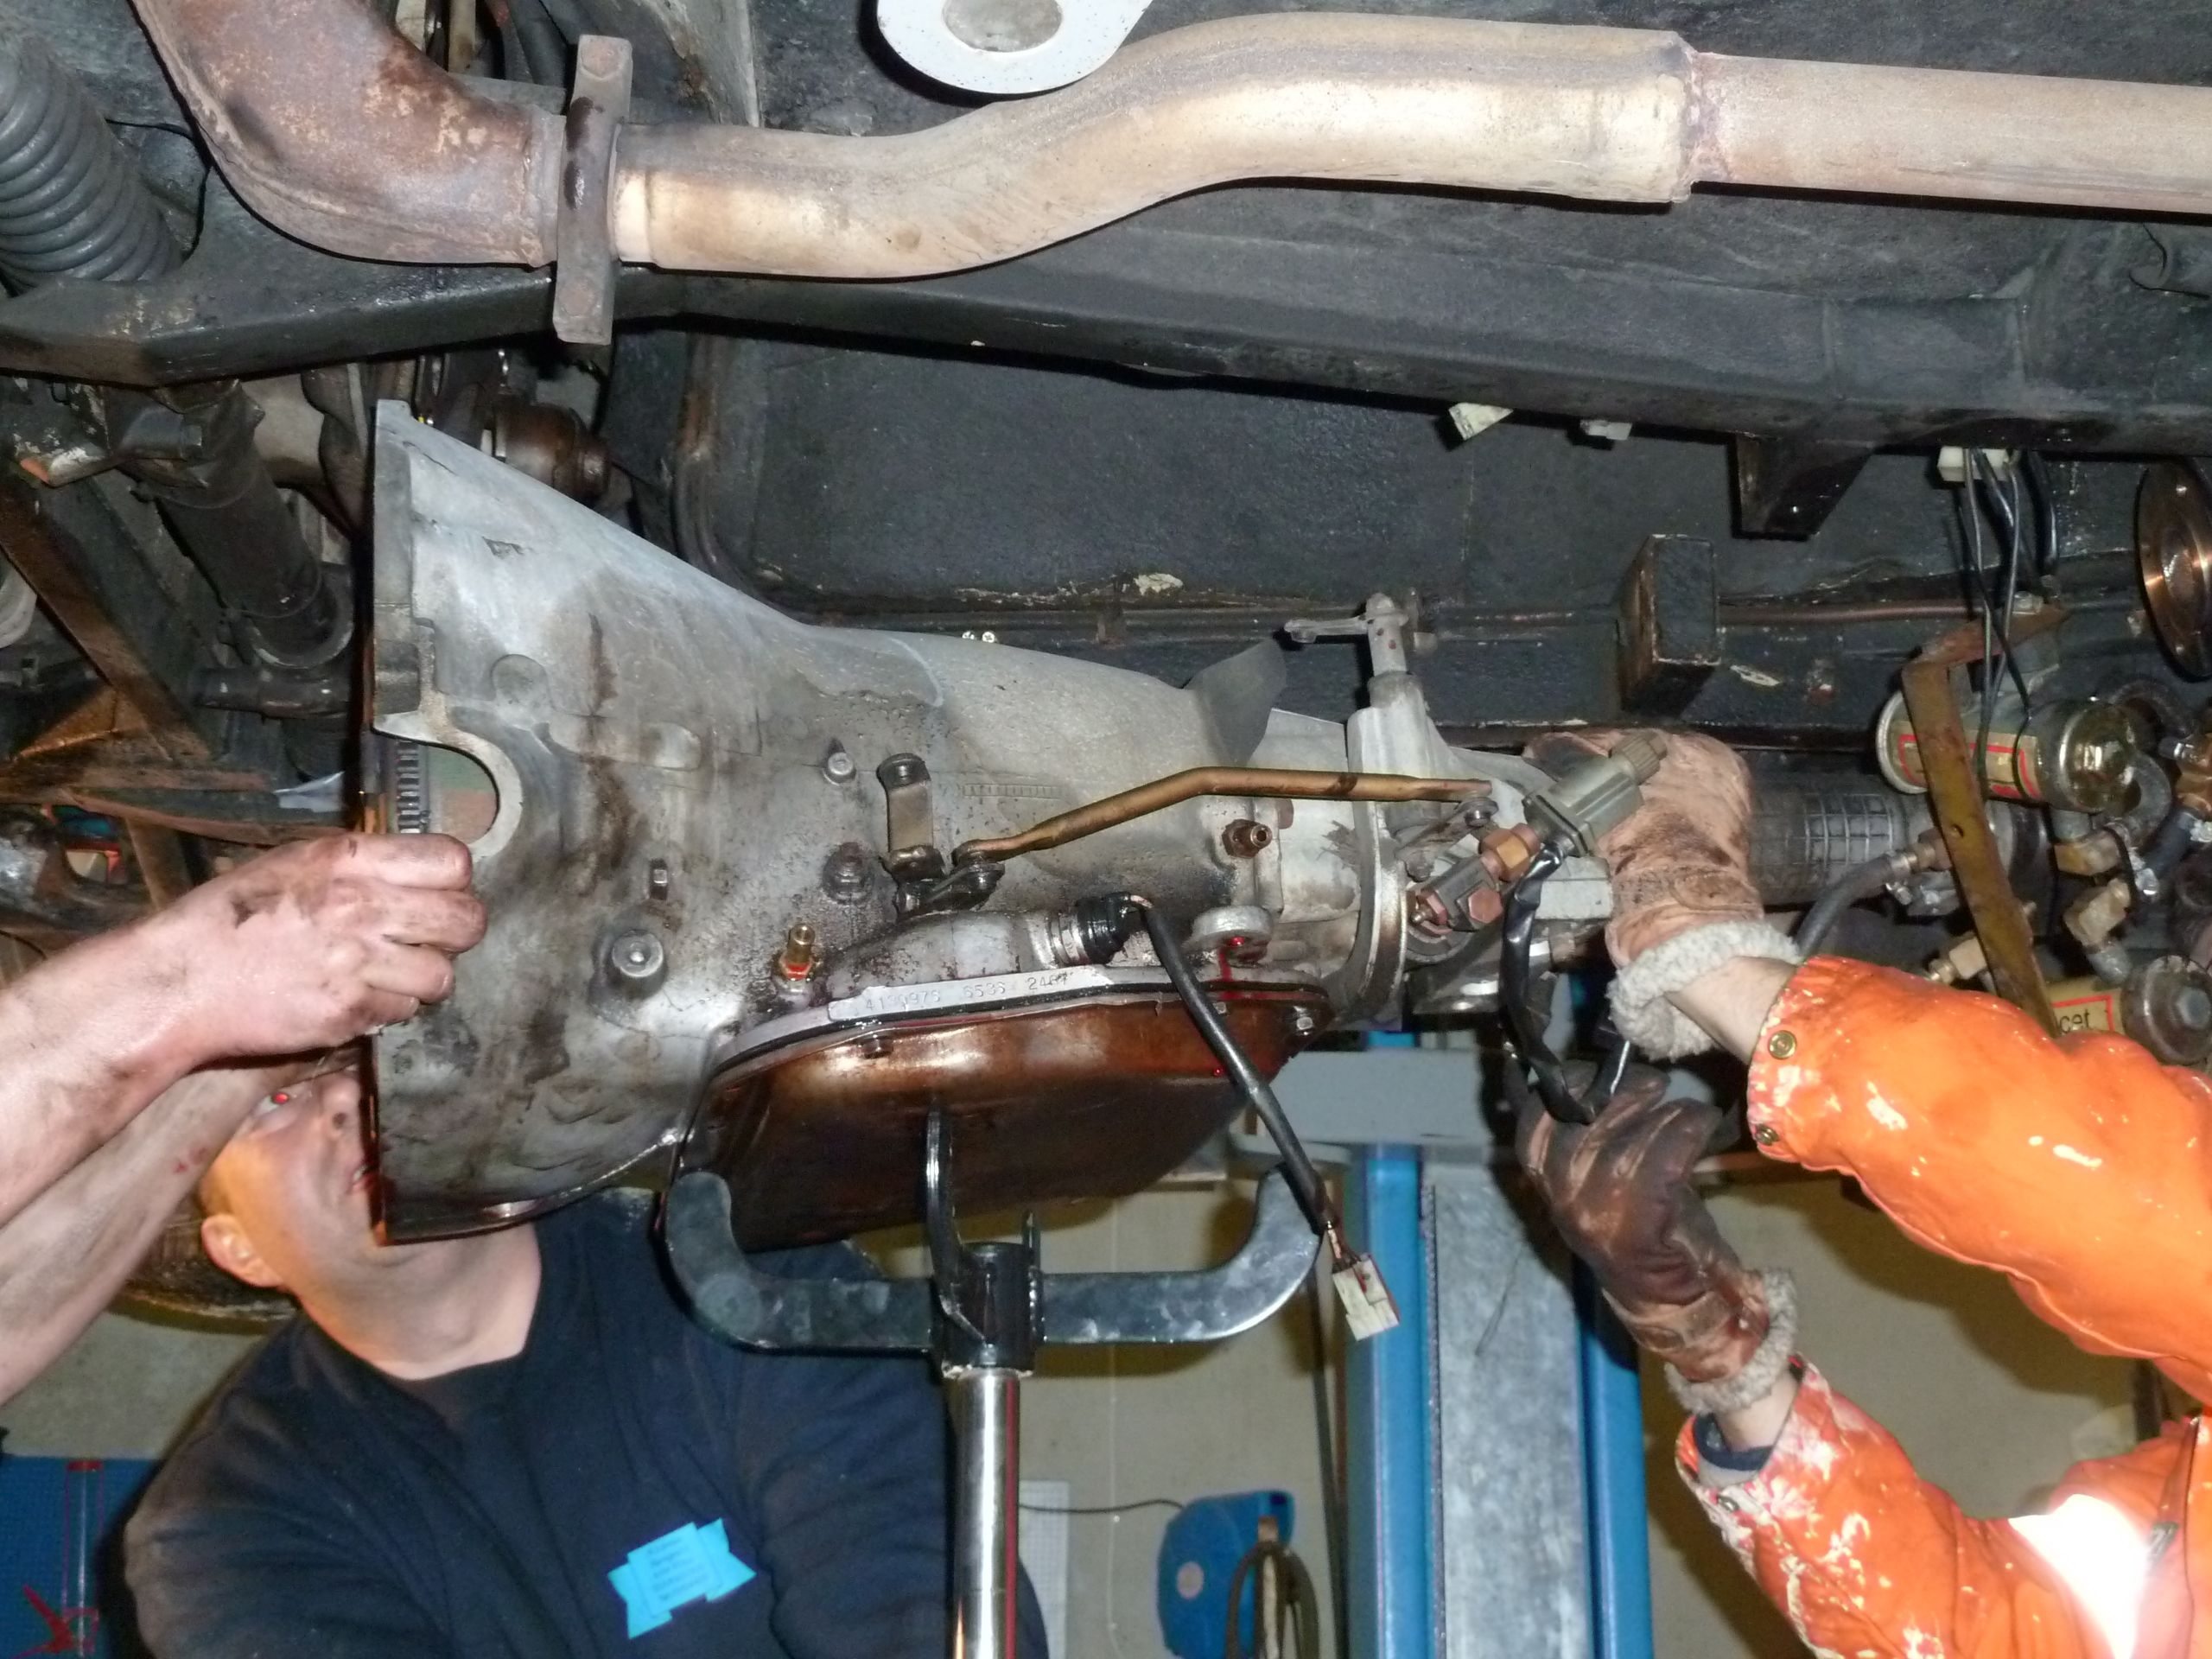
I delivered the starter motor I had pulled from the car to a local shop. Thankfully Maserati did the same thing here that they had done with the transmission – sourced it from Chrysler. Turns out they’ve used the same basic design from the 60’s up to about the 90’s. Of course Maserati also managed to mount it in such a way (upside down and backwards) that any condensation, rain or other moisture collects inside the starter, guaranteeing it won’t last for too long before needing to be replaced or repaired.

For reference, it’s a 1.8HP Chrysler starter, part number 4091950, also used in the 1980 Dodge 1/2 pickup truck.

The parts shop was unable to find the rebuild kit needed (not a lot of American cars here), so I obliged and ordered 2 rebuild kits and 2 solenoids in order to repair them both. Found them at “Alternator & Starter Parts Wholesale” www.ASPWholesale.com, part no: 66-302 (solenoid) and CH-79-1100 (brush holder, rings, washers, brushes, the whole kit). Total price $71.82 plus shipping for all parts for both starters. Not a bad deal.

Got the car into the shop that had the extra starter, brought along the parts, and this afternoon was able to drive out with a decidedly easier-to-start car. And an extra rebuilt starter. Always nice to have a spare in reserve.

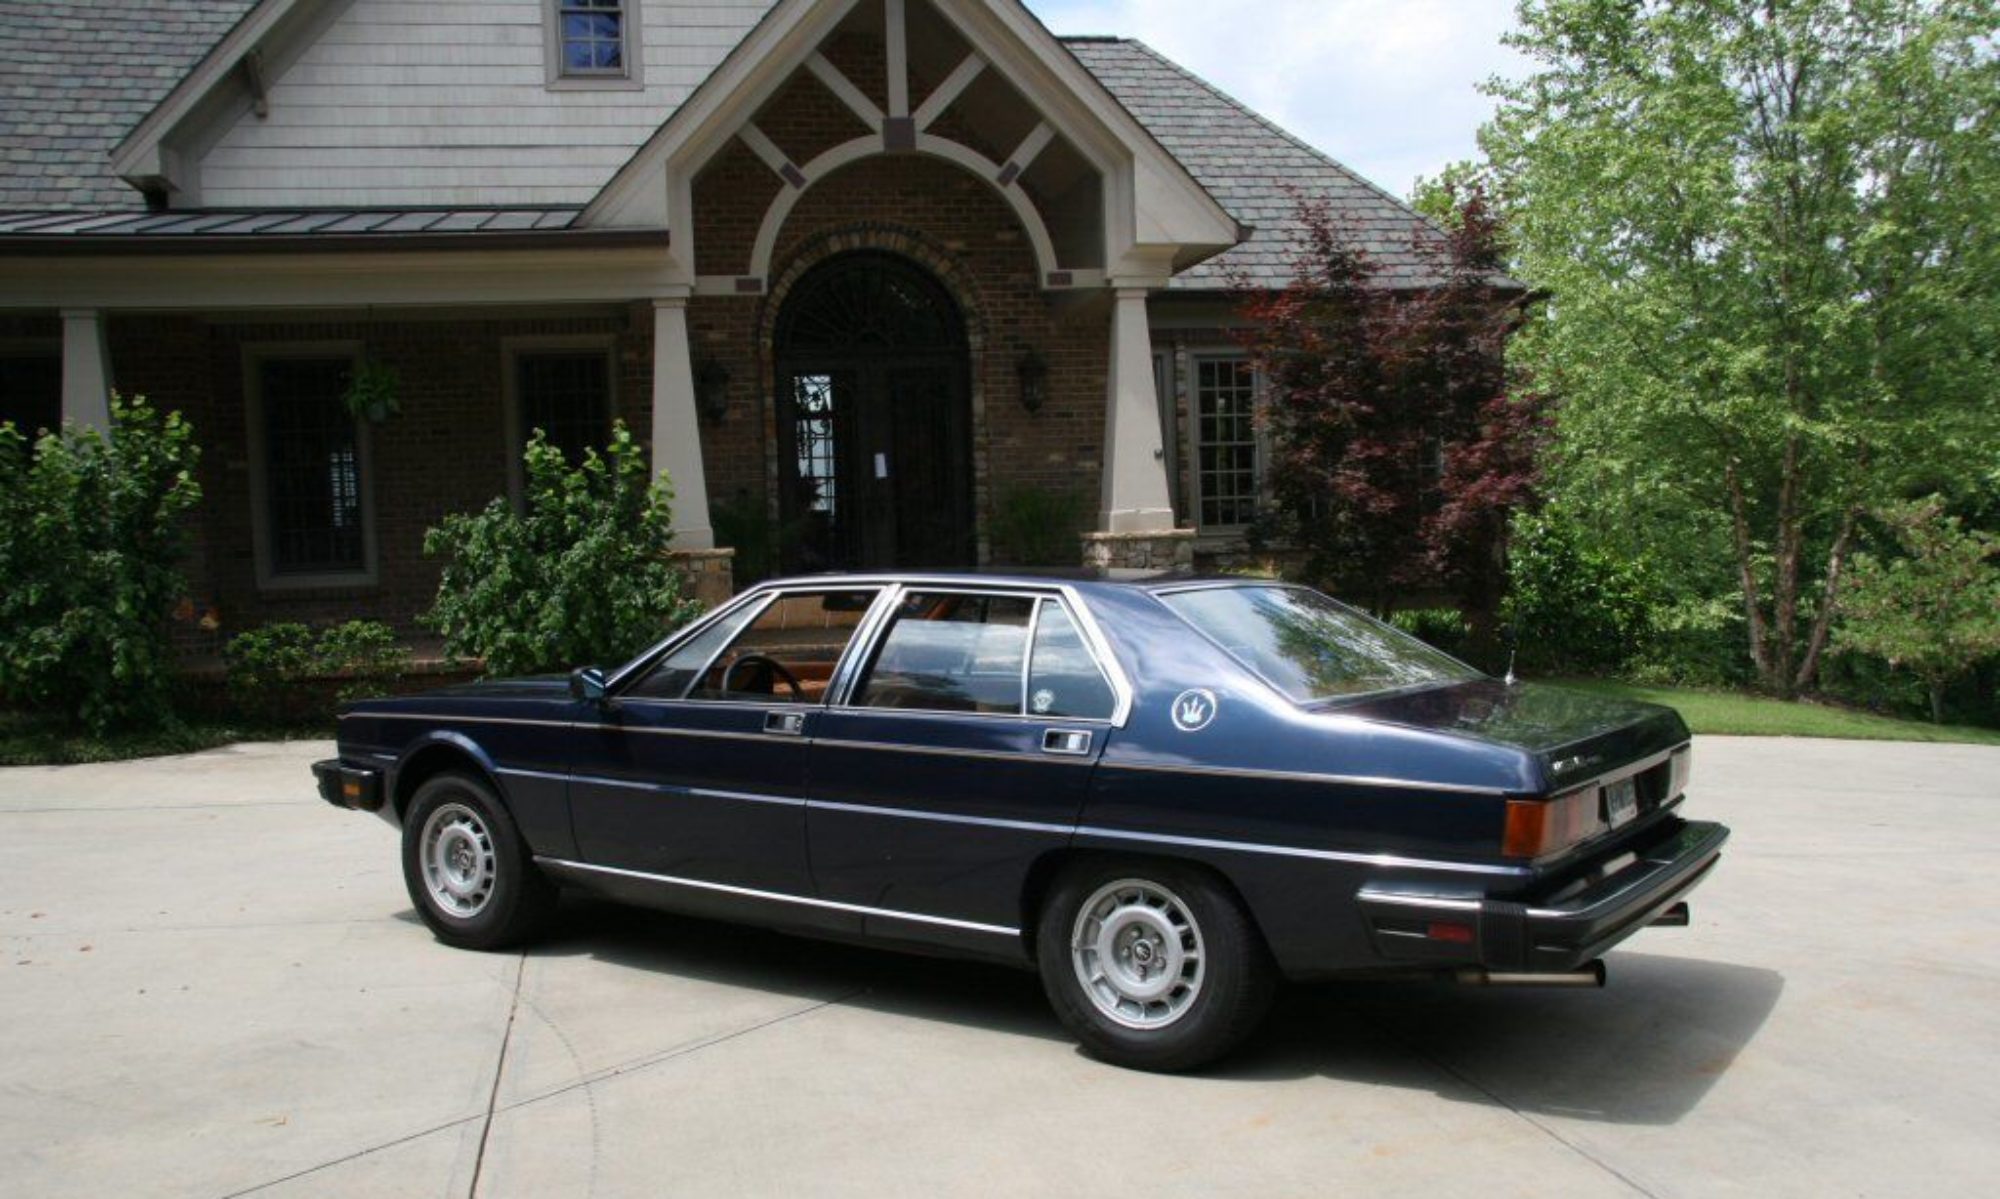
Getting another thing done on the car is always a reason to celebrate, that combined with the cold but dry weather brought us to a local establishment offering a good old fashioned by-hand car wash. Well, they use hoses and sprayers and all sorts of special products, but most importantly they all loved the car :-).

She’s clean, she starts, she’s garaged. Not a bad start for autumn.

MOT/DMV updates

The battery is now strapped down to the battery bracket. Rather unnecessary if you ask me (I know, no one asked) with an AGM type battery – it can be mounted in any position, and there isn’t anything to leak out in the event of an accident.

http://www.batterystuff.com/kb/articles/battery-articles/battery-basics.html

The parking brake now works on both sides – this design has additional calipers on the rear discs on both sides, with a wire leading to the emergency brake handle in the car. With 2 tonnes to stop in a potential situation, both calipers really need to do their job in order to have any chance at stopping the car.

The speedometer is working now, it turned out that the generator or elbow angle was not working correctly. We tried hooking it up directly to the output of the transmission and suddenly everything worked.

Although it appears that the speedo, while working, is showing the wrong speed – 100km/h shows as about 60. Could be that one of the poles of the generator isn’t working as it should. Time to order a replacement.

Exhaust

The exhaust had started to wheeze and even leak a little recently, resulting in unpleasant noxious fumes in the cabin. It was especially problematic with the windows down, and with as much beautiful warm sunny weather we have here, a lot of driving is done with the windows rolled down…

A quick inspection revealed that the PO had connected the headers to the exhaust pipes without any gasket or clamp, and it was surprising it didn’t make more noise than it did.

2 olive gaskets and exhaust clamps later and the beast is purring like a 2 tonne kitten, not a whiff of exhaust to be had in the cabin anymore.

Nice. Ready for the next problem!

Speedometer

Tried out some different things with a mechanic friend today and got the speedometer to work. We kept checking each part of the puzzle, and found that the angle on the impulse generator was causing the problems with the speedometer not working. Connecting the generator directly to the output of the gear on the transmission resulted in the speedo working, but showing too low a speed. Inspecting the angle, it doesn’t appear to offer any change to the rotational speed hitting the generator module, leading us to suspect a problem with the generator itself.

So now I need to find a replacement generator and angle and see of everything works after swapping in a new unit.

Speedometer/Odometer

My new odometer gear arrived today, courtesy of Palo Alto Speedo in California. The old one had crumbled into tiny pieces, I have no idea when. The speedometer hadn’t been working since I received the car, and I’ve been trying to do what I can to fix it.

When I overhauled the transmission, I also dismantled and checked the speedometer pulse generator and reduction gear, it’s a small assembly that takes the mechanical rotation of the speedometer from the transmission’s output shaft and uses it to run a tiny generator, not unlike those found on bikes in days gone by. This sends an electrical signal to the instrument cluster and speedometer. I had hoped that by  repairing it (there was a drive bar that was worn and too short) my speedometer would work again, but no such luck.

While speaking with several knowledgable people in the US about this, I learned that there are no standards whatsoever as far as speedometers and the impulse generators go. Some send out square waves, other sine, some are very low level, other high, and there are a variety of impulse per mile versions. Every car maker had their own system, especially when electronic instruments were just becoming common, i.e. in the early 80’s.

I did run it with a drill and measure the output, I neglected to note it but seem to recall it being approximately 0.5v DC.

Installing the odometer gear was easy, regardless of the problems with the speedometer. The new gear is also soft, but much less than the disintegrated and discolored original. I’m told they’re made like that so that they don’t make any noise, I don’t know if that’s true. The instruments in the Quattroporte are made by VDO and are the same as those used in contemporary Porsches. The electronic input board is Jaeger, the aforementioned gear reduction and pulse generator unit is Arthur Allen (unfortunately they’ve recently closed down, and are no more).

VDO USA recommended that I talk with Nichols Speedometer in North Carolina for help troubleshooting the speedo. “Chuck”, a wonderfully experienced gentleman with a southern drawl on the phone had a few tips. I applied 12v DC to the two wires connecting to the actual speedo coil, and the needle jumped to the far end, indicating at least that part is working. Touching 12v DC to the same colored wires on the PCB didn’t result in anything, however.

One last thing I need to do is check resistance between the sending unit and the molex connector in the dashboard. Maybe there’s a broken or shorted wire somewhere in there.
Anyway:
  • 6 screws (3 top, 3 bottom) secure the instrument binnacle to the instrument pod/cover. They might be filled with goo to keep people from opening it up.
  • 8 screws attach the instrumentation holder to the front panel of the instrument cluster. 3 screws with serrated washers fasten a flexible strap carrying electrical power on to the upper front of the binnacle for instrument lighting.
  • 4 screws hold the speedometer in the plastic casing. There is a small molex connector on the front that needs to be unplugged.
  • 2 tiny screws hold the faceplate on the speedometer, each has an almost invisible clear plastic washer. 4 screws at each corner hold the two halves of the plastic enclosure together. There is a spacer/insulator between the speedometer innards and the front faceplate. The indicator needle needs to be carefully pried off in a straight line (use a fork, knife or other instrument to support it in the center).
Speedo faceplate
The odometer/trip teller gears are held in by e-clips, and the posts they ride on are simply riveted to part of the plastic surround, be very careful removing the clips and gears. The lowest gear, connected to the trip meter, is removed by pushing the pin it’s mounted on out as far as you can with a fingernail or sharp object, then grabbing and pulling the steel pin out to release the gears.
Odometer gear train
Assembly is the reverse of teardown.
Voilá – as good as new!
Speedo fixed

Running rough

When I started her up after months in a rented garage to rebuild the transmission, it was like music to my ears. A minor setback with a recalcitrant starter motor aside, she started up willingly on the very first attempt, no coaxing was needed.

It’s hard to describe the throaty growl the Maserati tipo 107 creates, it’s got a great low rumble with an urgency to it at idle, with increasing midrange bark as the revs increase. It’s one of Maserati’s longest running engine series. You can read a little bit more about it here: http://www.maserati-alfieri.co.uk/menotti12.htm

Getting the car back on the road was great, and the engine sounded smooooth as could be when I rolled out of the garage a few months ago. She’s been running great since, up until about a week ago, when things started getting rough.

I haven’t done anything at all to the car or motor (well, I removed the rear seats in order to clean and provide better access to the rear parcel shelf, of which I’m trying to restore the leather covering), and am at a loss to understand why it’s running so poorly.

It usually idles ok, but at lower than normal revs (4-600 instead of 8-900). Today it actually died while idling, which is new. While out on a trip yesterday it would sputter and die when accelerating from a standstill, but would idle fine. If I managed to coax it past the stumbling, it would accelerate fine, and seemed smoother the higher I rev’ed the engine. The problem seemed to lessen after driving for 30 minutes or more on the highway (I always warm up the car – water & oil temp to at least 50C – before driving, what I’m describing happens after the car is warmed up), although today accelerating from a standstill seemed to work ok. The engine was running rough all along today, at slow or highway speeds.

Another symptom is backfiring – with occasional flames coming out the exhaust (as entertaining to passerby’s as it is disconcerting to me), at all speeds, but especially prominent when decelerating.

Pondering the cause and possible solution, several lines of thought emerge.

1. Perhaps something is clogging the fuel line, or the carburetor jets are dirty? I found the fuel pressure gauge had stopped working two days ago, and removed it and replaced it with a plug. I had used Teflon tape on the threads, bits of which seemed to be disintigrating. Finally I pulled it out, cleaned up the threads and used Locktite white thread sealant (e.g. Stag) on it. Maybe some bits ended up in the carbs?

2. Vacuum leak somewhere? Seems to be a common cause of backfiring and acceleration problems. Not sure if it’s mine, though, and even less sure as to where to begin looking.

3. Exhaust leak? I’ve noticed a faint whiff of exhaust in the car on occasion, especially when the windows are rolled down. Due to the missing grommet and bushing around the steering column through the firewall, i’ve previously thought that the open windows create a vacuum that sucks in fumes from the engine bay while driving, but lately I’m not so sure, and suspect there may be a leak between the headers and exhaust underneath the car.

4. Condensation in the distributor? The weather has been wildly (and typically) unpredictable, changing from sunny almost warm days to hail and prodigious downpours only a few degrees above freezing.

Today I checked all fuel input filters on the carburetors, hoping to find scads of miniature teflon spaghetti remains clogging them up, but was disappointed (and a little bit relieved) to find them clean and clear. So barring some larger debris in the fuel line between the fuel filter and carburetors (where the pressure gauge was installed), I can cross suspect number 1 off the list.

I recall that when I got the car, it was running a bit rough initially as well. It turned out to be the battery.  When I replaced it, the car ran perfectly and has since. Since the battery is only a year old (and a high output AGM type), and measures ok, it’s not the problem.

Next up will be to spray the distributor cap with moisture repellant and see that everything inside looks ok.

Since the PO (previous owner) had the heads, manifolds, and carbs all cleaned, refaced, rebuilt and tuned (and it has run perfectly before), I’ve ruled out carburetor adjustment for the time being, choosing instead to focus on the points listed above.

M.O.T/DMV – Road worthiness check

I actually remembered to take the car to it’s M.O.T. review (biannual road-worthiness check performed on all vehicles in the EU and Europe) within the deadline this time.

Getting there early, I chatted with a mechanic as I watched several cars come in, go in to the shop and up on the lift for their check.

Thus my consternation when the guy who was slated to check my car got in, fired her up, and then went out onto the street and floored it, rapidly disappearing in the distance. I casually asked the service manager if this was standard procedure when performing the check, he seemed surprised and shocked himself and just said “no….” (the dots were his).

Thankfully my car came back after a few minutes, the mechanic sitting behind the wheel with a largish grin on his face. I guess the car passed that part of the test…. (my dots).

Everything checked out ok with a few exceptions. He said the car seemed to be in really good shape and condition overall, and was surprised it’s as old as it is.

To fix:

Rear wheel bearings, driver side. I’ll do both sides to keep things balanced and even. Will have to find someone to help, as this is a job requiring both special tools and a workshop (lift, compressed air, hydraulic press, and more). Not to mention experience. The QP3 rear suspension looks an awful lot like a Jaguar, I’m pretty sure they’re identical. Of course, *which* Jaguar, I don’t know. Still, the inboard brakes, anti sway stags and other telltale components, all mounted in a self contained subframe riding on bushings, pretty much gives it away.

Suspension
Looks suspiciously Jag to me. Can anyone reliably identify it? (photo: William Abraham)

Parking brake – is only working on one side. Needs to be adjusted. Another typical Jaguar rear suspension detail (inboard brakes in the rear, with separate calipers and pads for the hand brake).

Battery – the battery tray has a small metal clamp that holds the lip on the base of the battery. Except that many modern batteries have no lip for it to grip. In the event of a collision, the battery can fly forwards, tumbling around in the engine room (right above hot manifolds). He suggested tying it down with a strap or similar.

Image
Battery needs to be secured

Speedometer. My speedo wasn’t working when I got the car originally, and the state inspectors went over the entire car before approving it as road worthy when I imported it. They seemed to think it was ok without a speedo then (everyone has GPS anyway, and it’s more accurate), but this guy said I need to fix it. It’s a VDO, same as used in Porsches in the 1980s. I had hoped that when I restored the sending unit connected to the transmission’s output shaft, it would work. No dice. Cleaning the contacts and molex connectors hasn’t helped either. I pulled and checked the speedo itself, but it shows no obvious problems like a burnt component or broken solder joint. I did find, however, that a gear had turned all gooey and crumbled up. I guess that explains why my trip teller and odometer had stopped working, but still doesn’t explain the speedometer itself. The other instruments all work, so I’m tempted to rule out a bad connection, because the wires are all bundled together.

Broken speedometer gear
Broken gear
VDO
VDO gauges

I’ve ordered parts for the wheel bearings and will need to find someone who can do the work, and have had several attempts at fixing the speedo. Not sure what to do, if I should buy a new speedometer, sending unit, or both. Bought a nylon belt with fastener to take care of the battery, and will need to have a closer look at the parking brake assembly soon.

Deadline is end of June to have everything fixed and approved.

The A727 transmission

Maserati has always been a small company. They didn’t have the resources to design and build tooling for the entire car and like many other small auto manufacturers utilized many off the shelf or OEM components.

The transmission in the Automatic versions of the QP3 is the (dare I say legendary) Chrysler Torqueflite A727. Designed by very talented engineers in the late 50’s and refined for decades. The standard choice for any heavy duty or high power application throughout the 60’s, 70’s 80’s and 90’s (although Chrysler had changed the naming convention by that time). Also the MOPAR standard for race cars, still loved and still out there winning.

Built to be bulletproof, simple, and reliable. Aside from a few minor details, it is.

As the vibrations in 3rd gear were really getting bad and winter was imminent with all it’s icy force, I decided to rent a spot in a workshop and overhaul my first transmission. Check back for pics outlining the gory details. It’s not yet back in the car, but that day isn’t far off (famous last words).

Image

For those of you looking to work on one of these, regardless of what kind of vehicle it’s in, here are some excellent links for info:

The legendary torqueflite automatic transmission

http://www.allpar.com/mopar/transmis…-tom-hand.html

http://www.youtube.com/watch?v=xzJhCBZ1wMY

Amazon.com: Torqueflite A-727 Transmission Handbook HP1399: How to Rebuild or Modify Chrysler’s A-727 Torqueflite for All Applications (9781557883995): Carl Munroe: Books

A-727 Torqueflite Diagnosis Dial

We did actually get the tranny back in the car, and my son learned a lot, among other things how to use a torque wrench, how to organize work in stages, keep things clean (despite what the picture might indicate…it’s a rented garage!) and follow directions.

Torquing down the bolts

When I get some time I’ll put together a list with pictures outlining the entire process. All in all it was pretty simple.

Has anyone else overhauled their transmission? How did it go?


To Do list

The car was sold as a “rolling restoration”, and had been extensively restored and cared for by the BPO (before previous owner). As far as I know the PO mainly just enjoyed the car (as have I, thus far).

It runs, in fact it started up on the very first attempt after 3 months of waiting at the docks, shipping to Europe and waiting to be picked up. As the seller quipped, “I don’t know of any other 30 year old Italian exotic that could manage to do that”. Good point.

That said, it does have some rough spots, and needs more than a little TLC to bring it back to looking and running its best. While the engine, suspension and parts of the drivetrain have all been carefully restored, the transmission hasn’t been touched. And the paint is showing it’s age, with a hint of a few small rust bubbles here and there on the wheel arches and lower door panels.

I went over the car when I received it and started making a list of things I wanted to address. After having had and used the car for a while now, I’m probably going to change this list somewhat, having learned to live with some things as idiosyncrasies and others as being more important to fix.

In no particular order:

  • transmission & torque converter rebuild
  • bare metal respray (eliminating rust spots, smoothing out the bodywork, remounting glass and chrome, polishing same)
  • fix radio and antenna (this is way up high on my list!)
  • fix sun visors (they sag)
  • restore/condition leather interior
  • restore/replace cracked wood veneer on dashboard shelf
  • check fuel pumps, change filters if necessary
  • replace fuel filter/regulator
  • replace spark plug wires
  • repaint cam covers
  • go through wiring to get all courtesy lights and stuff working correctly
  • fix speedometer (probably pulse send unit or toothed gear on sender)
  • buy a scissors jack that will support the car and fit in the trunk
  • possibly, maybe, remove US emissions stuff from the engine
  • rebuild/lubricate windshield wiper motors
  • rebuild/lubricate electric window motors
  • replace rubber sealant around trunk
  • remove all sound isolation material, replace with non-flammable and non-hygroscopic alternative
  • re-fabricate rear trunk panel, the one that hides the gas tank
There’s more, this is just off the top of my head.
Any help or advice that can be offered on any of the above points is greatly appreciated!

Air Conditioning

Just FYI – here is the measured and filled capacity of the Air Condioning fitted to the Quattroprte 3.

The York Borg-Warner system fitted to the QP3 needs periodic refilling like any other car. However, it’s unclear how much gas/oil is needed.

45cl Freon 12

The label on the air filter cover states that it needs 45cl (half a liter) of Freon 12, while the user and service manuals state 0.8 liters – almost twice the amount. Note that Freon 12 has been banned in many countries, but the system can easily be converted to use R134A at a slightly lower efficiency.

Even more confusing (my car’s A/C has been converted to use R134A) is that all the A/C shops around here use grams as their measuring (and billing) unit, not liters.

Since the local workshop was having a special on recharging A/C units, I figured I’d find out.

The answer: 850gm R134A in total.

Now you know.